Author: Ben Farhner

  • Developing a Morning Routine

    I’ve always struggled with a morning routine. I’ve never liked getting up early, although I like being up early, and I’ve also never needed to be up early for my job as a software engineer. However, there’s enough evidence of the benefits of getting up early and having some time set aside in the morning before starting work that I’ve wanted to find a way to accomplish this for myself, so this year I set about developing a morning routine as an experiment.

    This past summer, I listed to an episode of A Better Life with Brandon Turner featuring Hal Elrod, who wrote a book called The Miracle Morning. Full disclosure: I haven’t actually read the book. But, in the podcast episode, Hal shared the core principles laid out in his book, and it was inspiring to me in its simplicity and practicality.

    As I’ve mentioned before, having systems in place works really well for me, especially when they’re reduced to their essentials and kept simple. I decided to attempt developing a morning routine for myself based on the Miracle Morning principles, starting with setting my alarm for 7:30am (instead of 8am, or no alarm at all).

    In order to ensure I actually get up when my alarm goes off, I have my alarm sitting on my dresser across the bedroom, so when it goes off in the morning, I have to actually get up and walk over to the dresser to turn it off. This is the first “hack” I implemented to get myself up and going in the morning.

    Once I’m up, I’m already standing at my dresser, so I get dressed, grab my phone, AirPods, and notebook, and slip out of the bedroom (my wife is usually still asleep at this point).

    The rest of my routine consists of a list of tasks:

    • Drink a glass of water
    • Go to the bathroom
    • Brush my hair
    • Make coffee
    • Do devotions
    • Do DuoLingo
    • Make to-do list
    • Empty compost
    • Feed animals
    • Make breakfast

    Hal Elrod talks about a couple of key points to getting a successful start to your day: getting rehydrated, since we’re typically dehydrated after effectively fasting for 8 hours; and staying on your feet for as long as possible first thing in the morning. I’ve found now that if I skip drinking a glass of water first thing, I feel noticeably parched.

    I’ve revised my routine a couple of times now, and I’m still working out some kinks, such as if and when to make breakfast, and if it should be for just me or for my whole family (who usually aren’t up yet). The beauty of a system is that it can be iterated upon and optimized, and it gets me a little excited that I can play around with it and constantly tweak it to make it work well for me. One really cool feature of this morning routine is that I’m essentially building a habit, and with habits, you can do habit stacking. So once I had a basic framework, it was easy to tack on additional tasks that I’d like to get done in the morning (like emptying the compost).

    So far, my morning routine has been surprisingly successful. I’ve slowly set my alarm earlier and earlier since I started, and I’m now waking up at 6am and have a lot more time before I start work—in fact, I’m writing this blog post before anyone else is awake.

    I’ve also been trying to focus on enjoying the ritual of my morning routine, rather than viewing it as a highly optimized list of tasks to get done as quickly as possible. Slowing down and being more intentional about each task helps me to be more thoughtful about the work and have a greater appreciation for what I’m doing.

    As I continue to optimize my morning routine, I’ve begun thinking about developing an evening routine to support my morning routine—things like filling the kettle the night before and tidying the house to prepare for the next day. More on this in the future.

    If you’re curious for more discussion about morning routines, I also talked about this on my podcast.

  • Restoring a Vintage Coleman 413G Camp Stove

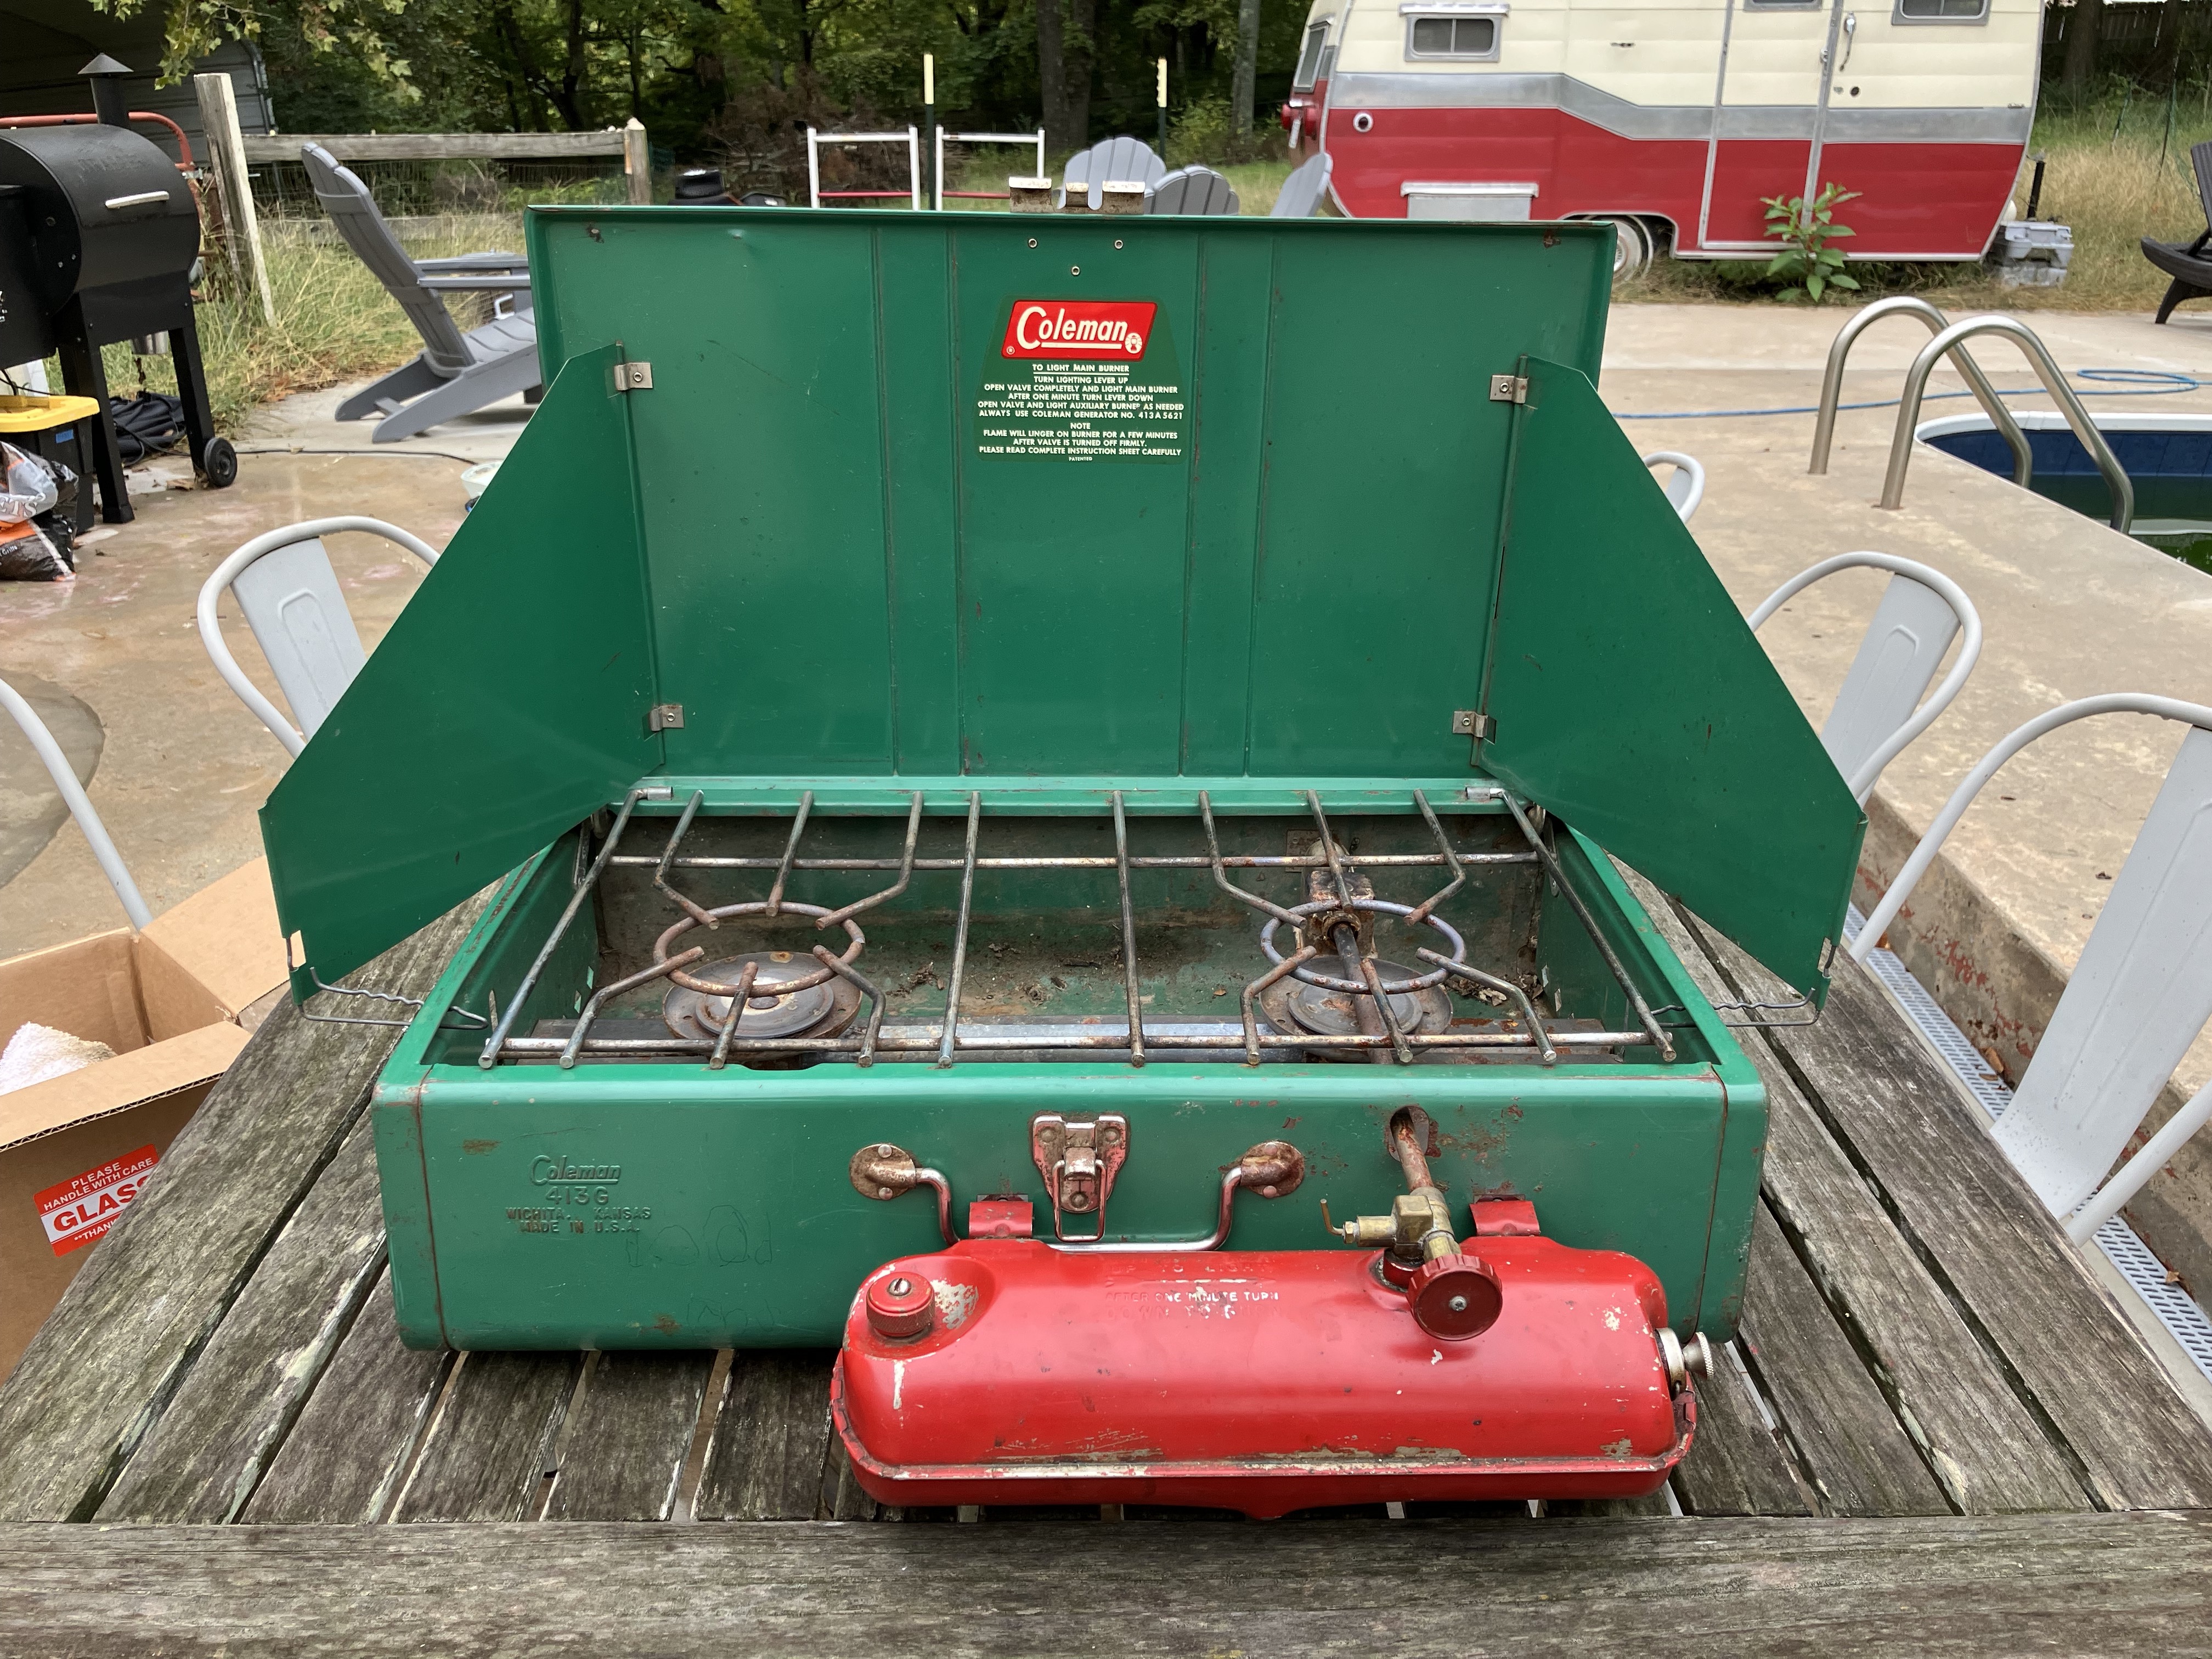
    The Coleman 413G camp stove as it was when purchased.
    The Coleman 413G camp stove as it was when purchased.

    In addition to my Coleman 220J pressure lantern, I also picked up a vintage Coleman 413G camp stove at the same flea market for $25. This is the larger of the two classic Coleman pressure camp stoves—I’d like to get the smaller 425 at some point as well.

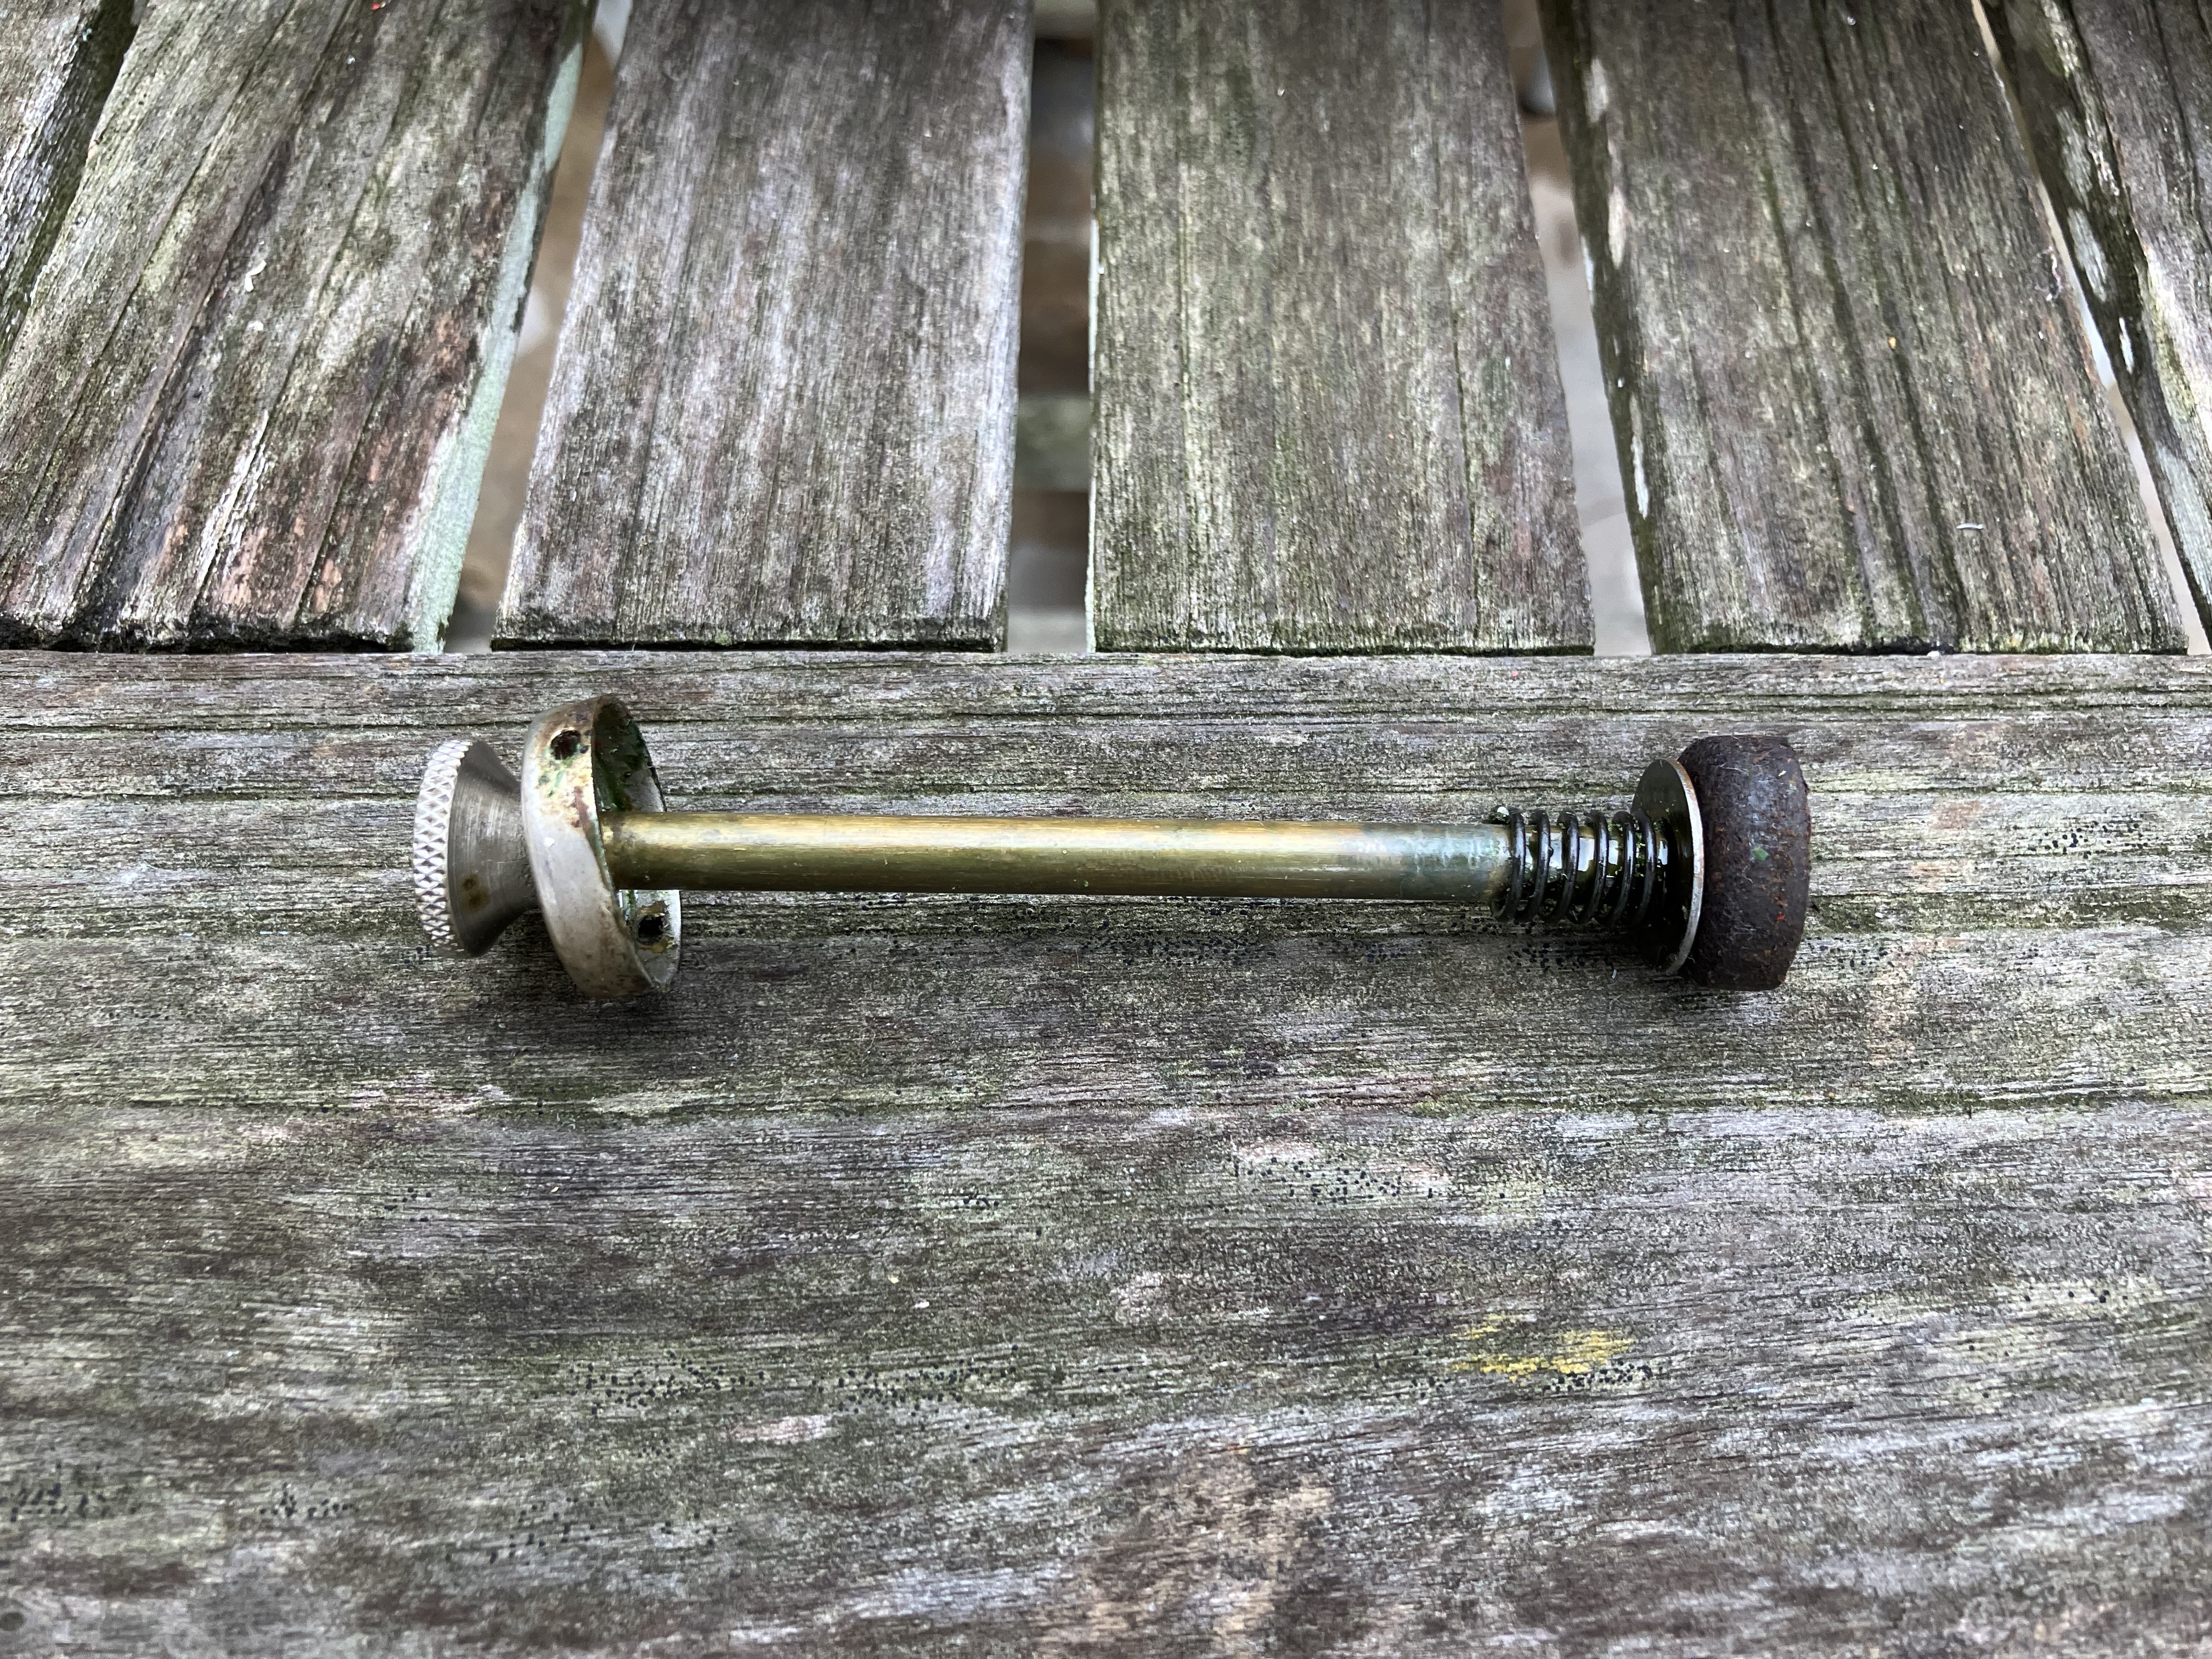
    The plunger with the original leather pump cup.
    The plunger with the original leather pump cup.

    The stove was in pretty decent shape to start with. As with the lantern, I immediately noticed that the pump wasn’t holding pressure and appeared to also have the rubber pump cup, so I ordered a replacement leather pump cup for it as well. However, it turned out that the stove actually already had a leather cup, it was just almost black with oil and age. So, I was able to clean and oil it and bring it back around to building pressure successfully, and now I have a spare on hand in case it fails down the road.

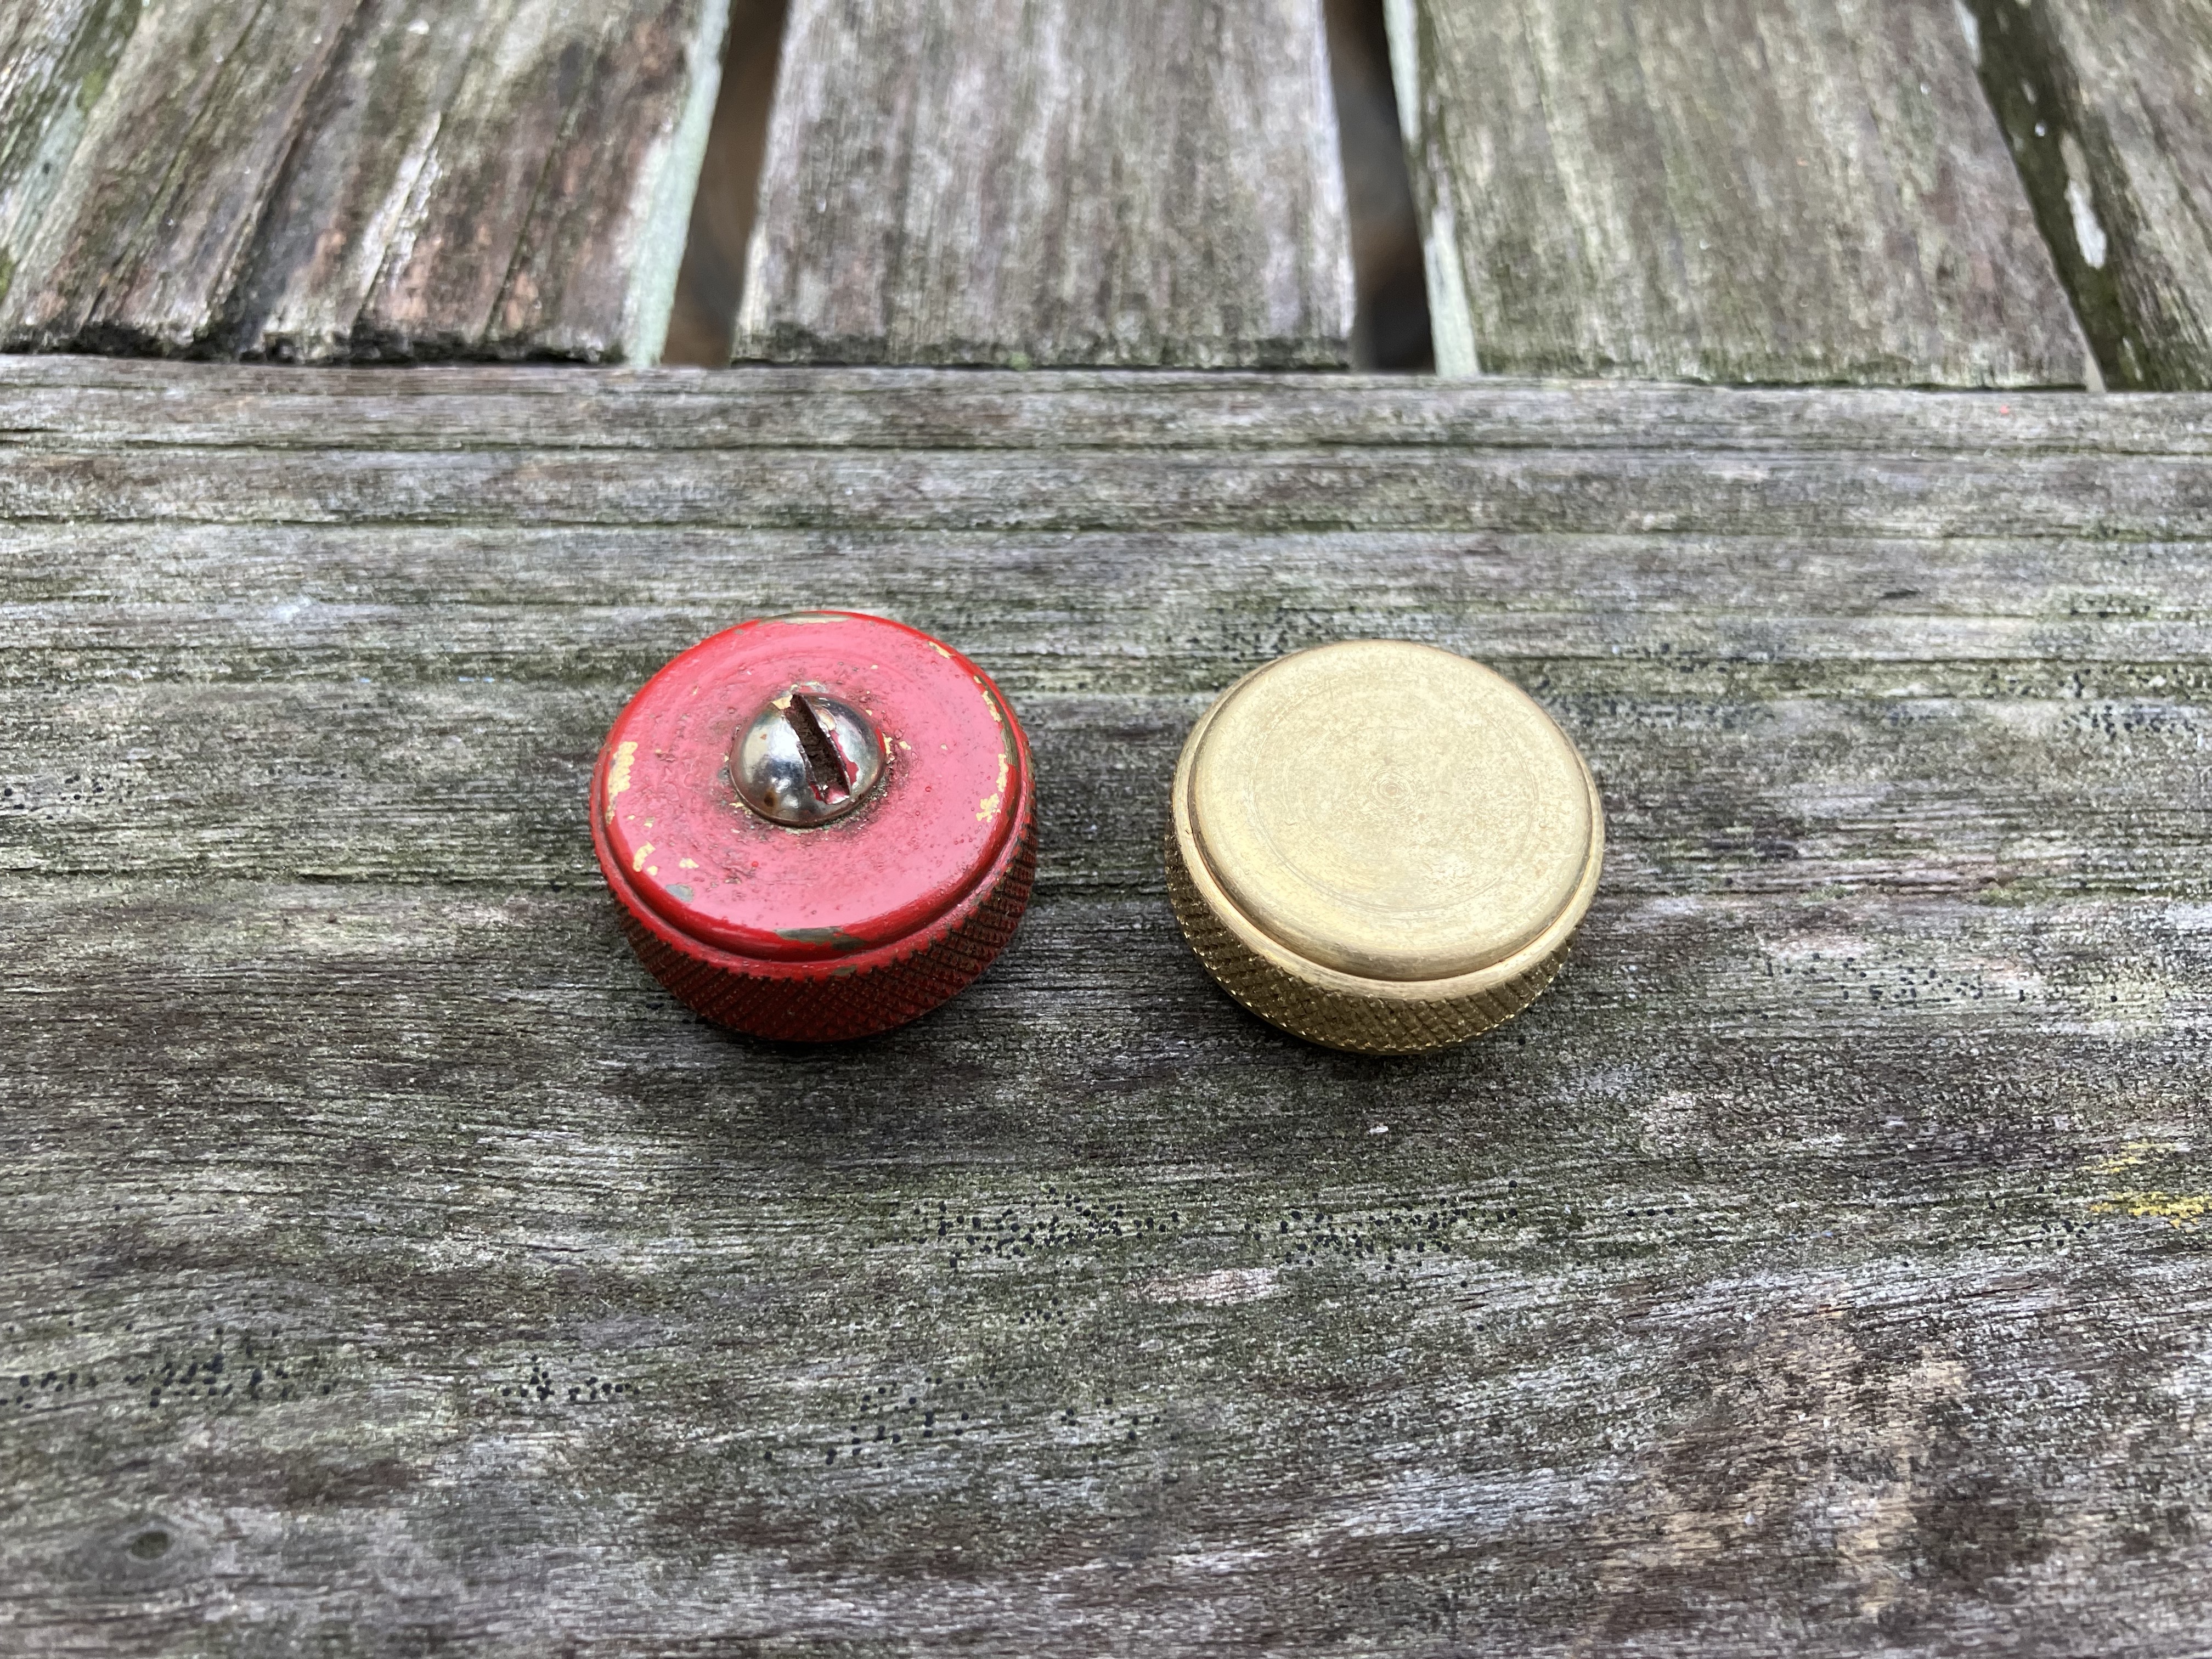
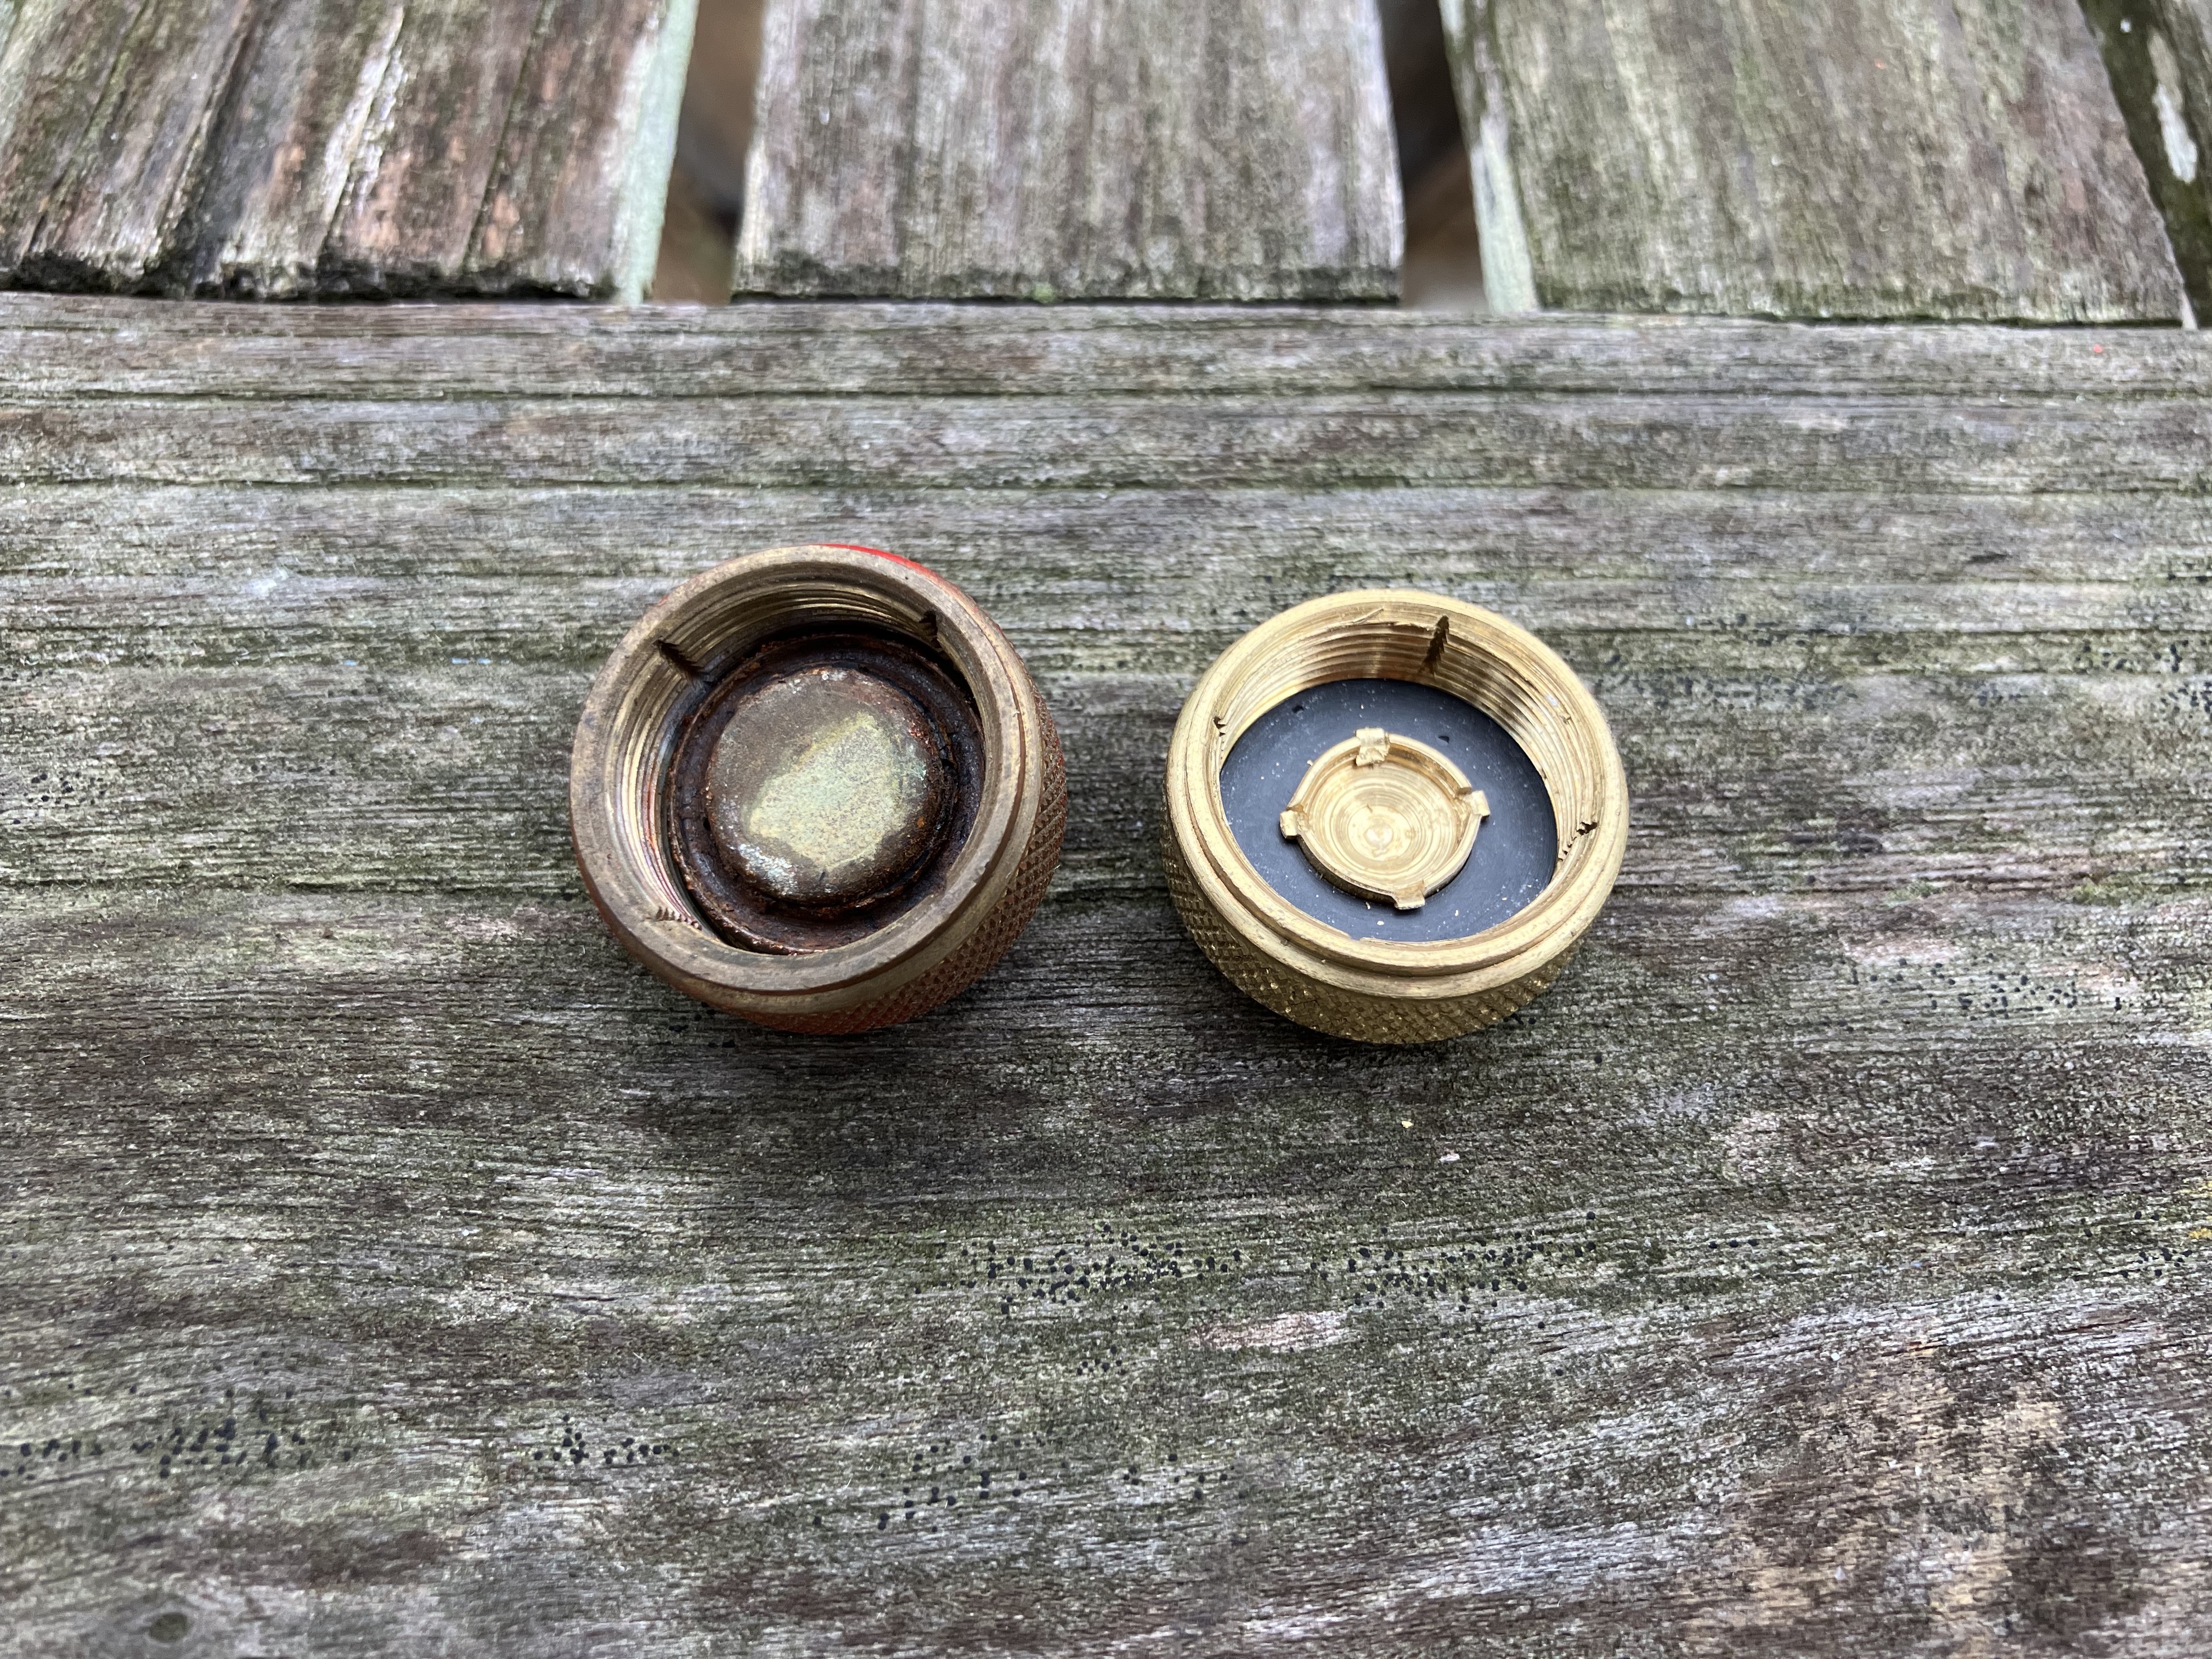
    The old 3-piece filler cap alongside the new 1-piece cap.
    The old 3-piece filler cap alongside the new 1-piece cap.

    The tank had one of the old 3-piece filler caps (although not one of the notoriously dangerous ones), and I went ahead and replaced it with a new one-piece brass cap just to be safe and ensure it holds pressure.

    The underside of the old 3-piece filler cap with rust and worn-out gasket versus the new 1-piece cap.

    I gave the whole stove a good wipe-down, then cleaned up the exposed metal parts with a wire brush and steel wool and applied Ballistol to keep them rust-free.

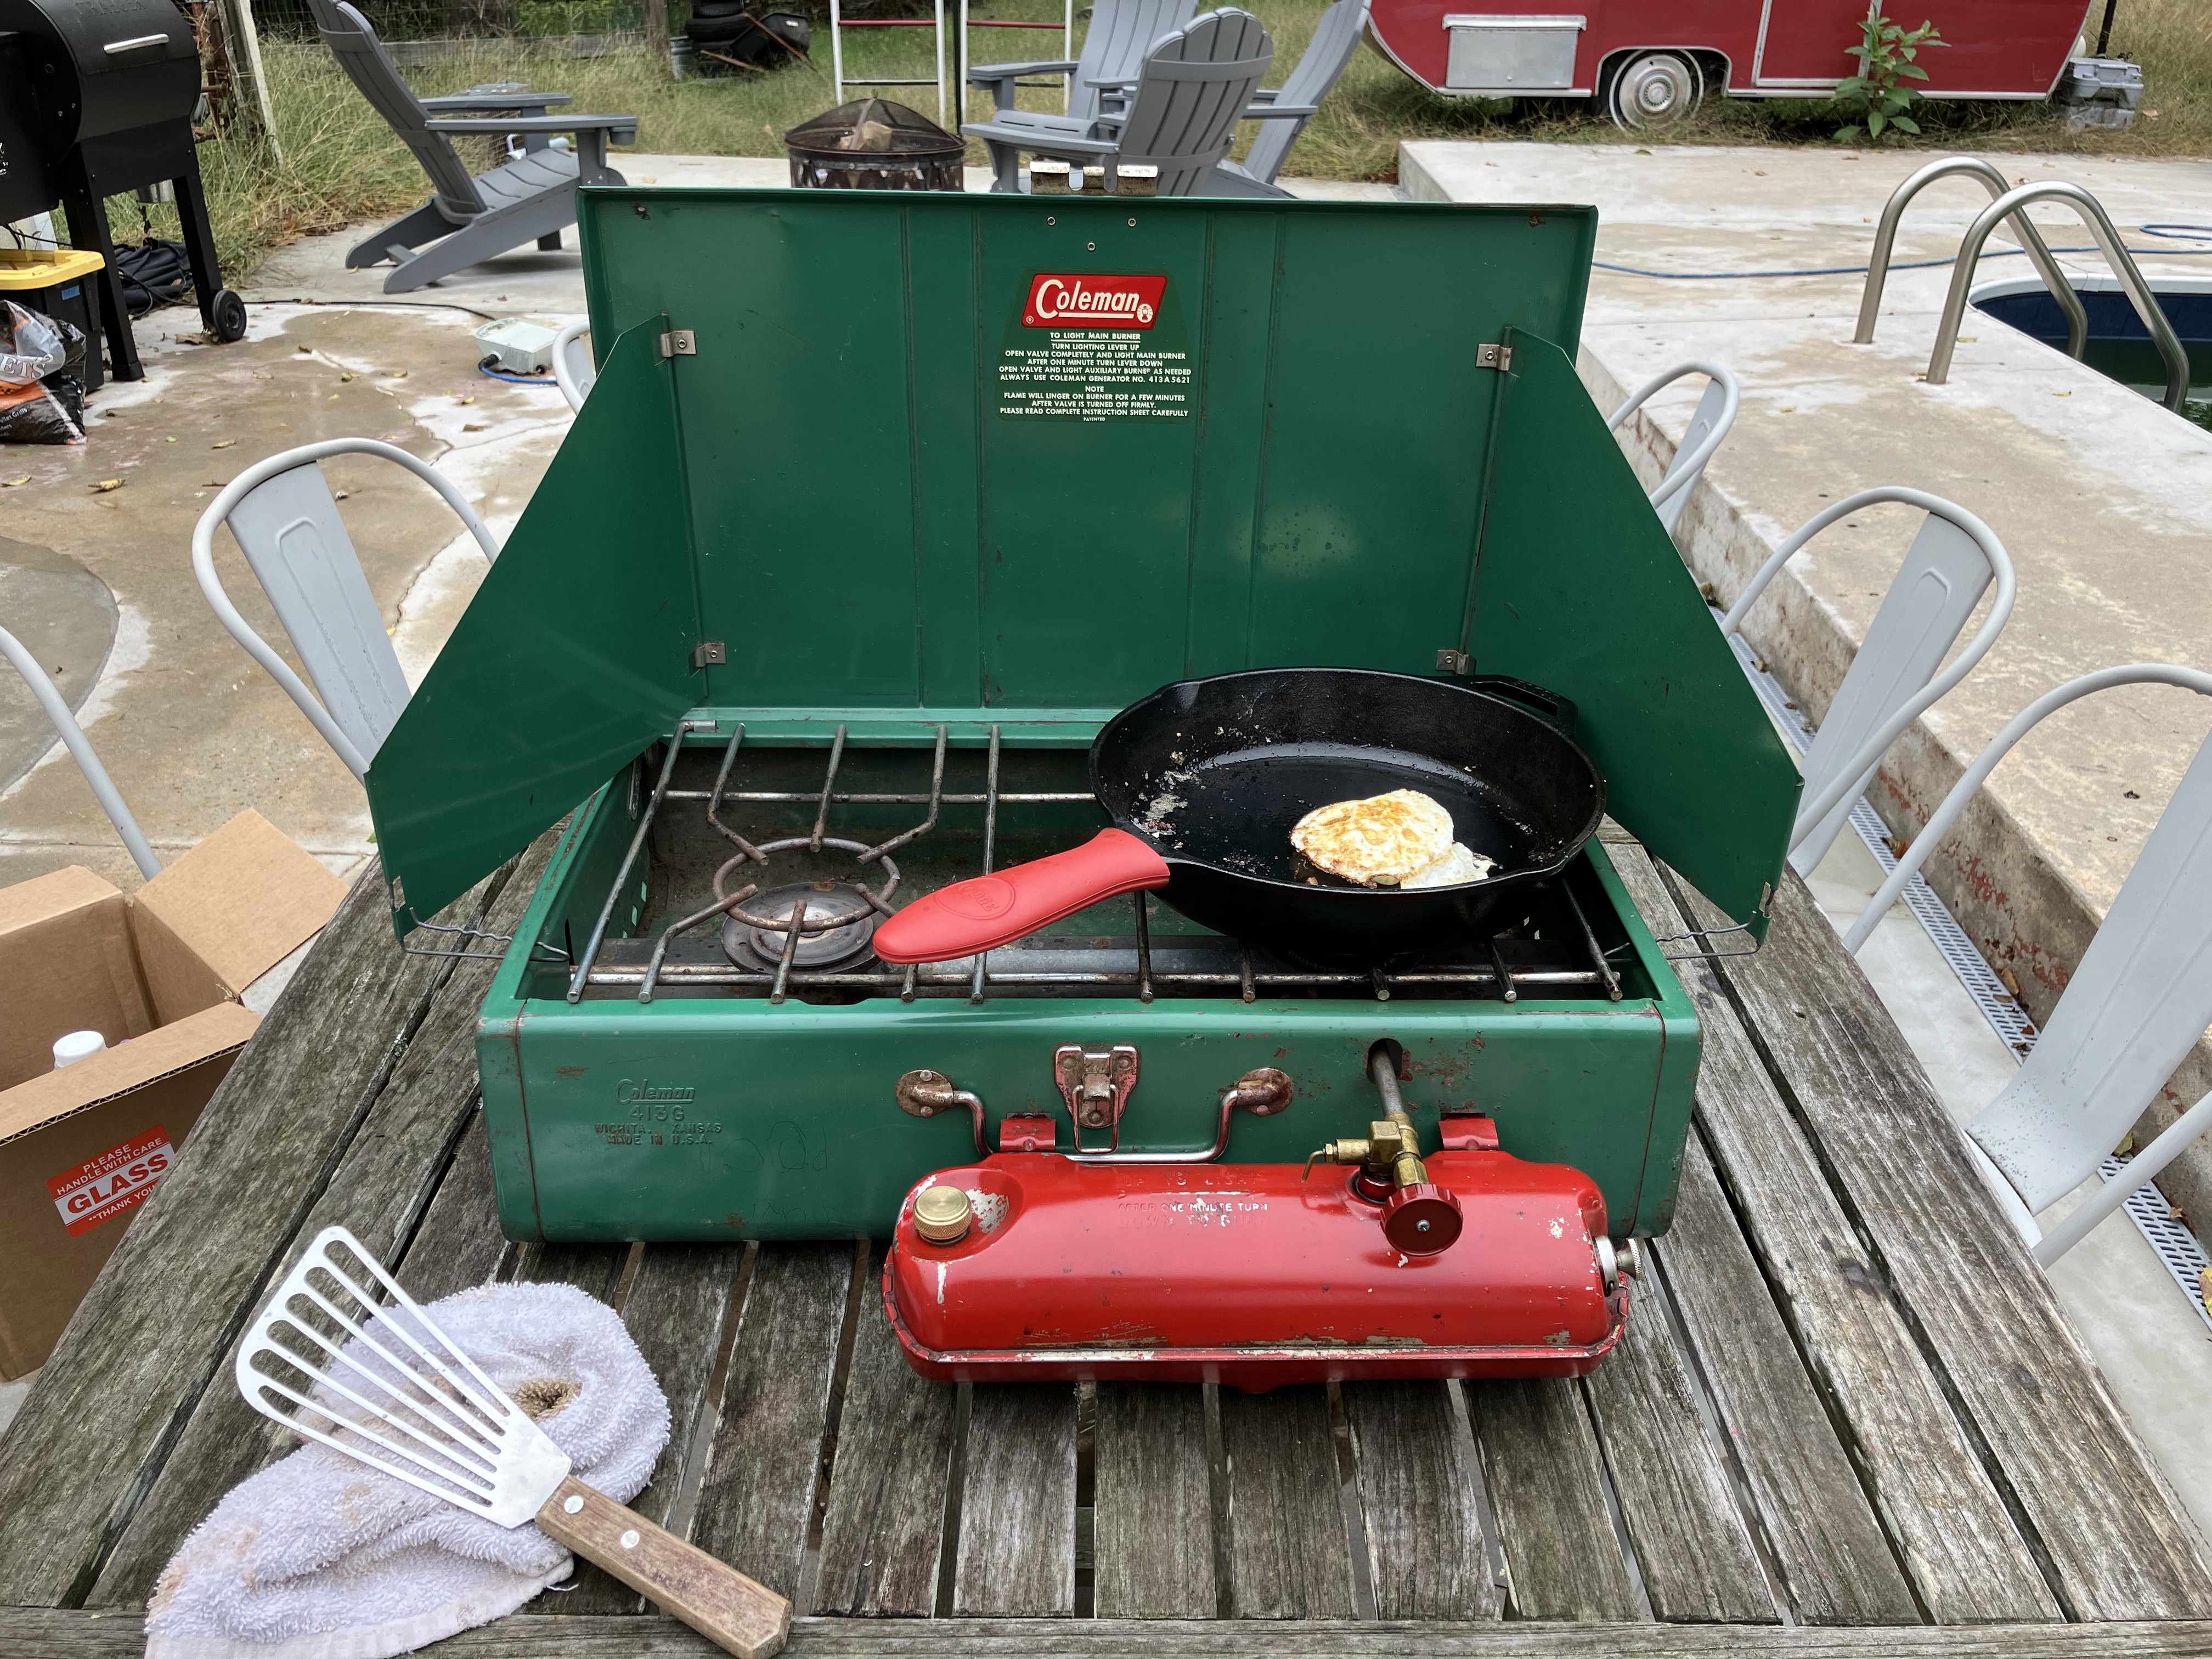
    Putting the Coleman 413G camp stove to work!
    Putting the Coleman 413G camp stove to work!

    With some fresh fuel in the tank, it was time for a test firing. The stove lit up right away, and after re-pumping the tank, I was able to get a nice, blue, almost invisible flame on both the main and secondary burners. This larger stove model will fit 2 12″ cast iron pans on it, which should work out really well for family camping trips. It fried an egg easily: success!

  • Restoring a Vintage Coleman 220J Lantern

    I recently picked up a vintage Coleman 200J lantern at a flea market for $20. I had been looking for some vintage camping gear for a few weeks and this was exactly what I wanted. My goal is replace some of my more modern camping gear with older equipment that, while perhaps a bit bulkier, is more reliable and rebuildable and will ultimately last a lot longer.

    The 220J lantern with missing glass and old mantles.
    The 220J lantern with missing glass and old mantles.

    The lantern is a Coleman model 220J manufactured in November 1976. It has a dent on the side near the bottom and the paint is chipping off in places, but it’s otherwise in pretty decent shape with all the parts. Unfortunately, as soon as I got it home and started to clean it, I dropped the glass globe and it shattered. That’s the first thing I added to the list of parts to buy, and, thankfully, Old Coleman Parts has replacement original globes with the same red logo on them.

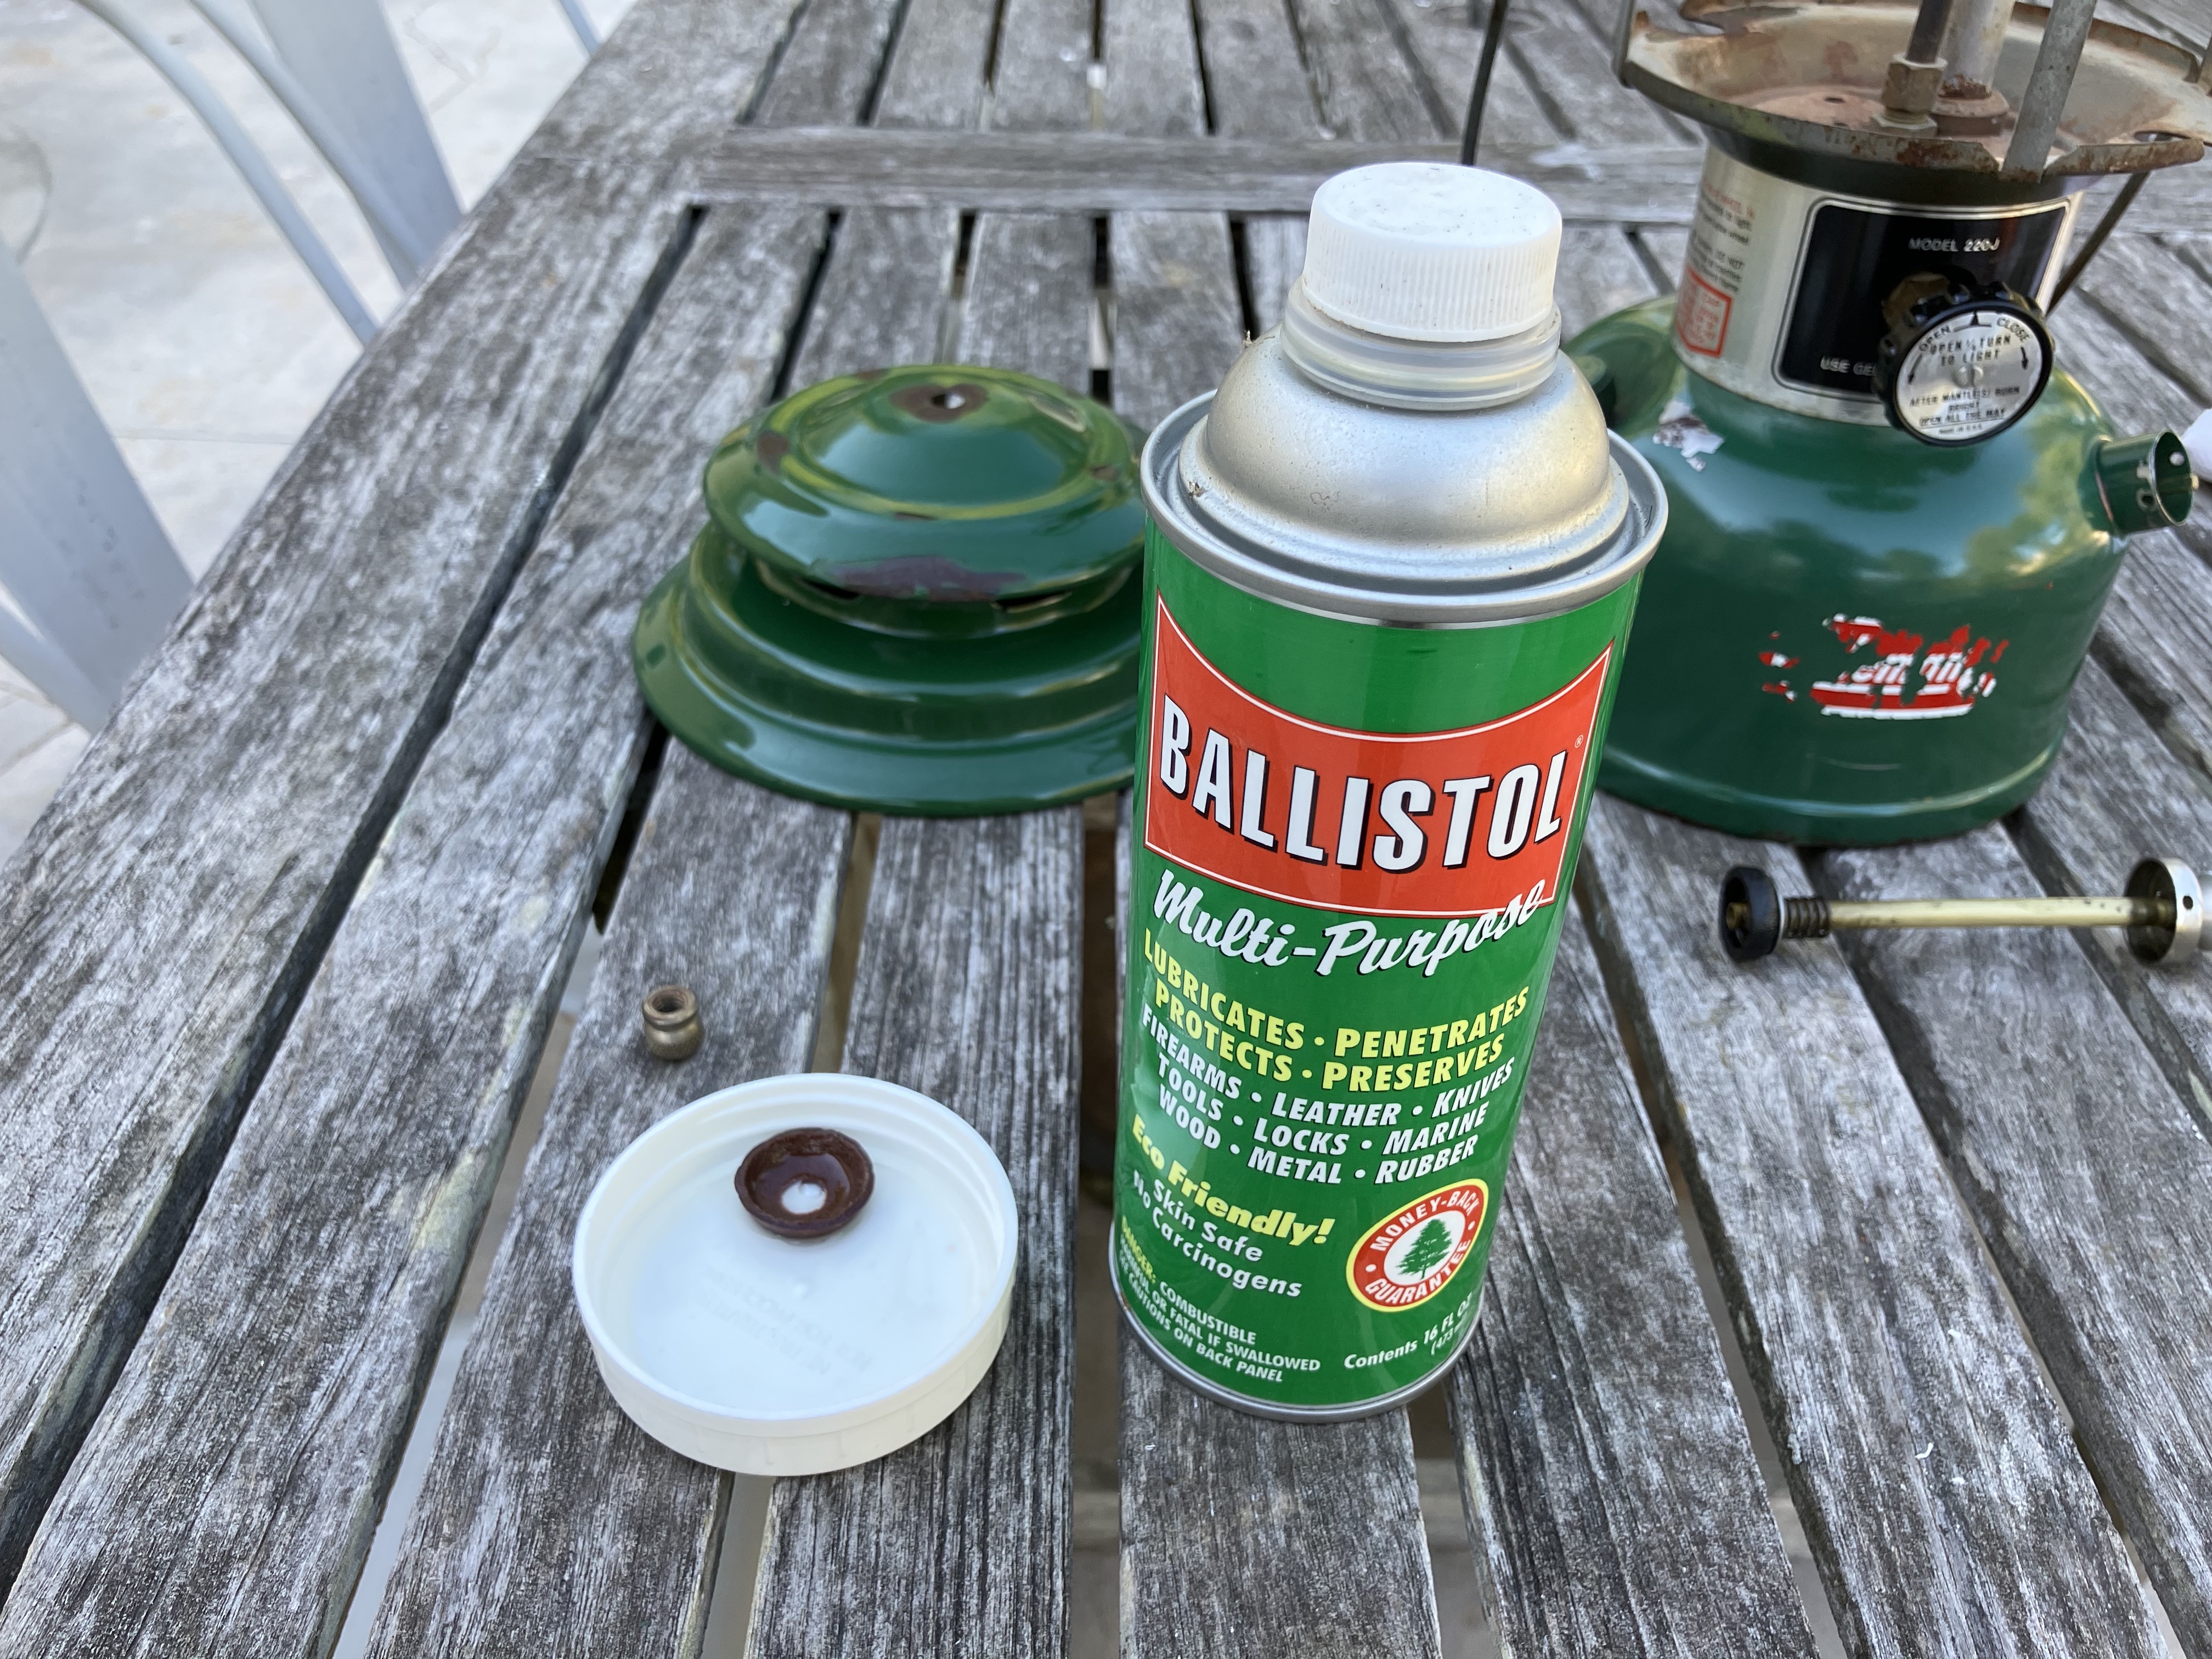
    Soaking the new leather pump cup in Ballistol. The plunger with the old rubber pump cup can be seen in the background on the left.
    Soaking the new leather pump cup in Ballistol. The plunger with the old rubber pump cup can be seen in the background on the left.

    The second part I bought was a leather pump cup. I had noticed at the flea market that the pump didn’t build pressure, and when I pulled the plunger out, I confirmed it was one of the rubber pump cups that deteriorate over time. The leather pump cups, from what I’ve read, last much longer and just need to be oiled occasionally to stay in good shape. To break in the new leather pump cup, I soaked it in Ballistol to lubricate it and make it more pliable.

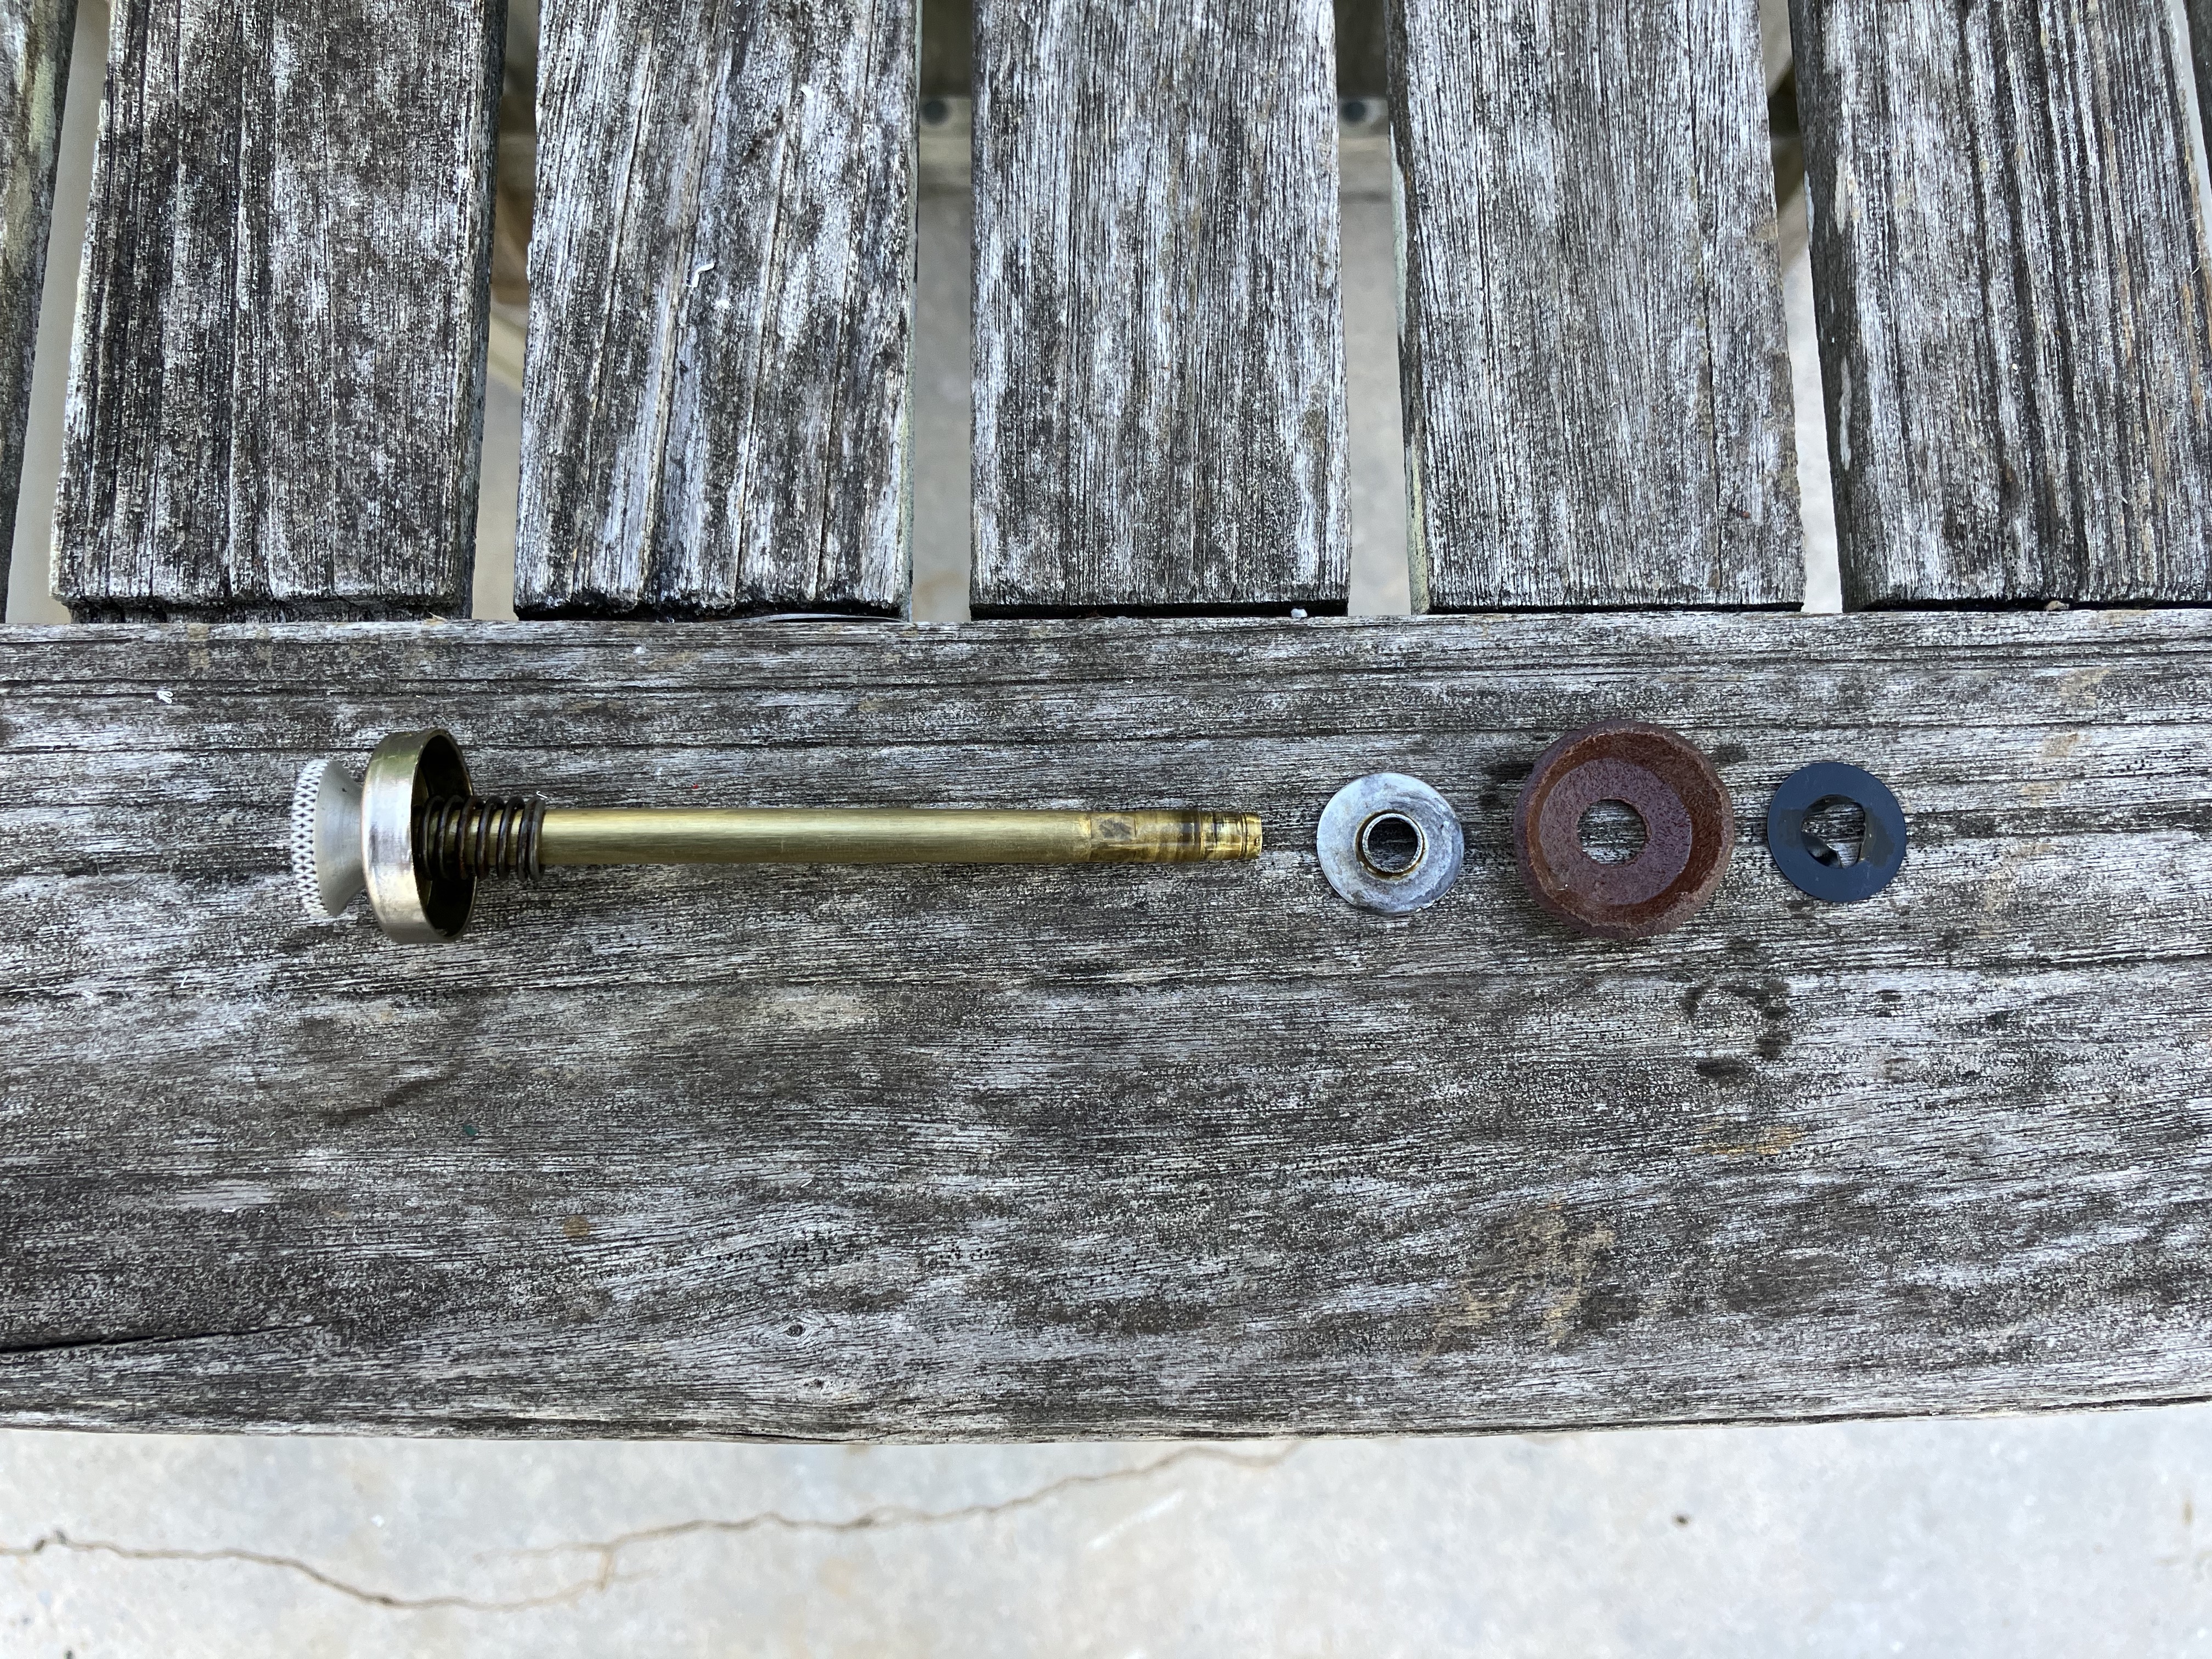
    Plunger assembly with old backing plate and new leather pump cup and clip.
    Plunger assembly with old backing plate and new leather pump cup and clip.

    Then I disassembled the plunger and, after some trial and error, found that the old backing plate worked with the new leather pump cup and new clip. The leather pump cup comes with a new backing plate too, but maybe it doesn’t work with all models.

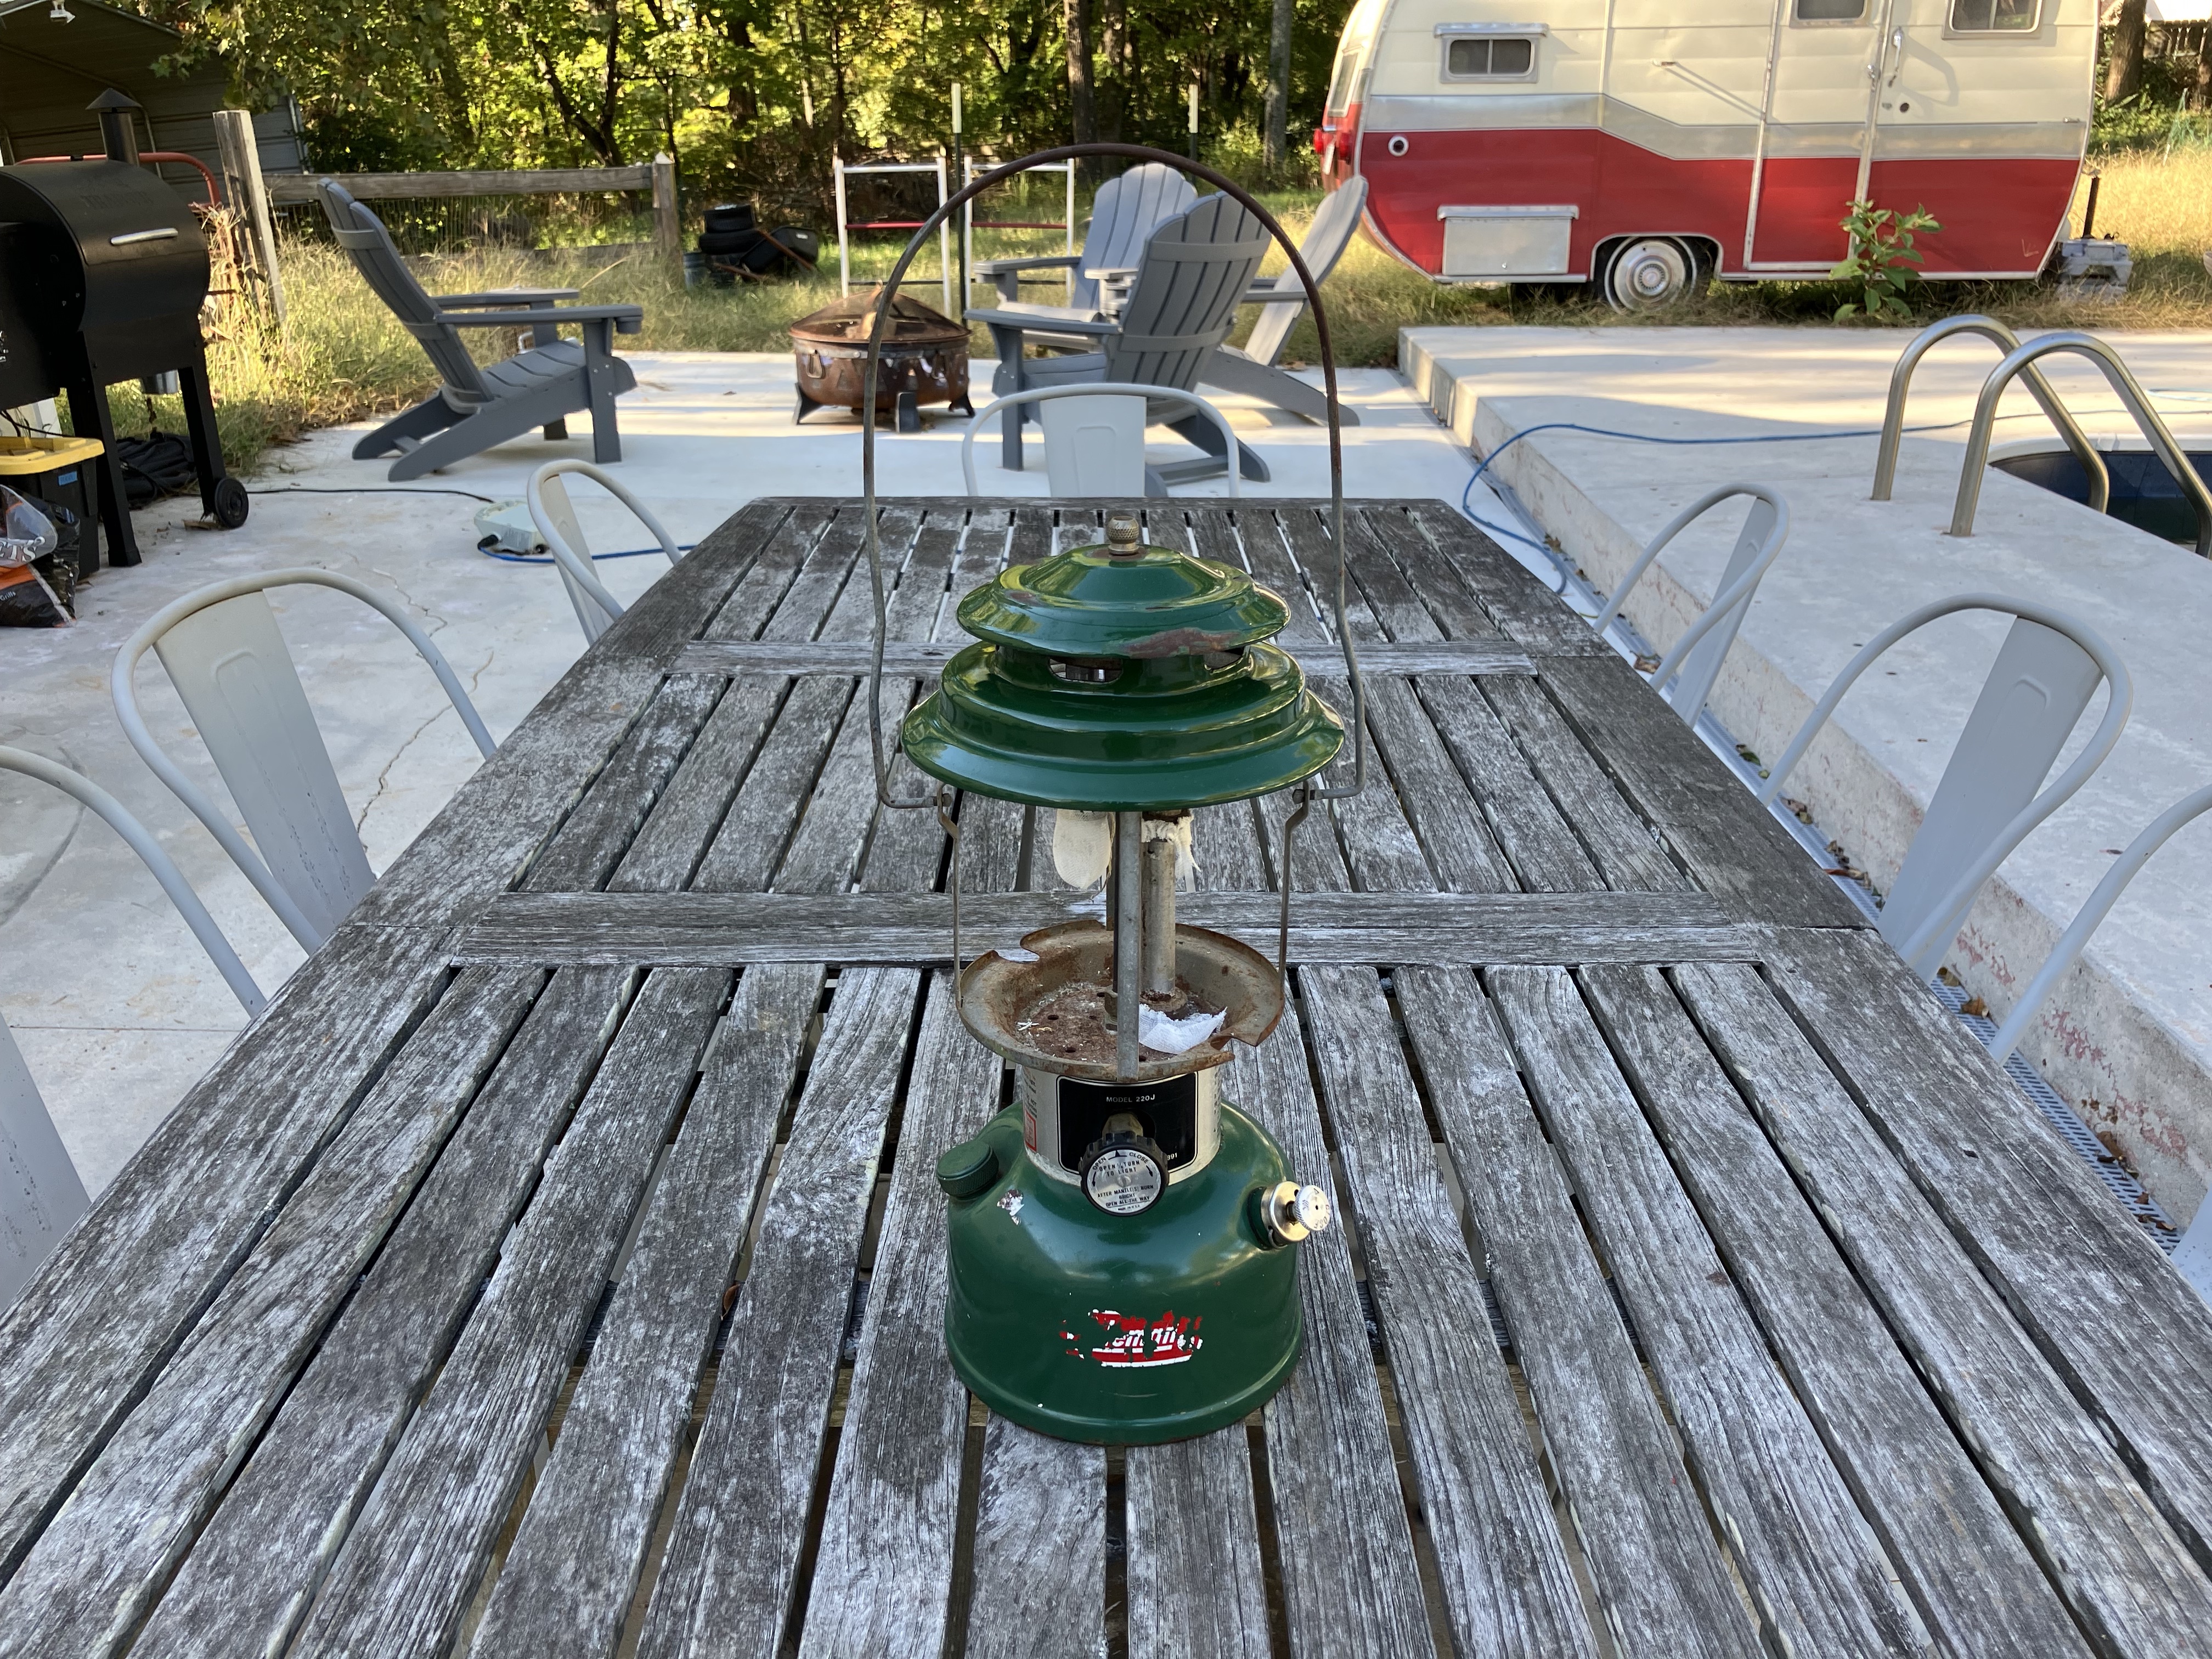
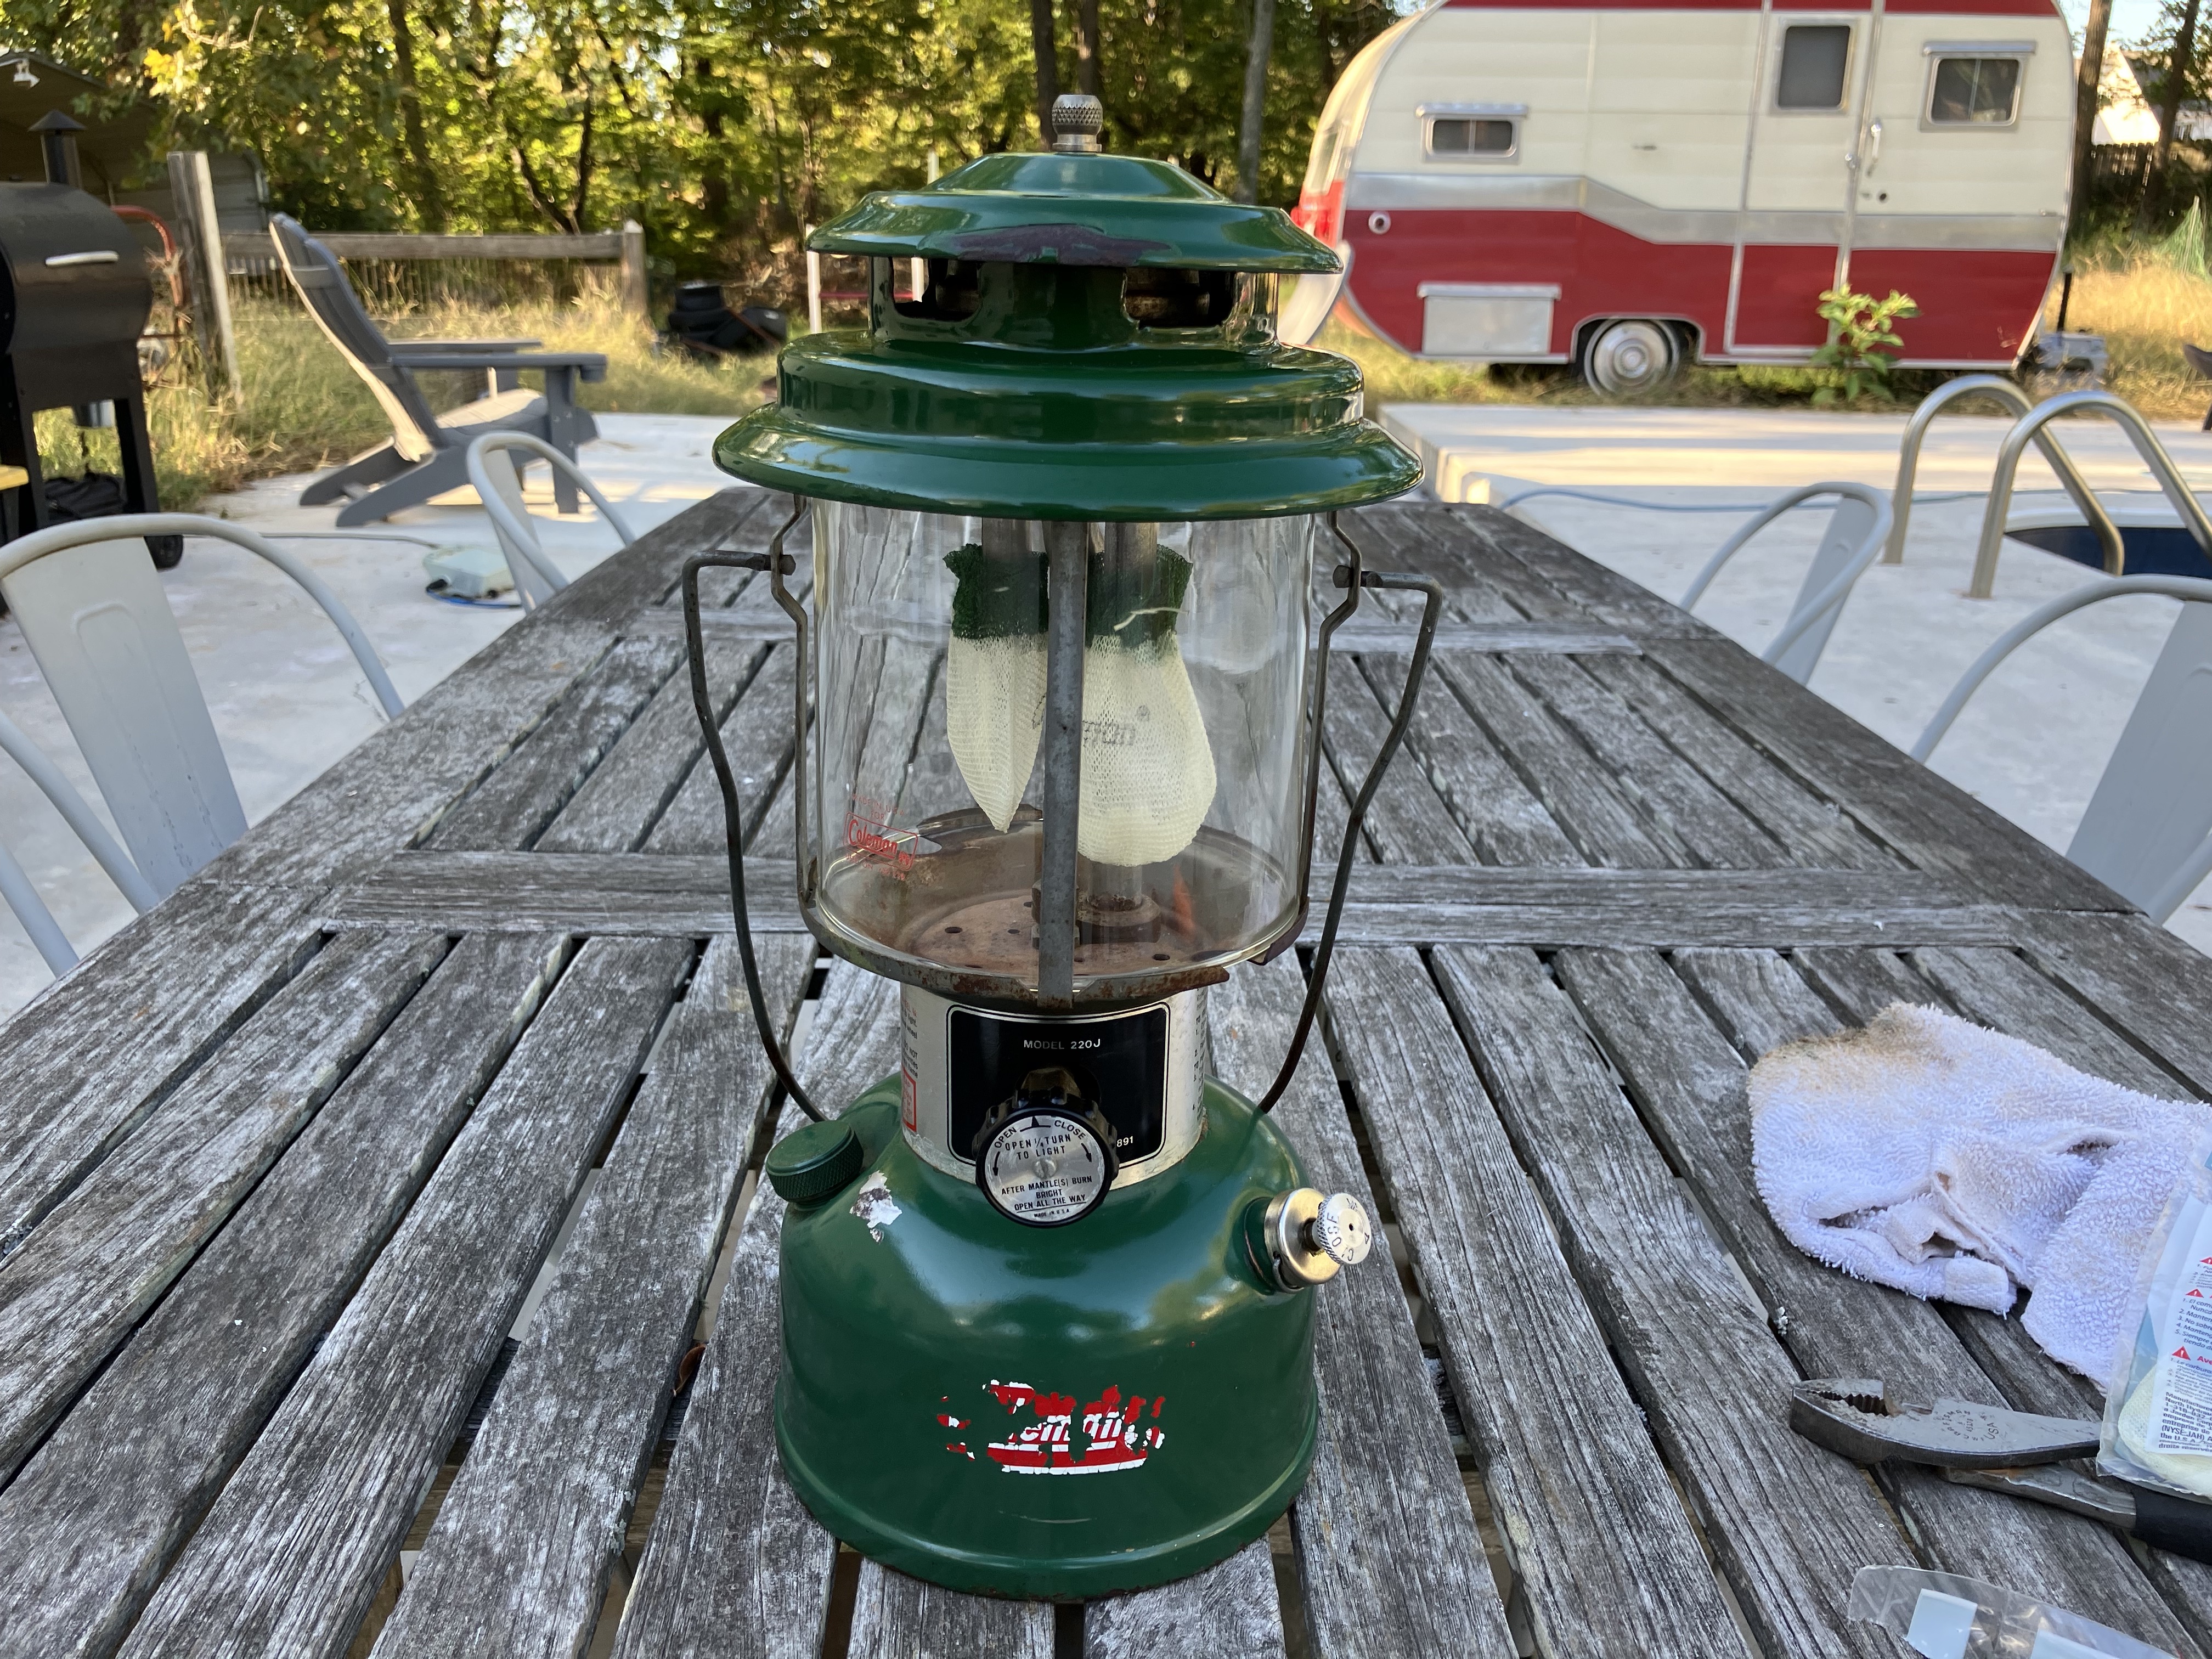
    The 220J lantern with mantles and a new globe.
    The 220J lantern with mantles and a new globe.

    I gave everything a good wipe down, lightly scrubbing at rust with steel wool and a wire brush, and coating any exposed metal with Ballistol to protect it. Then I put on new mantles, carefully installed the new globe, and put the hat back on.

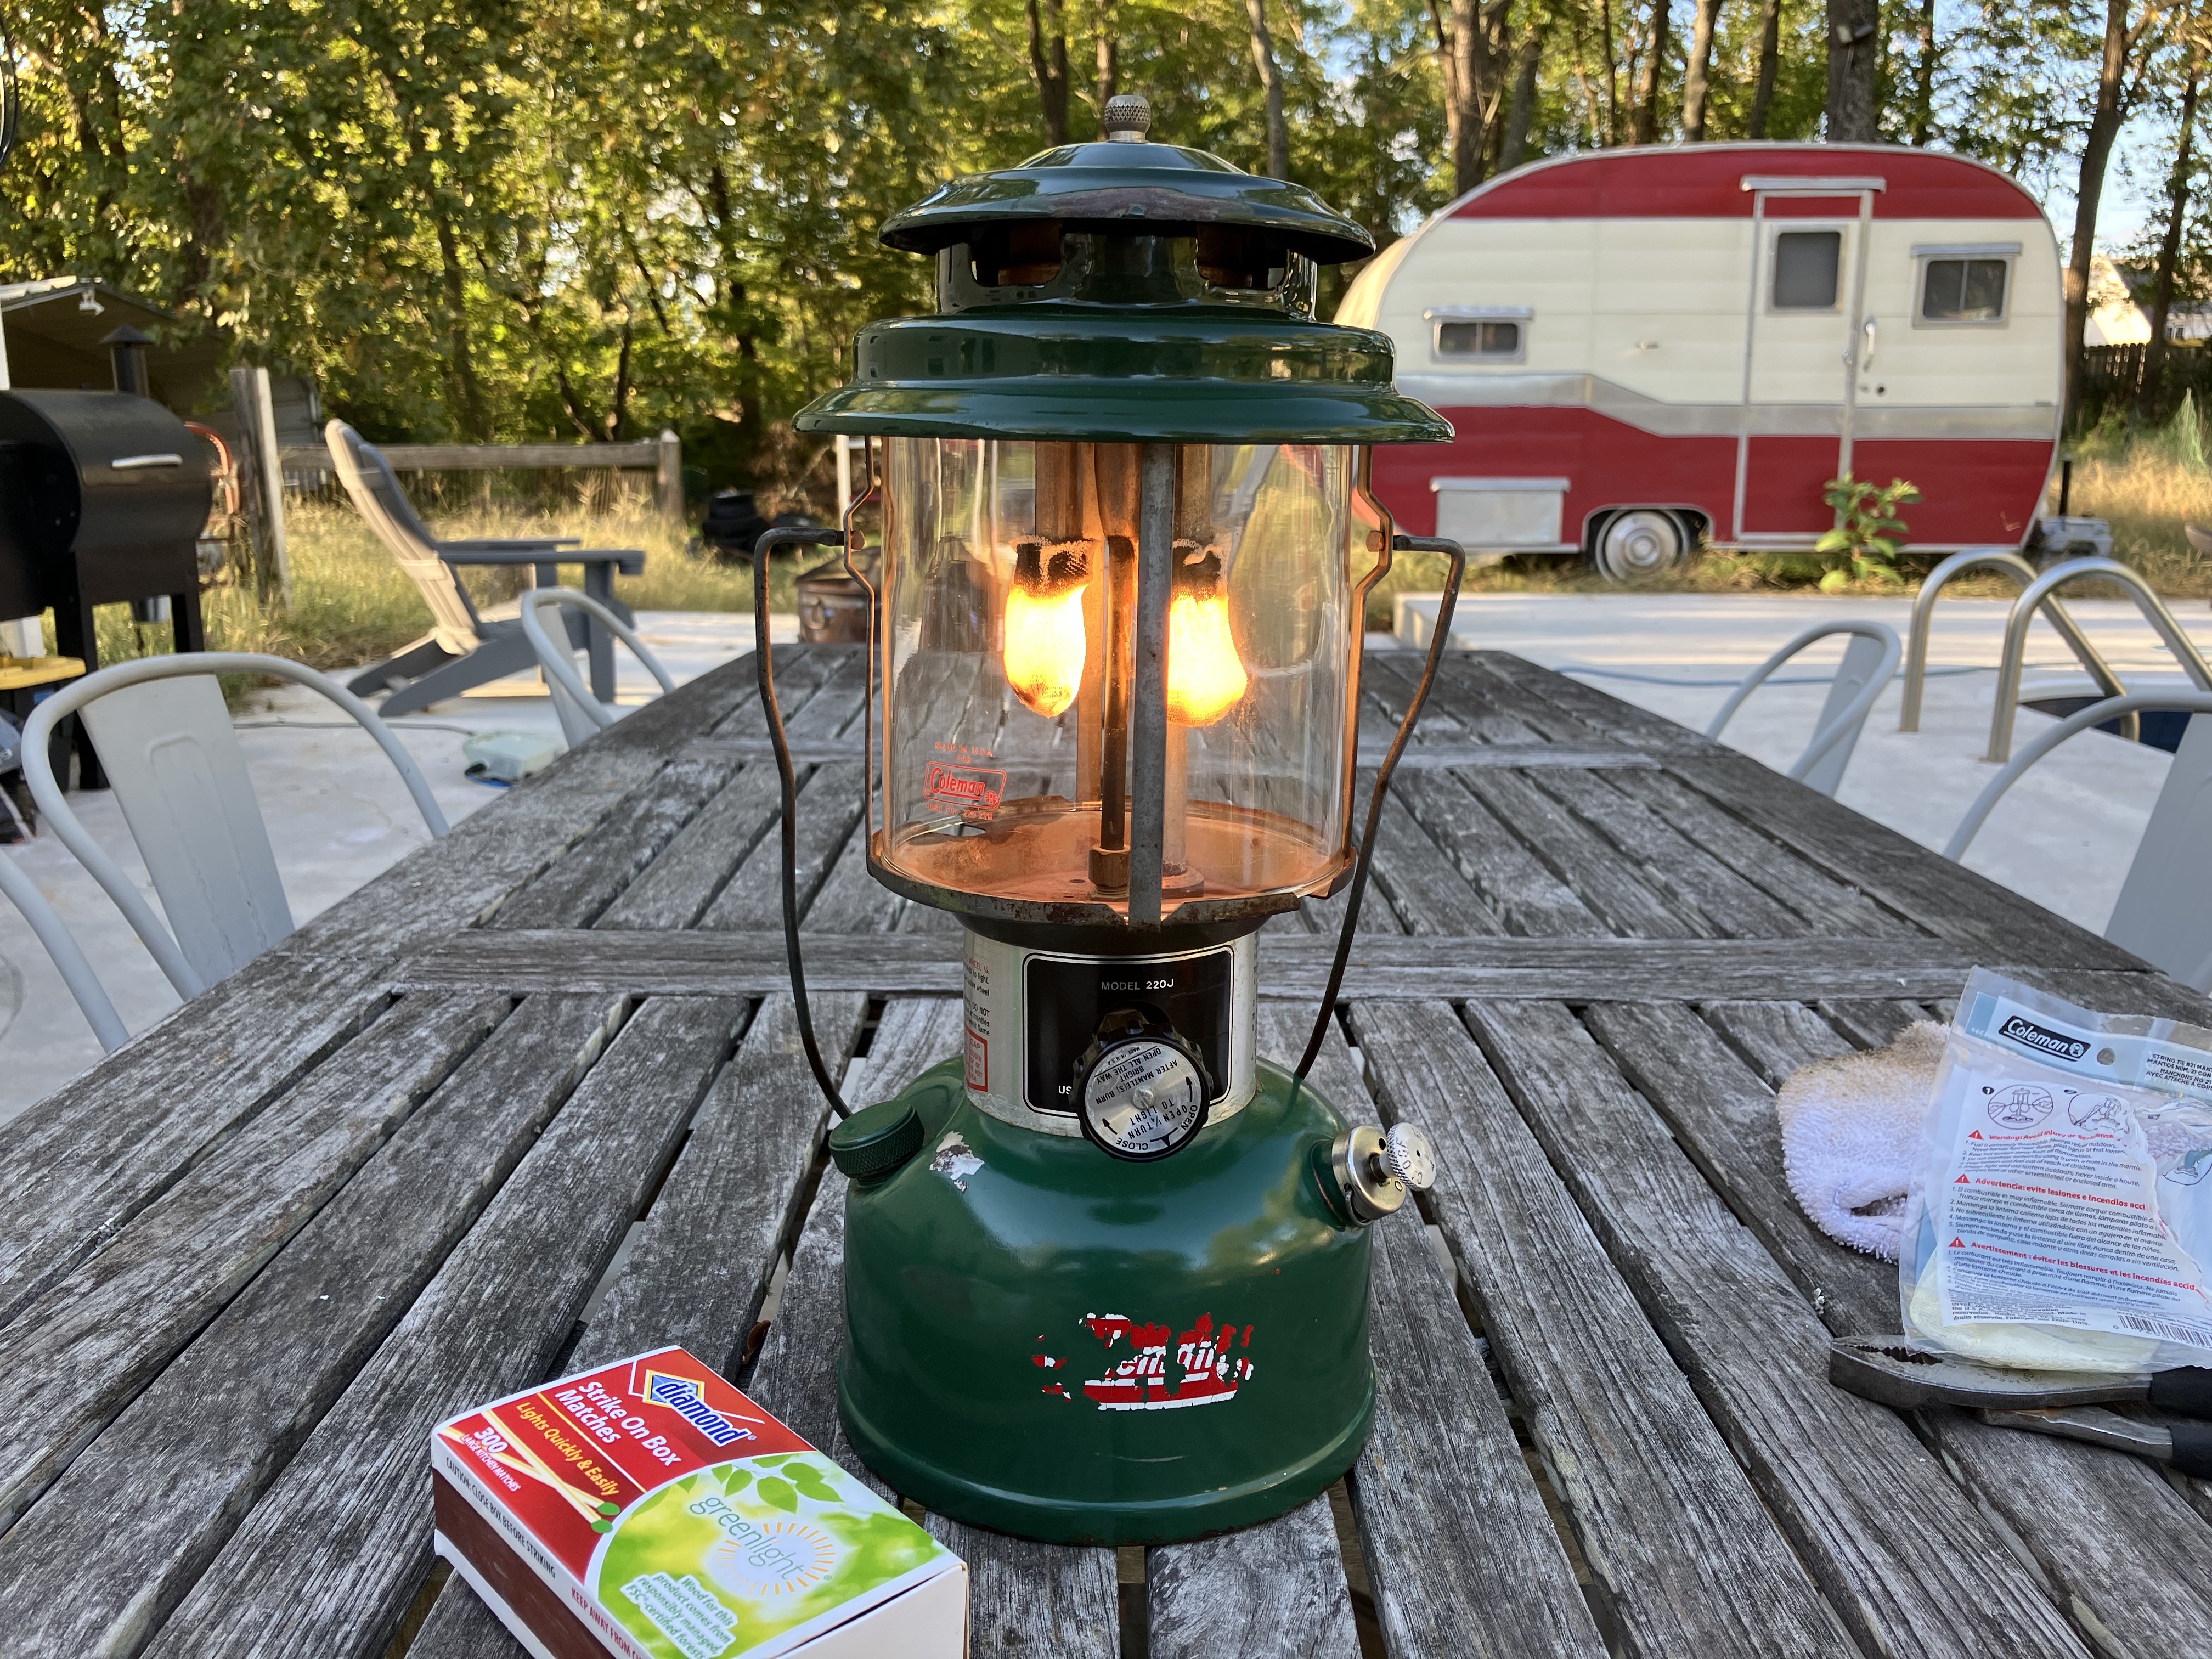
    The new mantles warming up on the Coleman 220J lantern.
    The new mantles warming up on the Coleman 220J lantern.

    Following the instructions printed on the lantern body, I pumped up the tank, which successfully built pressure with the new pump cup, and lit the lantern, which started right up! Once the new mantles were fully ignited, it glowed nice and bright and put off a pleasant warmth. It’s hard to beat a classic Coleman lantern.

    P.S. Another great resource for learning about and restoring these old pressure lanterns and other Coleman gear is Old Town Coleman. They have user manuals, parts diagrams, and lots of other useful information.

    P.P.S. I also bought and restored a Coleman 413G camp stove.

  • The Lazy Engineer

    They say that necessity is the mother of invention. Perhaps, then, a certain type of laziness is the fun uncle? Like I said in my first post on optimization, as an engineer, I’m driven to optimize, to make things work better. But I think there is a secondary force in operation here: a drive to work less—at least, to work less on uninteresting things.

    One could make the argument that this is actually still a form of optimization, just at a higher level: that I’m optimizing my time to work more on interesting things and less on uninteresting things. This sort of meta-optimization is at the core of what I am calling the Lazy Engineer (the group of which I consider myself to be a member).

    The Lazy Engineer doesn’t want to waste time on uninteresting tasks, therefore he optimizes those tasks to automate them and free up more of his time for interesting tasks. But there is an even higher level to this meta-optimization for the Lazy Engineer: he also doesn’t want to waste too much time optimizing, so he optimizes his optimizations for time spent.

    The guiding principle for this meta-meta-optimization is the Pareto principle, also commonly called the 80/20 rule. In this context, the application is this: find the 20% of a task that accounts for 80% of its outcomes, and build a system around that. Don’t waste time optimizing for the remaining 20% of outcomes, because that last 20% will take 80% of the time to optimize.

    Essentially, as a Lazy Engineer, I’m seeking that tipping point to maximize the effect of optimizations before reaching diminishing returns, and then calling it Good Enough. This goes back to the idea of seeking out the core principles of a task and focusing on optimizing those, effectively ignoring secondary outcomes and fringe benefits. By cutting out the fat and the fluff, these meta-optimized processes become simple, lean, and efficient. Perhaps one could call it Minimalist Optimization, but I think it’s more fitting to call it Lazy Optimization: the favorite tool of the Lazy Engineer.

  • Optimizing Pool Care

    Three years ago, we suddenly became “pool people”. When we purchased our current house, it came with a very large in-ground pool, and, of course, pool care duty fell to yours truly. I have now spent the last three years learning water chemistry, fine-tuning variable speed pumps, and fighting suction to take care of this pool, not to mention replacing—and paying to replace—various parts. They aren’t kidding when they call pools money pits.

    To optimize my pool care routine, I’ve been compiling a list of principles and developing a system to remove a bulk of the burden of “figuring it out as I go.”

    First, I have a Google Doc with core information and principles for pool care. These include things like the size of our pool (37,000 gallons), how many 3″ chlorine tabs to add at a time, and how many pounds of sodium bicarbonate to add to our pool to raise the alkalinity 10 ppm. I can use this document as a reference whenever I need to make adjustments to the water. It also has a schedule for pool care activities, such as how frequently to brush the sides or shock the pool.

    Second, I have a spreadsheet that I use to track how much of what chemicals I’m adding to the pool and when, as well as my purchases of those chemicals. This allows me to calculate total and average usage and cost of each chemical over the course of the pool season. My goal here is to help refine my understanding of the water balancing needs of our pool, which will be reflected in the first document, and also to help prepare for next season by allowing me to buy more chemicals in bulk rather than running to the pool store on a regular basis throughout the season.

    Finally, based on the schedule of various tasks outlined in the first document, I have actual calendar events on my calendar to help me stay on top of the pool care regimen. Currently, I just have a single recurring daily event for “Pool care,” and then reference the document to see which specific tasks I need to do, but my plan to refine this a bit further with more specific calendar events based on the schedule to avoid having to reference the document while I’m out at the pool.

    This system is definitely still a work in progress and not complete, but it has certainly helped me stay more on top of pool care this season compared to previous seasons, and my hope is that, as I continue to refine it, it makes future seasons even easier (and hopefully cheaper, too).

    I have to give credit to Swim University, run by Matt Giovanisci, whose articles, cheat sheets, and videos have really simplified pool care for me.

    I also have to give credit to our local pool store, who take care of opening and closing our pool each season, installed our new liner, and supply our chemicals. They have been very helpful when I’ve run into issues with the pool or had questions about balancing the water.

  • Optimizing with Systems

    In my last post, I talked about the value of leveraging systems to effectively automate optimizations. I’d like to dig more into the concept of systems and how they can be set up and used effectively.

    A system may be defined as “a set of principles or procedures according to which something is done; an organized framework or method” (Oxford English Dictionary). When designing a system to optimize a process, I try to suss out the core principles of that process—to break it down to its bare necessities—and build the system around those. Everything else is gravy. If I can turn those core principles into direct, specific action steps, often on a specific schedule (think S.M.A.R.T. goals), then I have a practical system that I can use to perform that process reliably, repeatedly, and without expending a lot of brain energy.

    When I talk about automating optimizations, I’m not so much talking about having a machine do it all for me (although that is sometimes very helpful), but rather triggering automatic thinking. If I can develop a system, which becomes a routine, which becomes a habit, and I can perform the process with minimal conscious decision-making, then I would consider that process automated in this context. Consider driving home from work on your normal route, and arriving home not remembering any of the drive itself—that’s automatic thinking: the commute home has become an unconscious habit that doesn’t require very much conscious decision-making.

    Whenever I find myself doing a process repeatedly, especially if it requires decision-making, I try to turn it into a simple system. Usually, I document that system somewhere (a notebook, a Google Doc, etc.) and fine-tune it over time until it’s working well for me. Developing a system is most definitely an iterative process, refining it until it reduces more friction than it creates.

    Here are some books that have been very useful to me as I think about developing systems:

  • Optimizing Personal Finance

    I’ve recently developed a renewed interest in the FIRE movement. I’ve followed Mr. Money Mustache off and on for about 10 years now, and gone through periods of time of being very excited about the possibility of financial independence, but unfortunately I never seriously put any of the advice into practice, leaving me on a more typical American career and financial path to date.

    My wife and I have followed Dave Ramsey’s financial principles since before we were married, which has provided us a really solid framework and language to talk about money together. I highly recommend his Financial Peace University course (we’ve taken it twice). However, his plan is for living financially secure on a typical career path—not achieving financial independence early.

    I’ve realized recently that a big reason I have failed to implement more of these FIRE strategies is a lack of systems. I talk with my wife a lot about having systems for things, because they allow me to effectively offload thinking and externalize decision-making. If I can put a system in place that I know and understand, ideally it will for me without me having to think about it going forward. But I found there was a big gap when it came to our finances: I was implementing very few systems to keep us on track, much less to get ahead and move more quickly towards financial independence.

    Thinking about this more, especially in this day and age, it’s very easy to set up systems that automate optimizing your finances. The first thing I did was set up a recurring auto-transfer to move money into savings—we currently have a goal of building a bigger emergency fund. Looking back, this is an absolute no-brainer, but we were missing our target month after month because we were not paying ourselves first. Now, it happens automatically, and I won’t have to think about anymore (until we hit our emergency fund goal, at which point I’ll redirect those funds).

    Another system that we already do have in place, but are still working to optimize, is having a separate checking account for my wife. The idea is for it to operate similar to Dave Ramsey’s paper envelope system, where we transfer money into that checking account for groceries and other spending each month, and she can spend out of that account without having to keep track of all the receipts. So far, this seems to be working for the most part, except when I forget to transfer money in, or something comes up and she needs more money than is available and just uses the main checking account. So, to optimize this a bit further, I now have an auto-transfer set up to drop money in there each month, and we’ve agreed to discuss any budget adjustments as they come up, in which case we may transfer additional funds into that account.

    Finally, I also had the idea of getting account balance texts sent to our phones each day, so we know how much is available in the “envelope” account. However, I couldn’t find a service that offers this—some specific banks do, but not ours. So, that’s not in place yet, but I may end up building a tool to do it…

    I’ve also spent time over the years tweaking our budget categories and the annual budget spreadsheet to eke out more efficiencies and usefulness. This minor tweaks are part of the ongoing optimization process to make managing our finances more and more simple and intuitive. The more I can automate with our finances, the more optimized the whole process will be and the less time it will take out of my day to stay on track. I’m looking forward to finding more ways to optimize our personal finances this year.

  • Optimize Everything

    I’m an engineer at heart (and at work). Engineers have a tendency to try to optimize the things they touch—at a base level, this is simply a drive to make things work better. My wife and I have long joked about how I try to optimize everything and try to create systems in my life to both simplify things and make things more efficient. But jokes aside, I think that, when pursued intentionally and driven by core values, optimization is a worthwhile undertaking.

    In subsequent posts, I’m going to attempt to document the various things I’m currently working to optimize in my life, including personal finance, digital interaction, daily routines, pool care, beer brewing, and more. This post serves more as an introduction to the overall topic of optimization.

    Why Optimize?

    The first question that optimization begs is, of course, why bother optimizing in the first place? Aren’t things going pretty well as they are? I would argue that they are not. As humans, we have an unfortunate tendency to fall into patterns without very much forethought. Whatever patterns we are already following in our lives, there is a very high chance that they are not operating very efficiently at all. Humans seem to collect habits, both good and bad, as a kind of default behavior, rather than as a carefully designed approach to life: this presents a very ripe opportunity for optimization.

    What to Optimize?

    If we are to approach the challenge of optimizing our lives, we first need to determine what to optimize. Not everything is a good candidate for optimization, but I think most, if not all, areas of one’s life are worth examining to see how efficient they are.

    I want to take a moment to talk about efficiency. A lot of times, efficiency is used to mean purely an increase in productivity and profits—doing more in less time. But in this more holistic context from which I’m approaching general optimization, I mean efficiency in the sense that my time spent throughout the day is directed towards things that I value, rather than frivolous pursuits that are not aligned with my values. So, when deciding what to optimize, it’s helpful to start with a list of values around which to base your life.

    Once you have a list of values, I think the best things to start optimizing are the obvious candidates in your day-to-day life that are completely misaligned with your values: if you value reading books, but you spend your free time playing video games instead of reading, that’s a misalignment that needs to be addressed.

    After the obvious candidates, the rest of your day (and even your night) can be examined to see what tweaks can be made to bring all areas of your life more in line with your values.

    When to Optimize?

    The agile methodology has a lot of traction in the software industry because of its iterative approach to software development. Boiled down, the idea is to continually review and reassess throughout the process to ensure alignment with goals and to course-correct before going too far down the wrong path.

    In a similar vein, my approach to life optimizations is not a one-and-done deal, where I jump head-first into the Most Optimal Approach, but rather an iterative process where small improvements can be made continually over time, gradually bringing my life more in line with my values, one area and one tweak at a time.

    Additionally, a good time to look for inefficiencies is when adding or changing something in your life—by taking a proactive approach when entering a new season in life, you can avoid some (not all) of the human tendency for poor habit formation and get yourself on the road to more efficient, value-aligned behaviors from the get-go.

    “The cost of a thing is the amount of what I will call life which is required to be exchanged for it, immediately or in the long run.”

    Henry David Thoreau, Walden
  • Portable Glass Rinser

    Portable Glass Rinser

    Being able to rinse out glasses at a homebrew event is a big deal. Not only does it mean that your beer will be showcased in its purest form, but drinkers also appreciate getting their sample glasses cleaned out. It elevates the whole experience. So, naturally, as I was preparing to bring some beer to my next homebrew event, I wanted an elegant solution for rinsing glasses—something better than a pitcher of water or a spray bottle. After scouring the Internet for ideas (and not finding many), I settled on this clever bucket idea for a portable glass rinser. The basic concept is to use a 5 gallon keg of water to rinse glasses, with the waste water flowing into a 5 gallon bucket: a self-contained system.

    Parts

    To build this portable glass rinser, I used the following parts:

    Cost

    I already had a spare ball lock disconnect, so I didn’t need to purchase one for this project. The rest of the parts cost the following for me at the time of purchase, not including tax or shipping:

    • $4.98 for the bucket
    • $2.28 for the bucket lid
    • $8.99 for the glass rinser
    • $11.34 for the ice maker supply line
    • $8.88 for the 1/2″ FIP x 1/4″ compression adapter
    • $3.88 for the 1/4″ compression x 1/4″ FFL adapter
    • $5.99 for the ball lock disconnect (if needed)

    Grand total: $46.34

    Build

    This build was pretty quick and straightforward. Besides assembly, the only real “build” part is modifying the Lowe’s bucket lid. After placing the glass rinser base on top of the lid to determine where to mount it, I drilled a 7/8″ hole for the glass rinser shank. Then I drilled a 5/8″ hole for the ice maker supply line to pass through. Finally, I cut out a circle in the center of the lid for the lip of the glass rinser to rest and drain into the bucket.

    Holes drilled and cut in the bucket lid for the portable glass rinser
    Holes drilled and cut in the bucket lid

    After that, it was just assembly: installing the 1/2″ FIP x 1/4″ compression adapter onto the glass rinser shank, the ice maker supply line onto the adapter, the 1/4″ compression x 1/4″ female flare adapter onto the ice maker supply line, and a ball lock liquid out disconnect onto the flare adapter.

    1/2" FIP x 1/4" compression adapter and ice maker supply line installed on the glass rinser shank for the portable glass rinser
    1/2″ FIP x 1/4″ compression adapter and ice maker supply line installed on the glass rinser shank

    Finally, the supply line was fed through the smallest hole in the lid, and the lid installed onto the bucket.

    The fully assembled portable glass rinser
    The fully assembled portable glass rinser

    To use it, simply attach the liquid out disconnect to a Corny keg full of water, and use 10-15 psi of CO2 to push water to the glass rinser. The water doesn’t need to be kept as cold as beer for rinsing, so the whole setup can be easily toted around as needed without the need for a jockey box, ice, or even a table. May your patrons enjoy clean glasses at your next event!

    Testing the portable glass rinser using the water keg in my keezer
  • DIY Glycol Chiller

    DIY Glycol Chiller

    After moving a few years ago and selling my fermentation chamber, I’ve been without proper temperature control for my beers. I’ve been fermenting them in the house—typically in the bathroom, which stays a bit warmer than the rest of the house. When the “shower beer” situation peaked at 25 gallons of beer, I realized I need to solve this problem sooner than later: I needed a way to ferment in the garage and control temperature. Time to build a DIY glycol chiller!

    Too much shower beer!
    Too much shower beer!

    Whereas I had previously built a fermentation chamber to control temperature via heating and cooling the air, this time, I decided to step up my game and move into glycol chilling. This would require fermentors capable of supporting a chilling coil, as well as the glycol chiller and circulation system. After some research, I settled on the Delta FermTank 14 gallon fermentor.

    For the chiller, I stuck to my guns and went the DIY glycol chiller route using a window A/C unit and a cooler. But not wanting to be outdone, I over-engineered this thing to be more compact than the other DIY solutions I’d seen.

    Parts

    • Midea 5000 BTU mechanical window air conditioner (Walmart)
    • Igloo Legend 17-qt cooler (Home Depot)
    • Circulation pump (Amazon)
    • InkBird ITC-1000F temperature controller (Amazon)
    • 1 gallon food grade inhibited propylene glycol (Amazon)
    • 2 gallons distilled water

    Build

    Modifying the Air Conditioner

    The first step was to cannibalize the A/C unit. I set the temperature and mode to maximum cooling capacity, then removed the knobs and exterior case.

    The A/C unit for the DIY glycol chiller with front panel removed
    The A/C with front panel removed
    The A/C unit for the DIY glycol chiller with enclosure and evaporator fan removed
    The A/C with enclosure and evaporator fan removed

    Then I went about slowly and carefully realigning the evaporator coil to fit into the cooler.

    The scariest part of this whole build: reorienting the A/C evaporator coil
    The scariest part of this whole build: reorienting the evaporator coil

    Bypassing the thermostat

    To make the A/C run whenever the temperature controller told it to, I had to bypass the built-in thermostat. I did this by folding up the probe inside the wiring enclosure, then wiring the two leads from the thermostat control to each other, bypassing the control completely. The thermostat could be removed completely, but since it wouldn’t save me any space in the overall build, I left it where it was.

    The bypassed A/C thermostat
    The bypassed thermostat

    Closing the gap

    I used a hacksaw to remove the excess shaft coming from the fan motor to save space. I also made several modifications to the metal base plate of the A/C unit to facilitate placement of the cooler. If I were to do this again, I might just remove the base plate entirely and make my own mounts for the compressor, fan, and wiring enclosure.

    The shortened A/C fan motor shaft
    The shortened fan motor shaft
    Modifying the A/C base plate with a hacksaw
    Modifying the base plate with a hacksaw

    To fit the cooler as close as possible, I also modified the wiring enclosure so the start capacitor could be reoriented 90º. This took a bit of cutting with tin snips and adding screw holes, but wasn’t too difficult.

    The rotated A/C capacitor
    The rotated A/C capacitor

    I shopped around for the smallest cooler I could find that would fit the coil. This would minimize both the amount of glycol needed and the chilling time. With the modifications to the A/C base plate, wiring enclosure, and fan motor shaft, I was able to snug the cooler up very closely in the A/C footprint.

    A test fit of the cooler for the DIY glycol chiller with preliminary wiring mockup
    A test fit of the cooler with preliminary wiring mockup

    Wiring the chiller

    The wiring for this DIY glycol chiller was a bit of an evolution. I wanted to keep it as flexible as possible while using easy-to-get components. I initially started out with house wiring components, but ended up using a combination of house wiring and stranded project wiring. To handle the majority of the wiring within the enclosure, I bought a spool of 14-gauge stranded wire and several terminal blocks.

    The end result is a chiller with a light switch as the main power switch, standard outlets for powering external heaters for each fermentor, and internal terminal block wiring for running the A/C unit, glycol circulation pump, exhaust fan, and each fermentor’s pump, as well as all the temperature controllers.

    For components like the circulation pump that had standard power cords, I trimmed the plug off and crimped on spade terminals to connect them directly to the terminal blocks. For components like each fermentor’s glycol pump that have a wall wart, I modified cheap extension cords in a similar manner, so the power adapter plugs into the extension cord, and the extension cord is wired directly to the terminal block.

    The terminal block wiring and modified power cords in the DIY glycol chiller
    The terminal block wiring and modified power cords

    This is the final wiring diagram I arrived at after a few iterations and simplifying things as much as possible:

    The final wiring diagram for the DIY glycol chiller
    The final wiring diagram

    Building the Enclosure

    I originally started building the enclosure from 3/4″ plywood that I had on hand, but quickly realized I needed something thinner to be able to panel-mount the components. I also wanted something that could be more easily removed for service. In the end, I used fiberboard panels mounted to aluminum angle brackets on a plywood base.

    Original plywood enclosure for the DIY glycol chiller
    Original plywood enclosure
    New and improved fiberboard enclosure on casters for the DIY glycol chiller
    New and improved fiberboard enclosure on casters

    I designed the chiller to be able to support a total of 4 fermentors. I only have 1 right now, so I haven’t verified that it’ll work at that capacity, but as I expand I’ll be able to test it out. If it can’t handle 4 a time, I could modify the build and enclosure as necessary.

    Since the temperature controllers support both heating and cooling, I designed this system with outlets for heaters. Each outlet is controlled separately, so each fermentor’s heating jacket can be plugged in constantly and only receive power when it needs to raise the temperature.

    The side of the DIY glycol chiller, featuring the power switch, heating outlets, and glycol bath temperature control
    The side of the chiller, featuring the power switch, heating outlets, and glycol bath temperature control

    With the initial assembly of the enclosure, I realized there wasn’t enough airflow inside when the A/C was running. In fact, this led to the A/C fan motor overheating and melting its plastic mount! Fortunately, I was able to salvage it without any major impact to function. To solve the airflow issue, I added an exhaust fan that runs constantly, even with the A/C off. I also added a vent hole in the bottom of the enclosure to allow fresh air in.

    The exhaust fan for ventilation inside the DIY glycol chiller
    The exhaust fan for ventilation inside the glycol chiller