Recently, the rear window on my 2nd gen 4Runner started intermittently not rolling down. Pretty soon, it was intermittently working and usually didn’t work at all. When it worked, it worked great, but when it didn’t, nothing happened, so I knew it wasn’t the window motor. Since I could hear the rear window relay click when I turned the key in the tailgate, I suspected the contacts had worn out and the relays needed to be replaced.
(If you’re diagnosing rear window issues, 4Crawler has a great troubleshooting page that I found really helpful. It’s geared toward 1st gen 4runners, but most of it is applicable to 2nd gens as well.)
I had actually already replaced the rear window relays about 3 years ago, but I used some cheap Chinese relays from Amazon that weren’t built to last. This time I ordered 4 Panasonic relays from DigiKey. They’re a drop-in replacement for the original relays and are rated for 10A instead of 6A so they should last quite a bit longer.
Parts
Tools
- Soldering iron
- Solder sucker (recommended)
- Solder
- Flux (recommended)
- Third hand (optional)
Cost
This is a cheap fix to a common problem. I only paid $12.66 for these high-quality relays from DigiKey, half of which was shipping, and I already had all the tools. If you have to buy a soldering iron, solder, and flux, you might spend $30 or $40 total.
Accessing the Relay Box
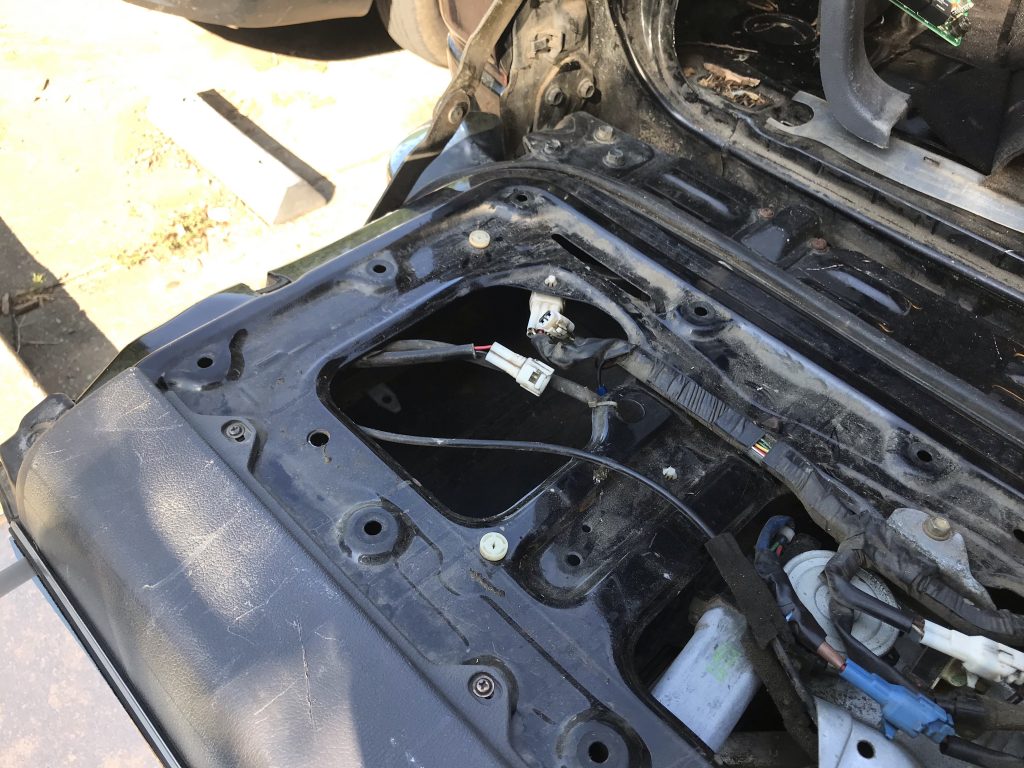
The first problem was that my window was rolled up, and I needed to open the tailgate to get to the relay box. To solve this, I ran jumper cables from the battery into the cargo area, popped off the tailgate panel inside, and used some alligator clip jumpers from the jumper cables to the pins on the rear window motor plug to roll the window down. Kind of a pain, but it worked!
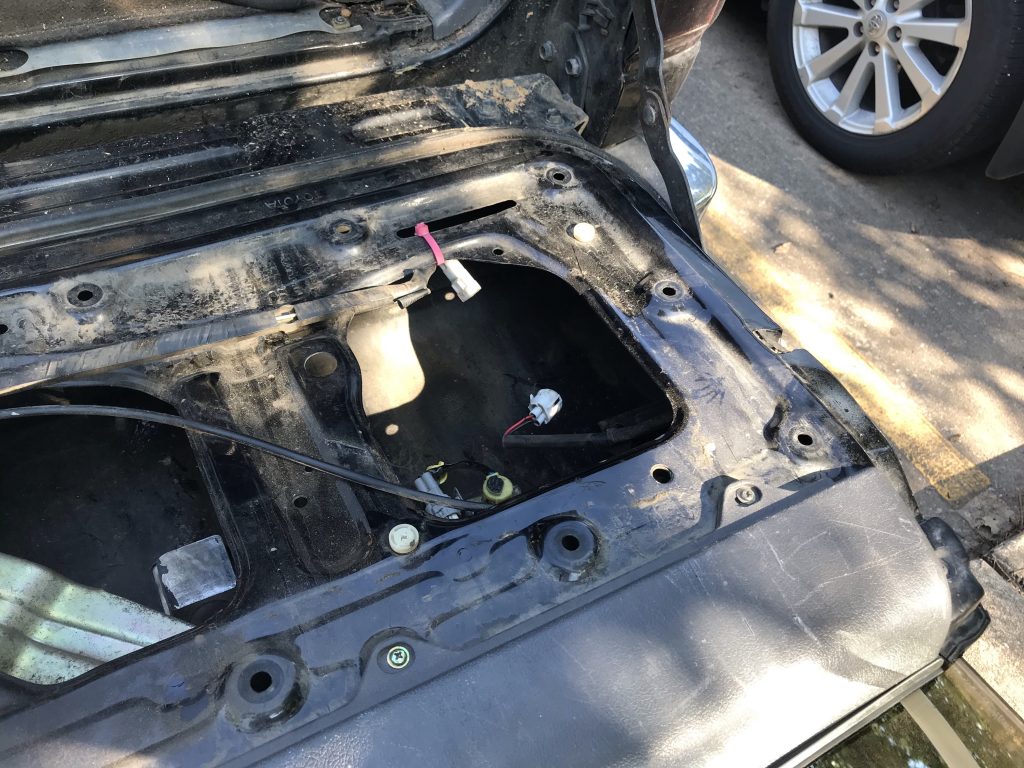
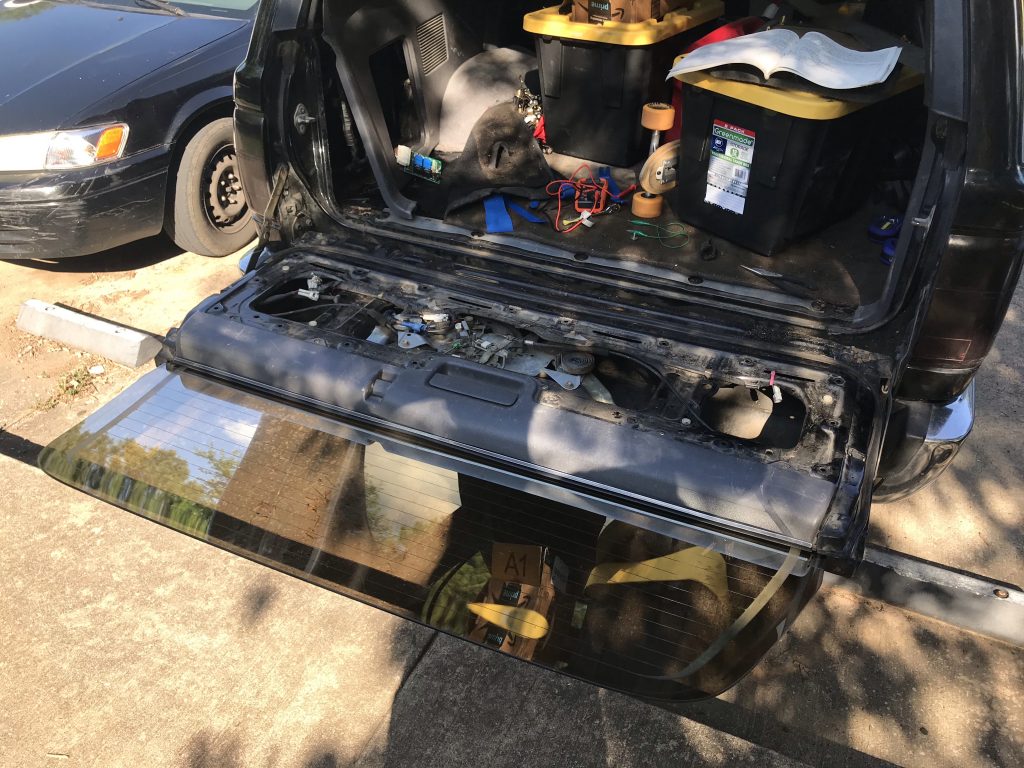
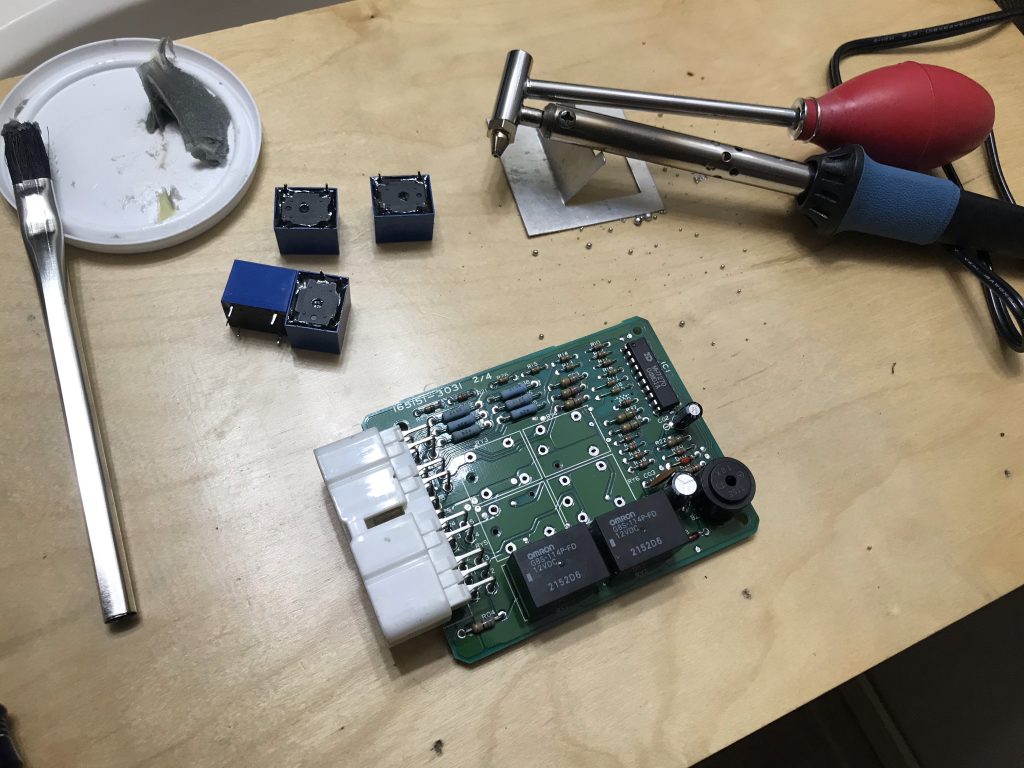
With the tailgate open, I pulled off the trim along the bottom edge of the cargo area, and then pulled back the driver side quarter panel trim, just enough to access the bolts holding the relay box to the body. The relay box unplugs from the connector and then there are 3 enclosure pieces that pop off in order to slide the circuit board out.
Replacing the Relays
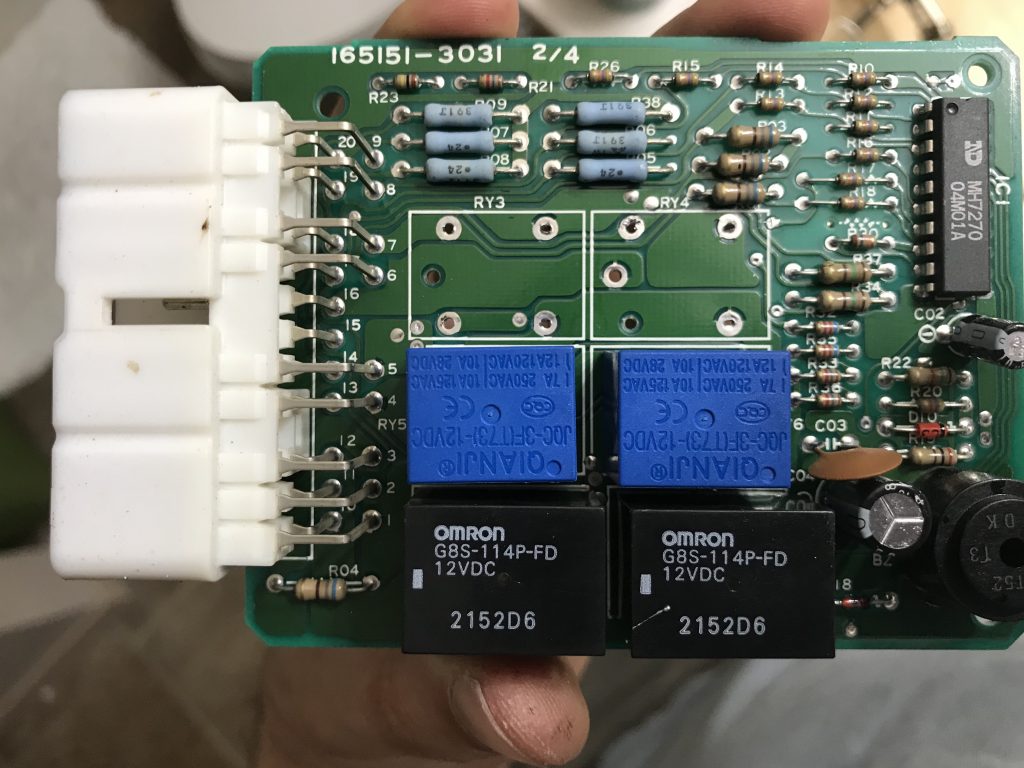
Once I had the circuit board free, I warmed up my solder sucker, dabbed a little flux on the joints, and proceeded to remove the solder from the old relays.
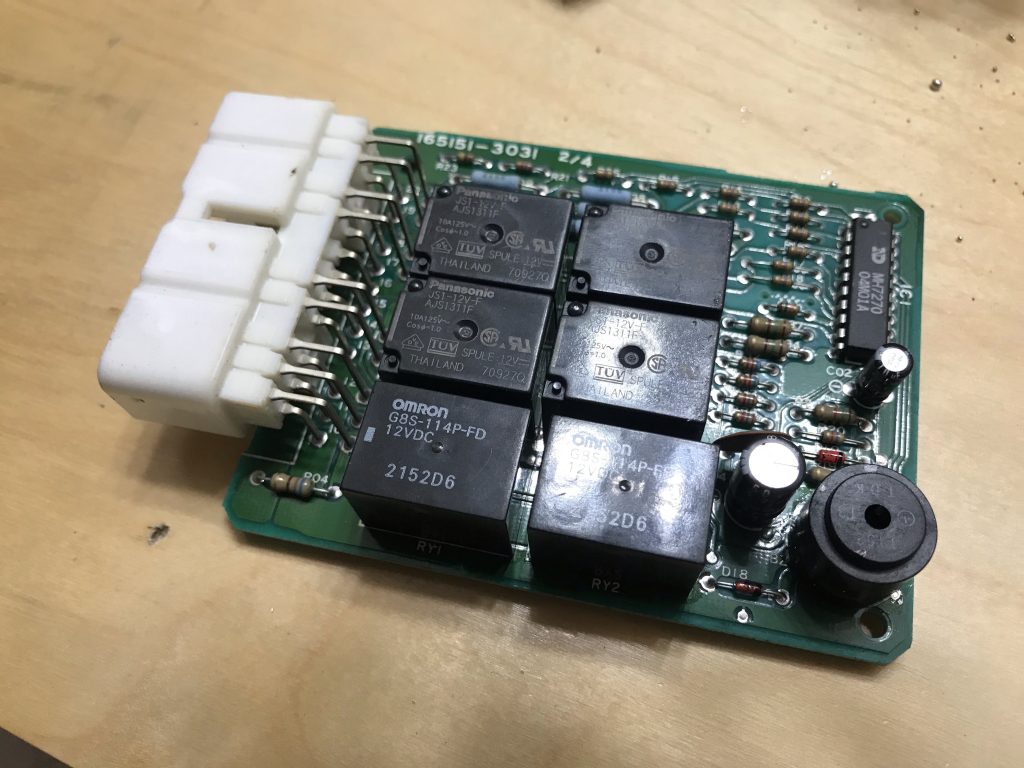
You’ll notice on the circuit board that the relays are labeled. By examining the wiring diagram and doing some probing on the circuit board, I worked out the following:
- RY3 is the window up relay
- RY4 is the window down relay
- RY5 and RY6 appear to be for the rear washer
- RY1 and RY2 appear to be for the rear wiper
I went ahead and replaced RY3, RY4, RY5, and RY6 since they were all the same cheap relays I had replaced before. If you’re only having problems with the window itself, you can probably get away with just replacing RY3 and RY4.
I highly recommend a solder sucker, desoldering iron, wick, or braid to remove the old relays. It’s not necessary, but it makes the process a lot faster and cleaner. Flux isn’t necessary either, but it helps.
With the solder removed, the old relays should pop out pretty easily with a little wiggling.
The new relays fit snugly in the holes, so I didn’t end up needing a third hand. I had to re-tin my soldering iron but then I was able to quickly solder the pins to the board.
Be sure to use proper technique when soldering on the circuit board, since it is easy to damage the board. Make sure the soldering iron is clean and properly tinned first. Then get a bit of solder on the end of the iron, hold the relay pin in place, and touch the soldering iron to both the pad on the board and the pin. The solder should flow onto both the pad and the pin to make a solid connection. Let it cool without moving the pin, then move onto the next pin.
With the new rear window relays installed, reinstall the relay box and test out the rear window. If the relays were the problem as they were on mine, it should be working like new now!
Switch Mod
While I had the circuit board out, I took the opportunity to do the switch mod that allows me to roll down the rear window using the switch in the center console without having the key in the ignition. Since using the key in the tailgate doesn’t require the ignition switch, it’s simply a matter of jumping the pins used for the tailgate switch to the pins used for the console switch.
For the 2nd gen 4runner, the following pins are jumped:
- Pin 9 (tailgate switch up) to Pin 7 (console switch up)
- Pin 17 (tailgate switch down) to Pin 6 (console switch down)
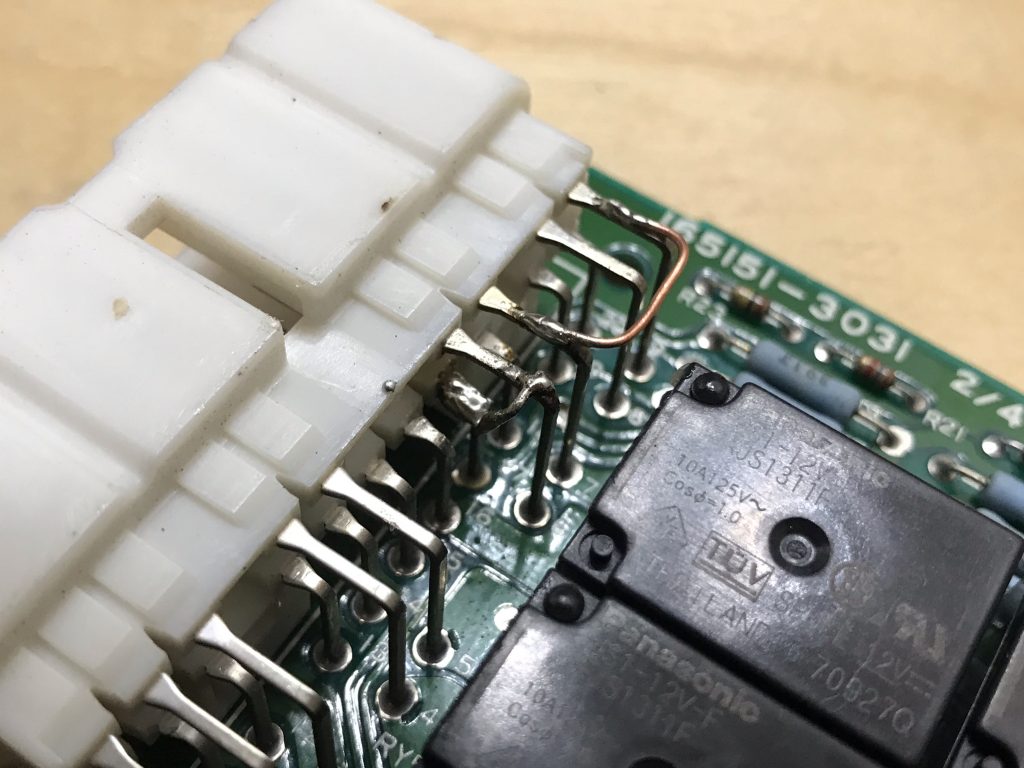
I chose to jump the pins on the top of the circuit board by soldering some copper wire across the connector leads, but it was pretty tricky to solder pin 17 this way. Alternatively, you could jump the pins on the bottom of the circuit board where the connector isn’t in the way.
This mod worked great and really makes it easier to access the back without using my key at all. It also sets me up to install a future mod: an additional rear window switch located in the cargo area, so I can easily roll down the rear window if I’m sleeping in the back.
Bonus: Tailgate Access
As an aside, once you have your rear window working, if you need to roll it up to access the guts of the tailgate while it’s open, you can disconnect the 2 rear window lock switches located on either side of the tailgate, and then roll the window up with the switch. This is handy for accessing the key switch in the tailgate from the inside. Careful not to roll it up too far, though!