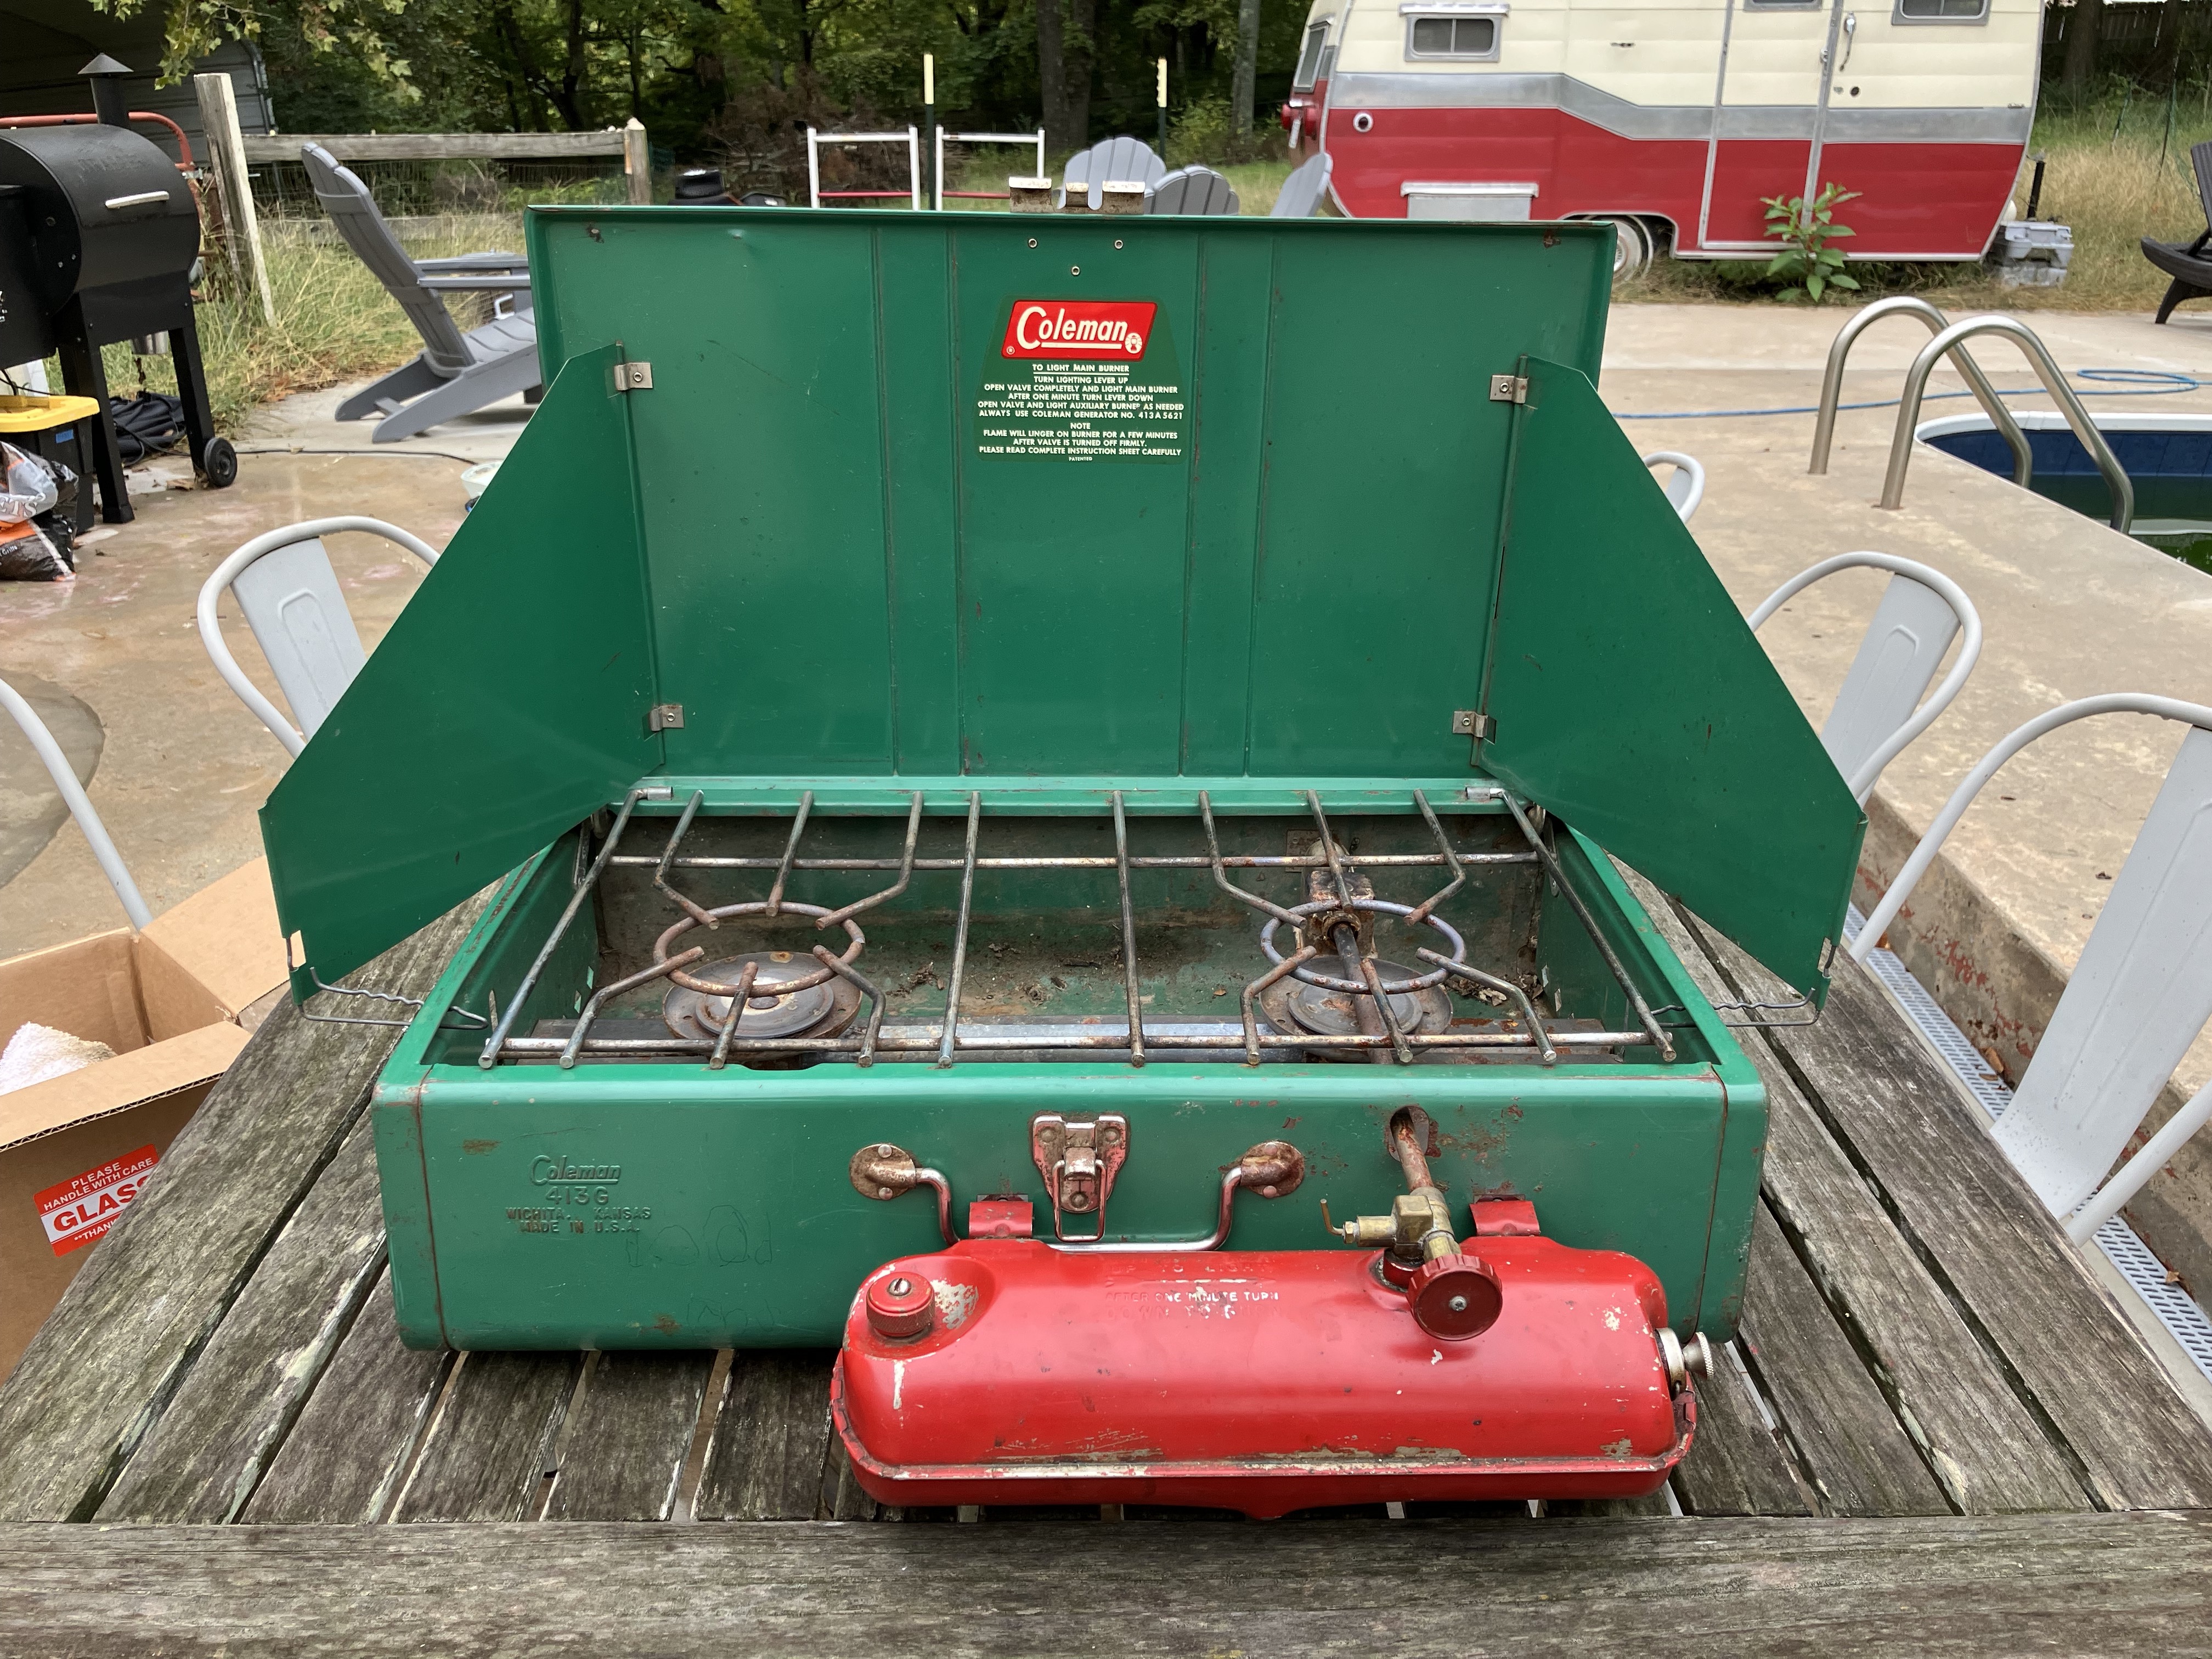
The Coleman 413G camp stove as it was when purchased.
In addition to my Coleman 220J pressure lantern, I also picked up a vintage Coleman 413G camp stove at the same flea market for $25. This is the larger of the two classic Coleman pressure camp stoves—I’d like to get the smaller 425 at some point as well.
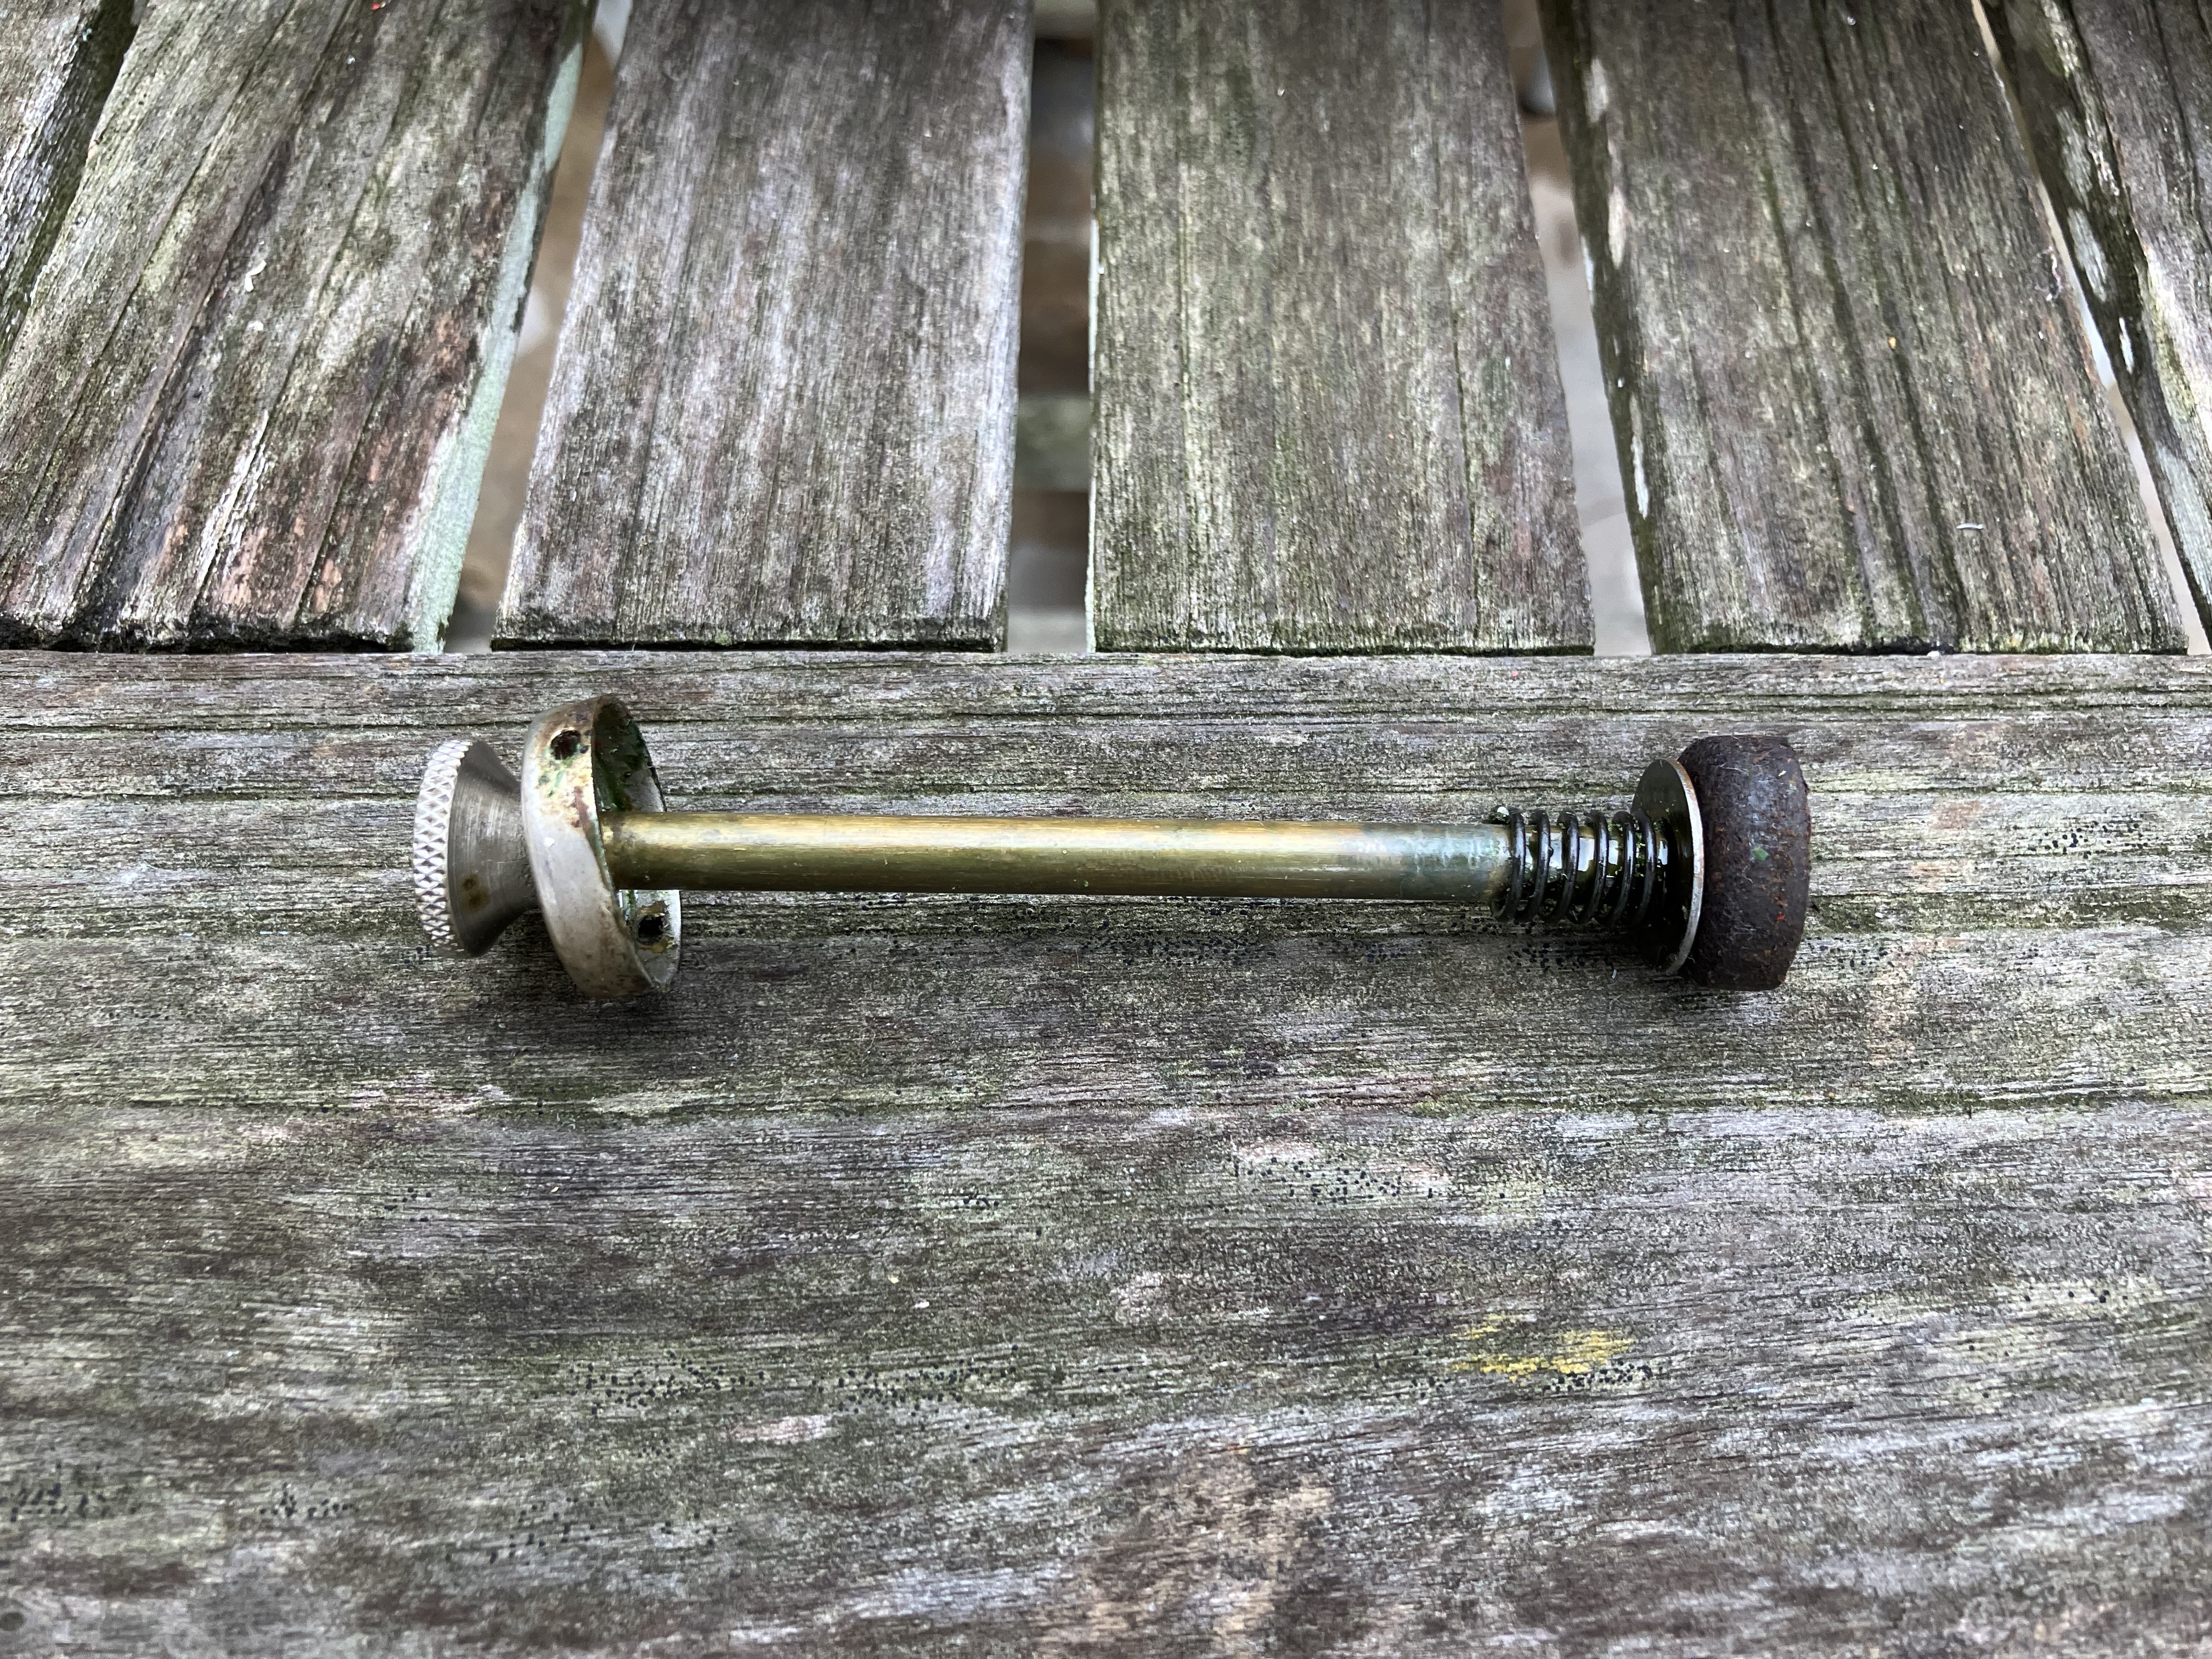
The plunger with the original leather pump cup.
The stove was in pretty decent shape to start with. As with the lantern, I immediately noticed that the pump wasn’t holding pressure and appeared to also have the rubber pump cup, so I ordered a replacement leather pump cup for it as well. However, it turned out that the stove actually already had a leather cup, it was just almost black with oil and age. So, I was able to clean and oil it and bring it back around to building pressure successfully, and now I have a spare on hand in case it fails down the road.
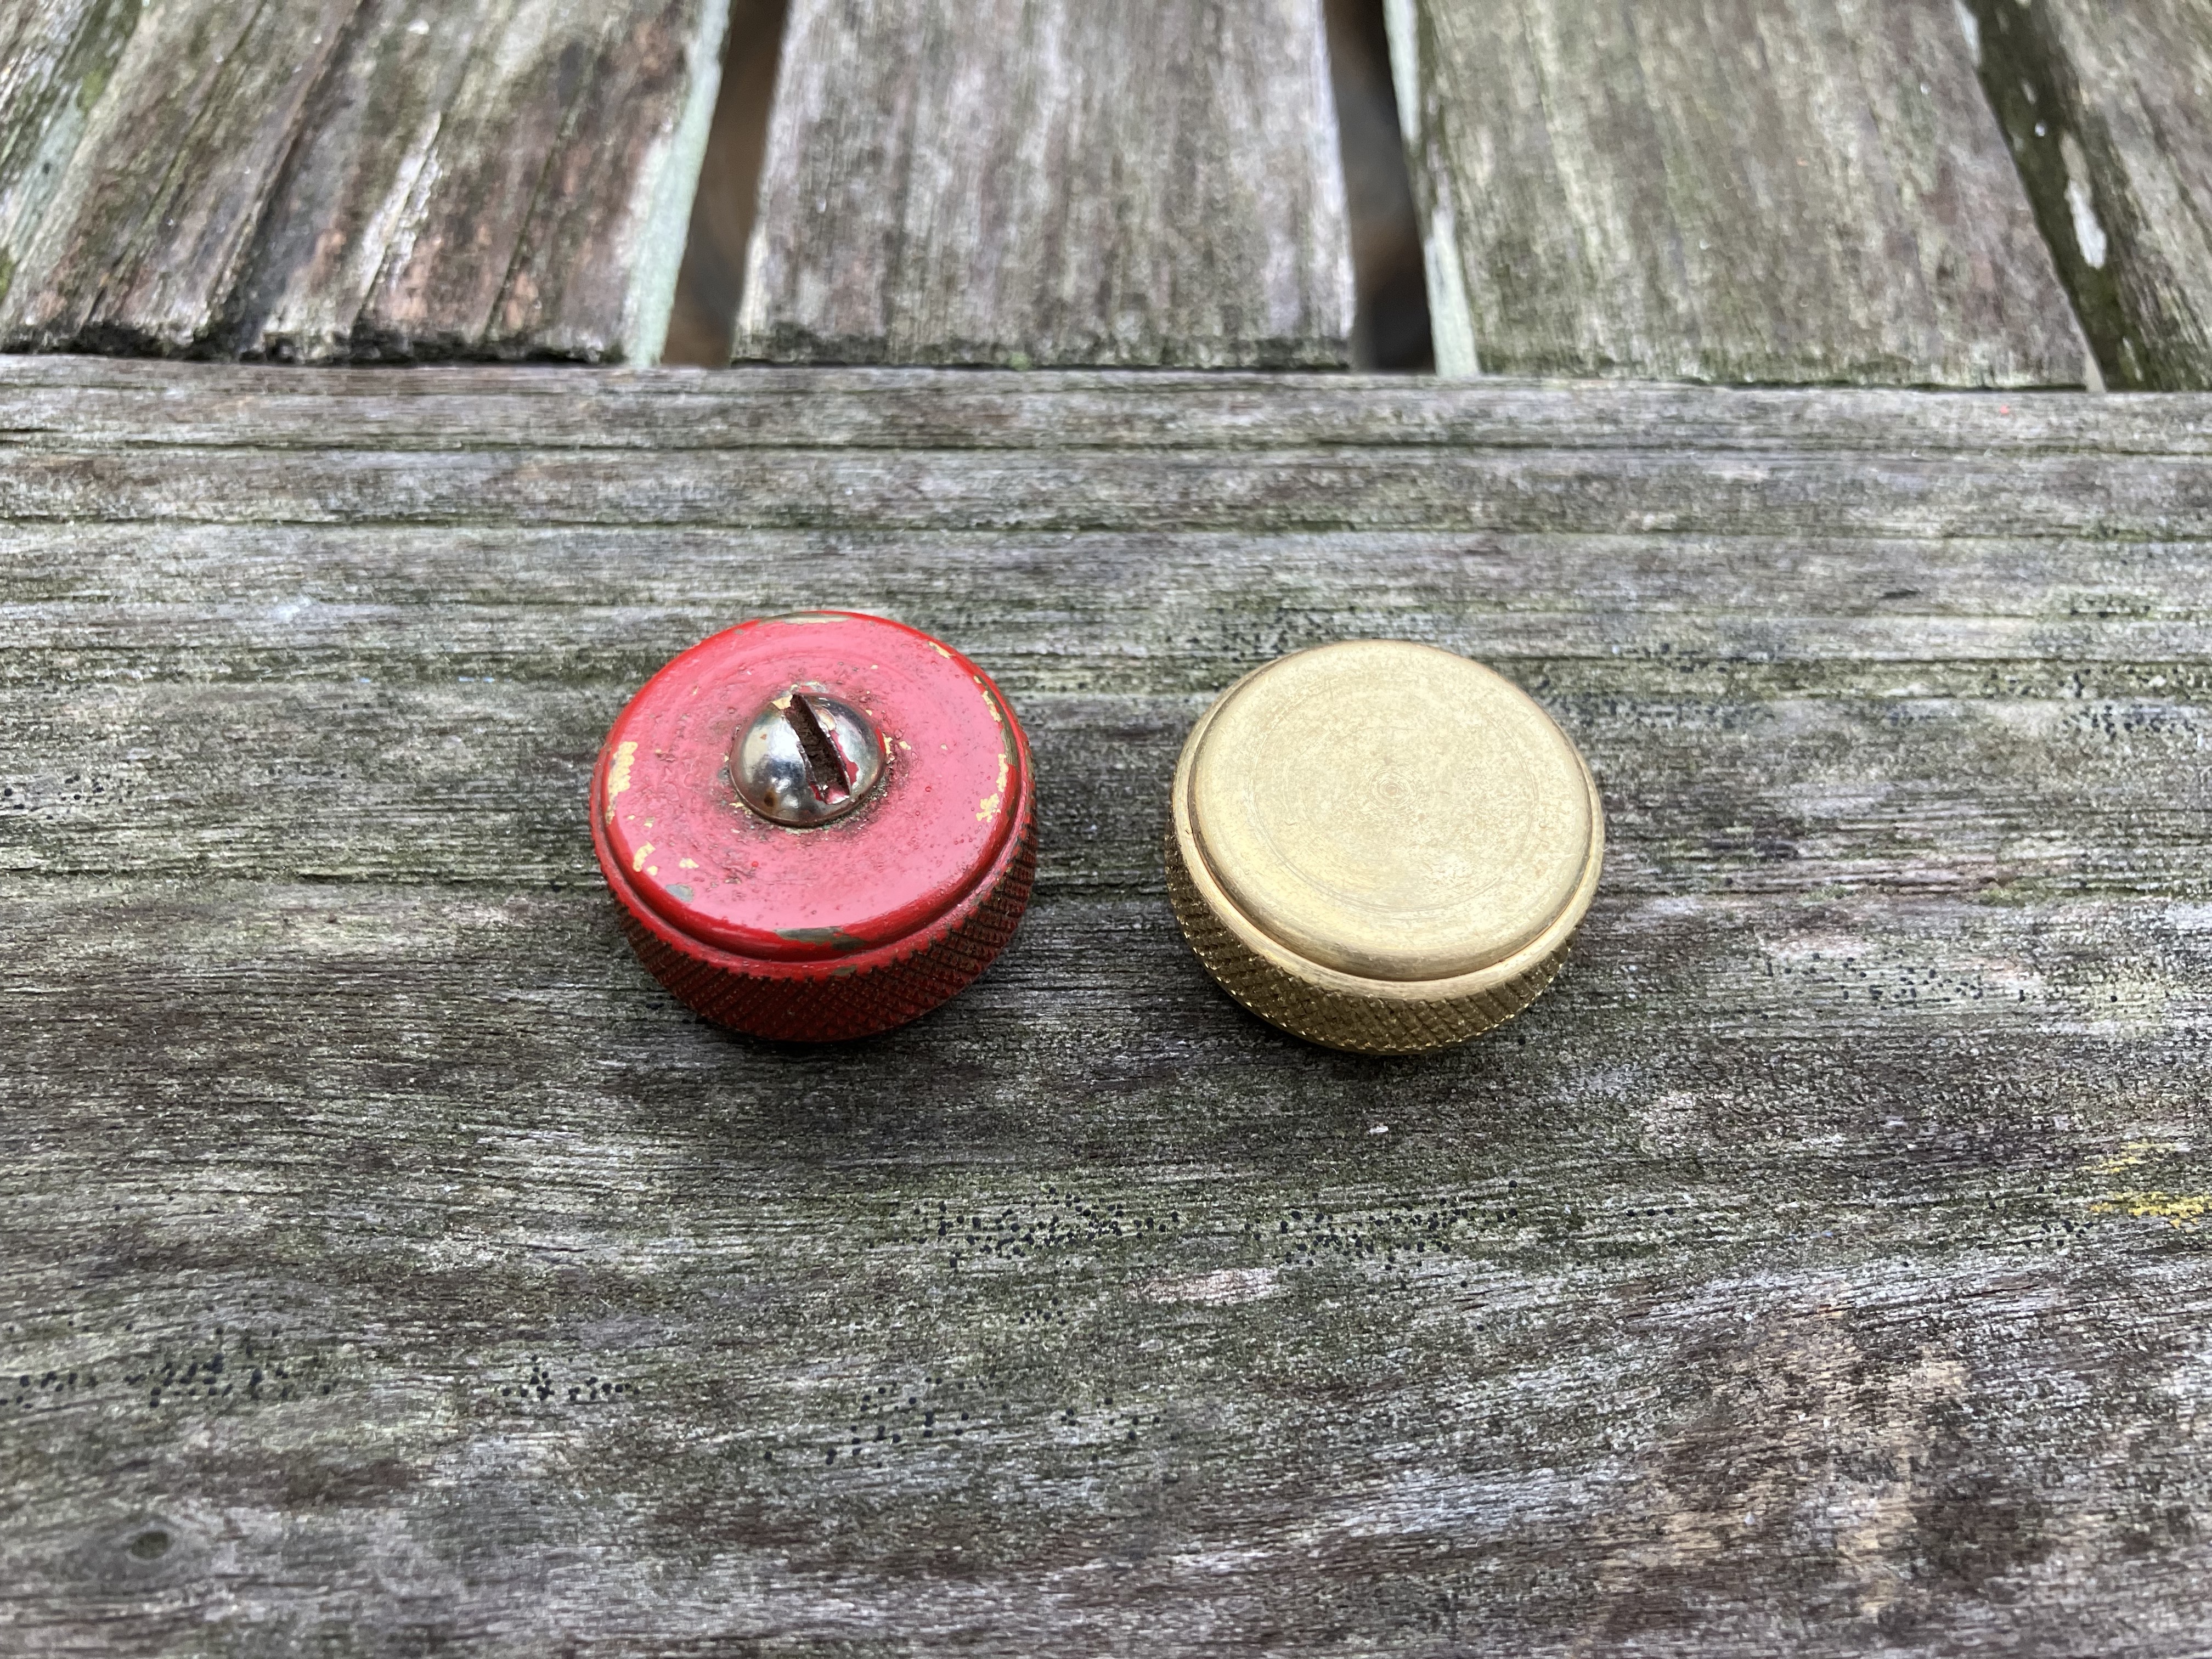
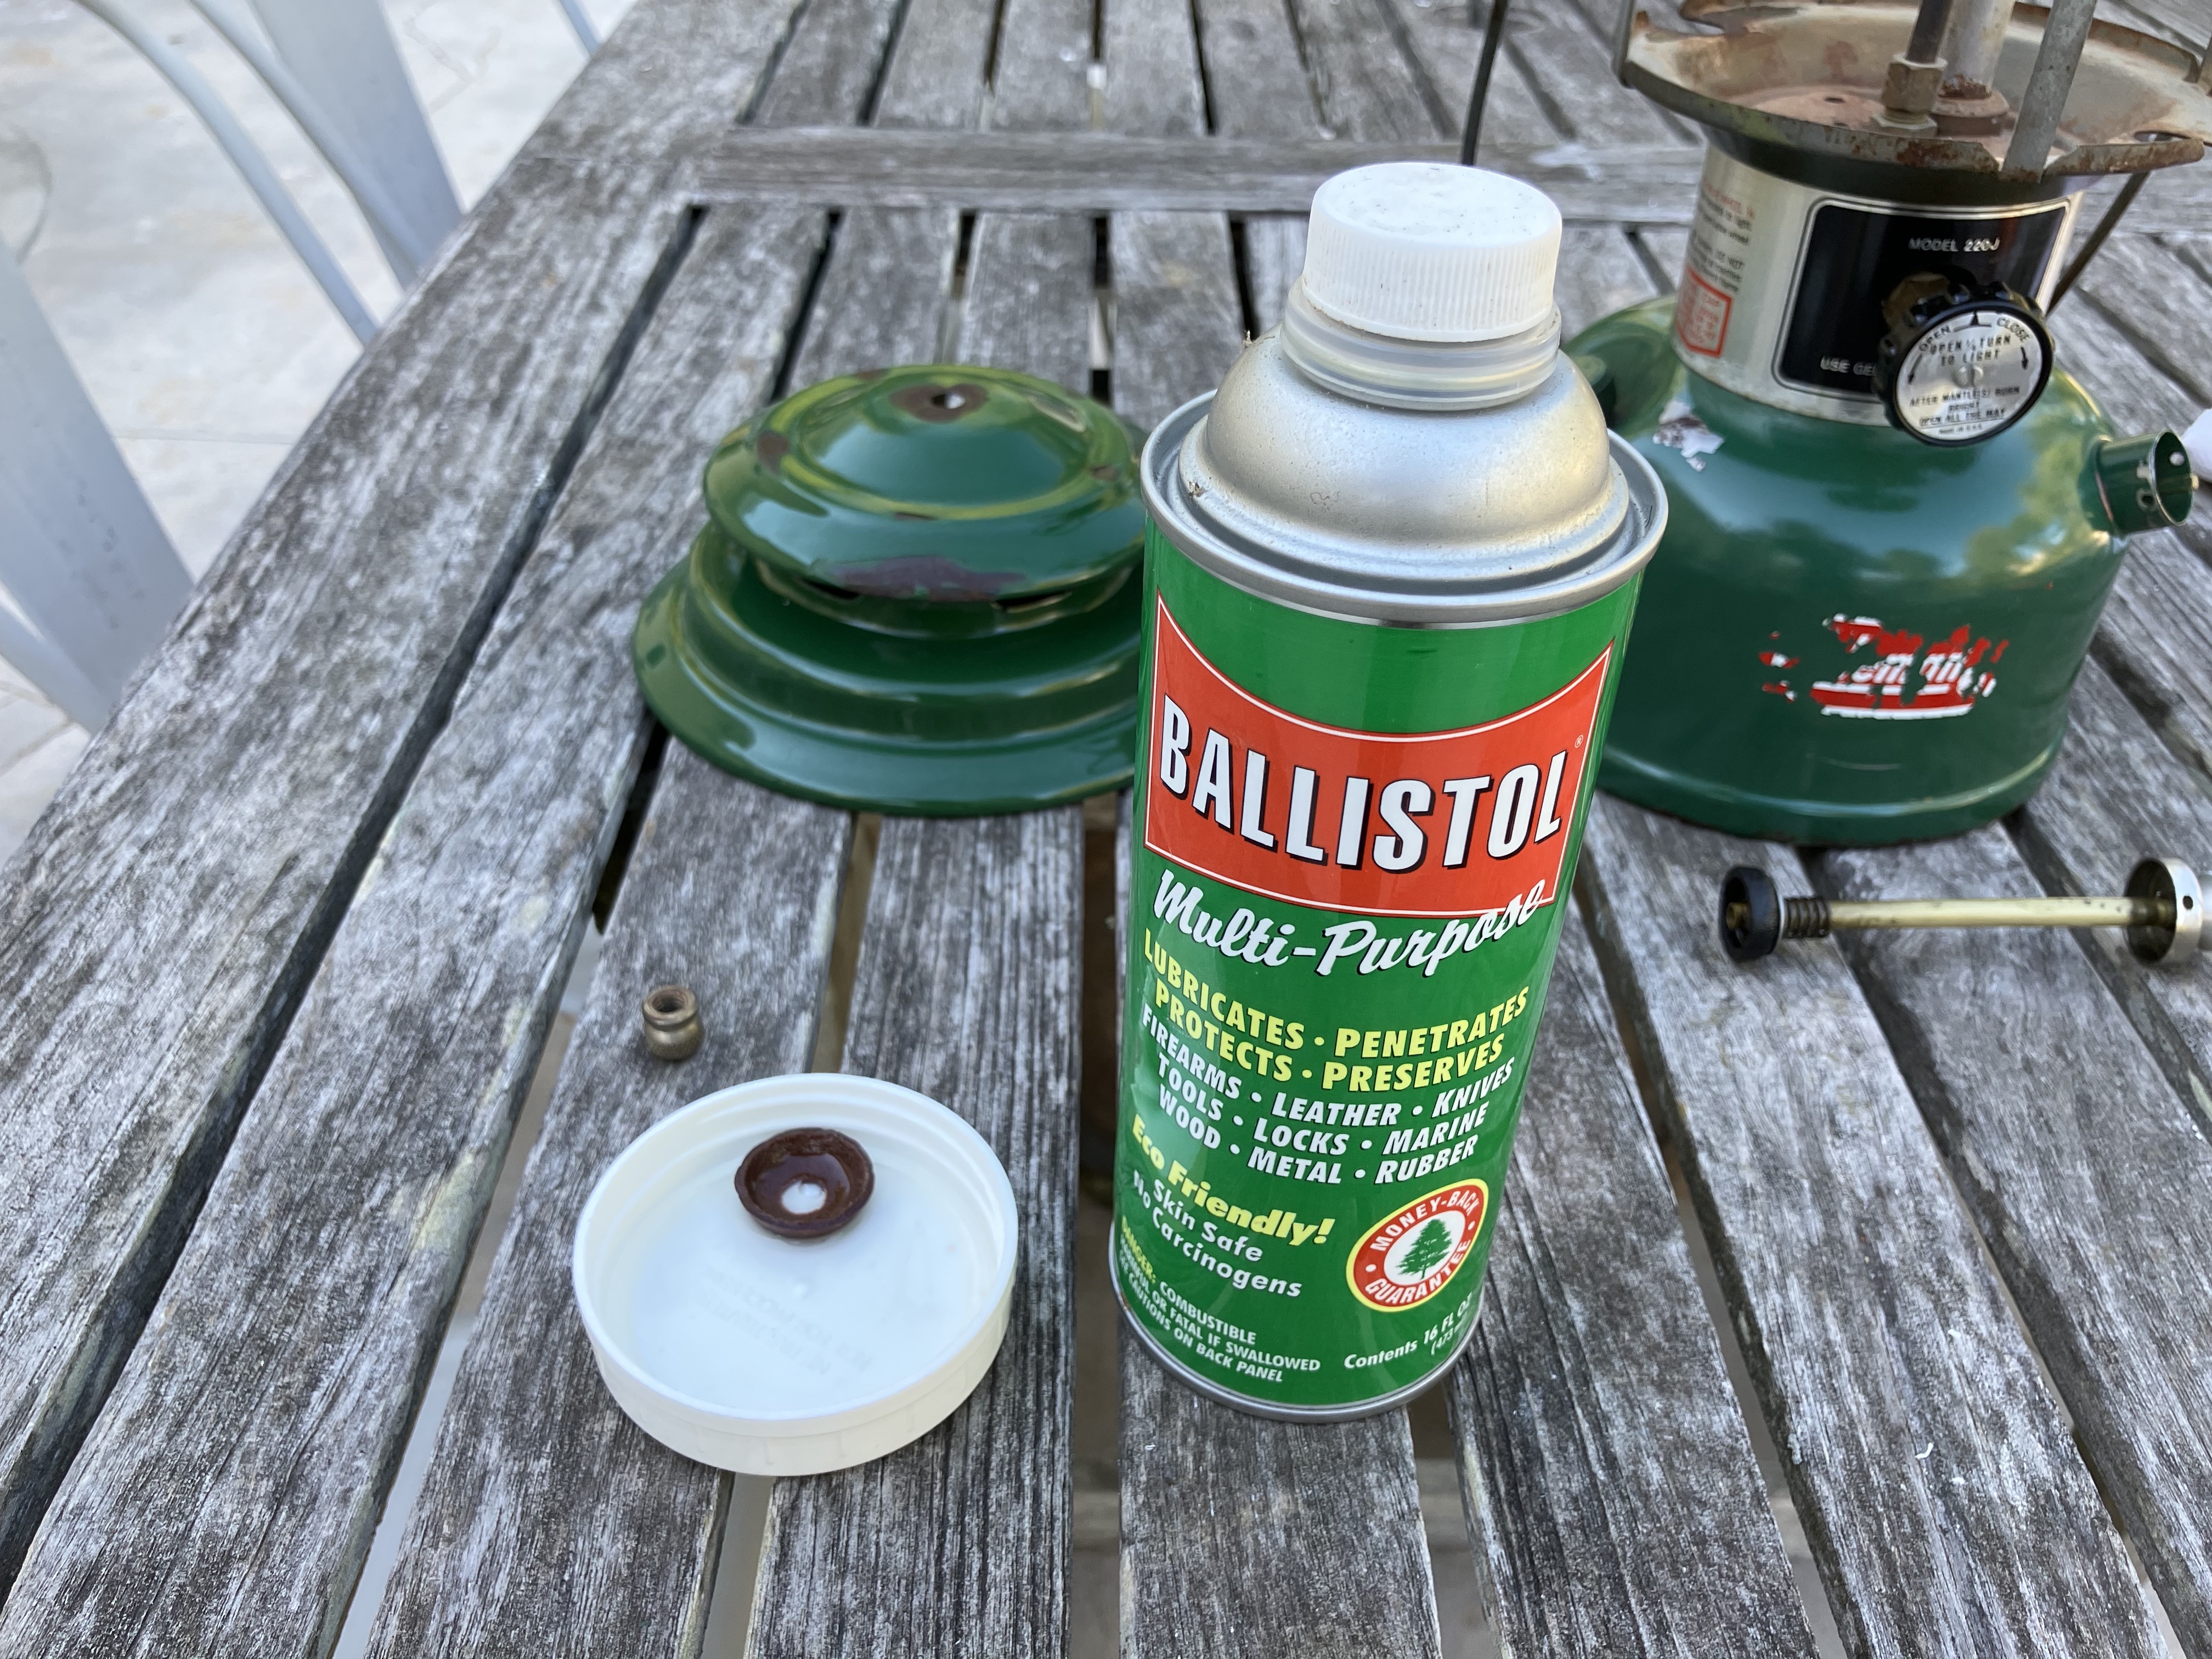
The old 3-piece filler cap alongside the new 1-piece cap.
The tank had one of the old 3-piece filler caps (although not one of the notoriously dangerous ones), and I went ahead and replaced it with a new one-piece brass cap just to be safe and ensure it holds pressure.
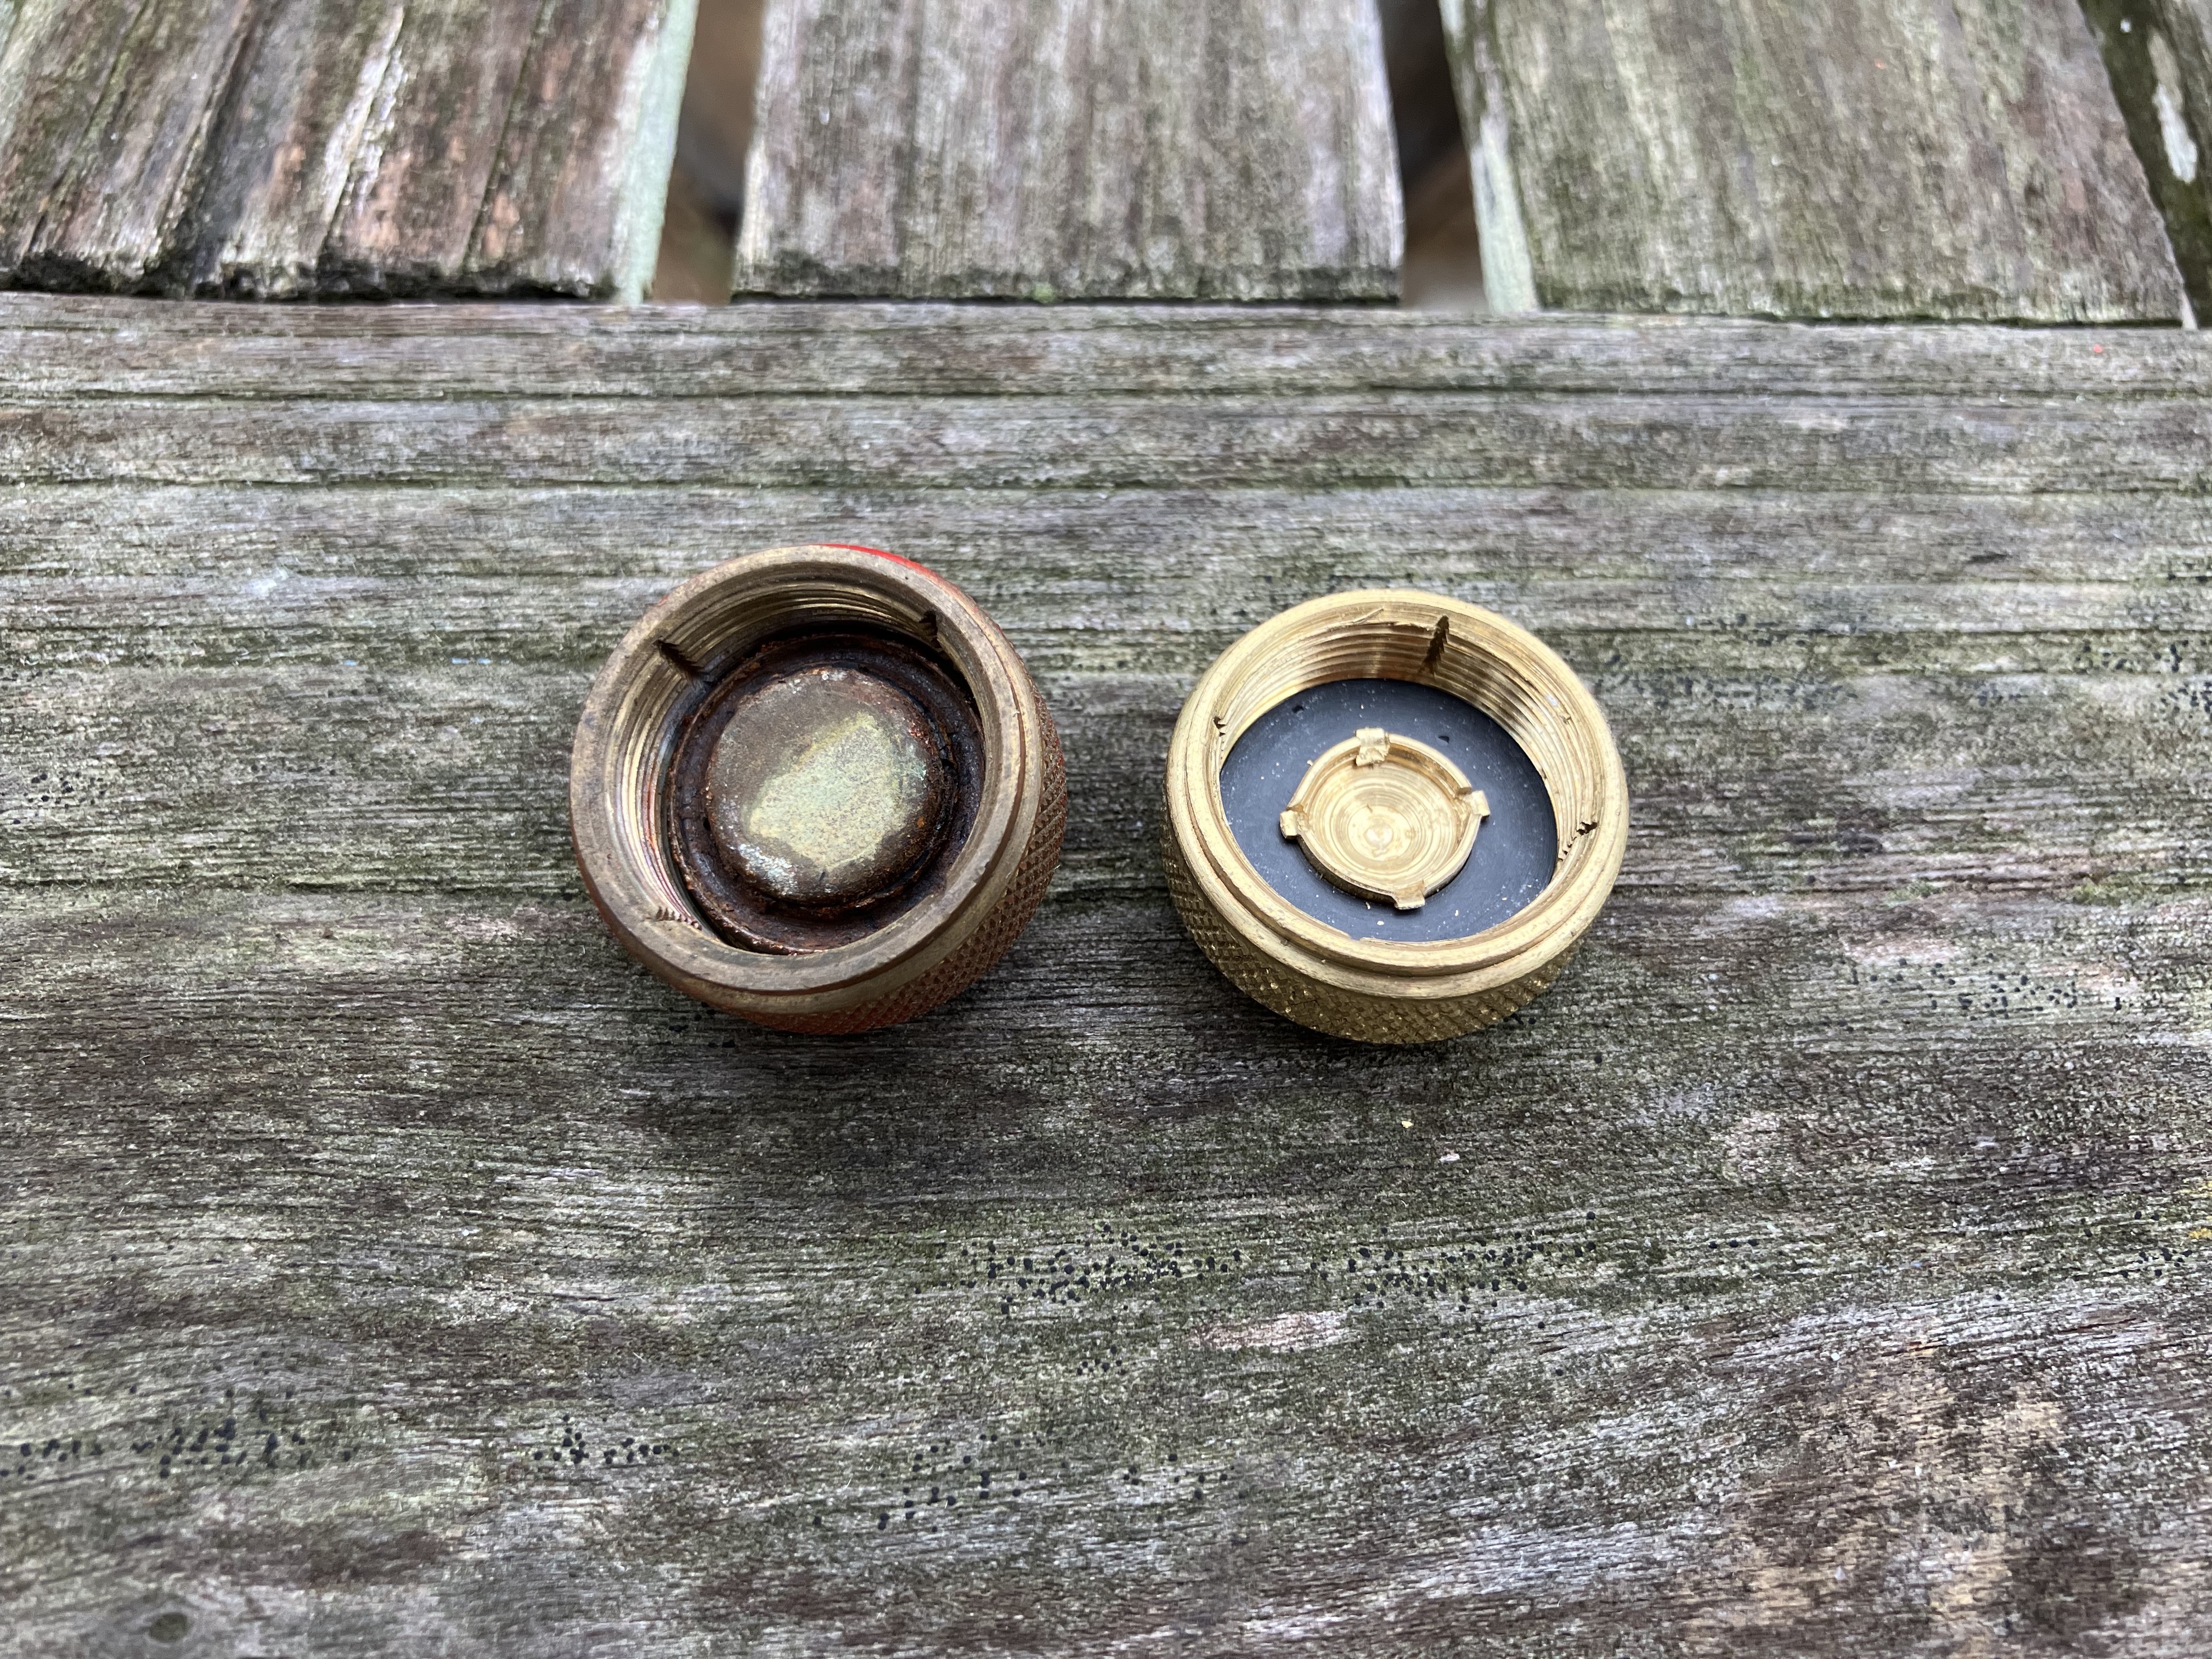
The underside of the old 3-piece filler cap with rust and worn-out gasket versus the new 1-piece cap.
I gave the whole stove a good wipe-down, then cleaned up the exposed metal parts with a wire brush and steel wool and applied Ballistol to keep them rust-free.
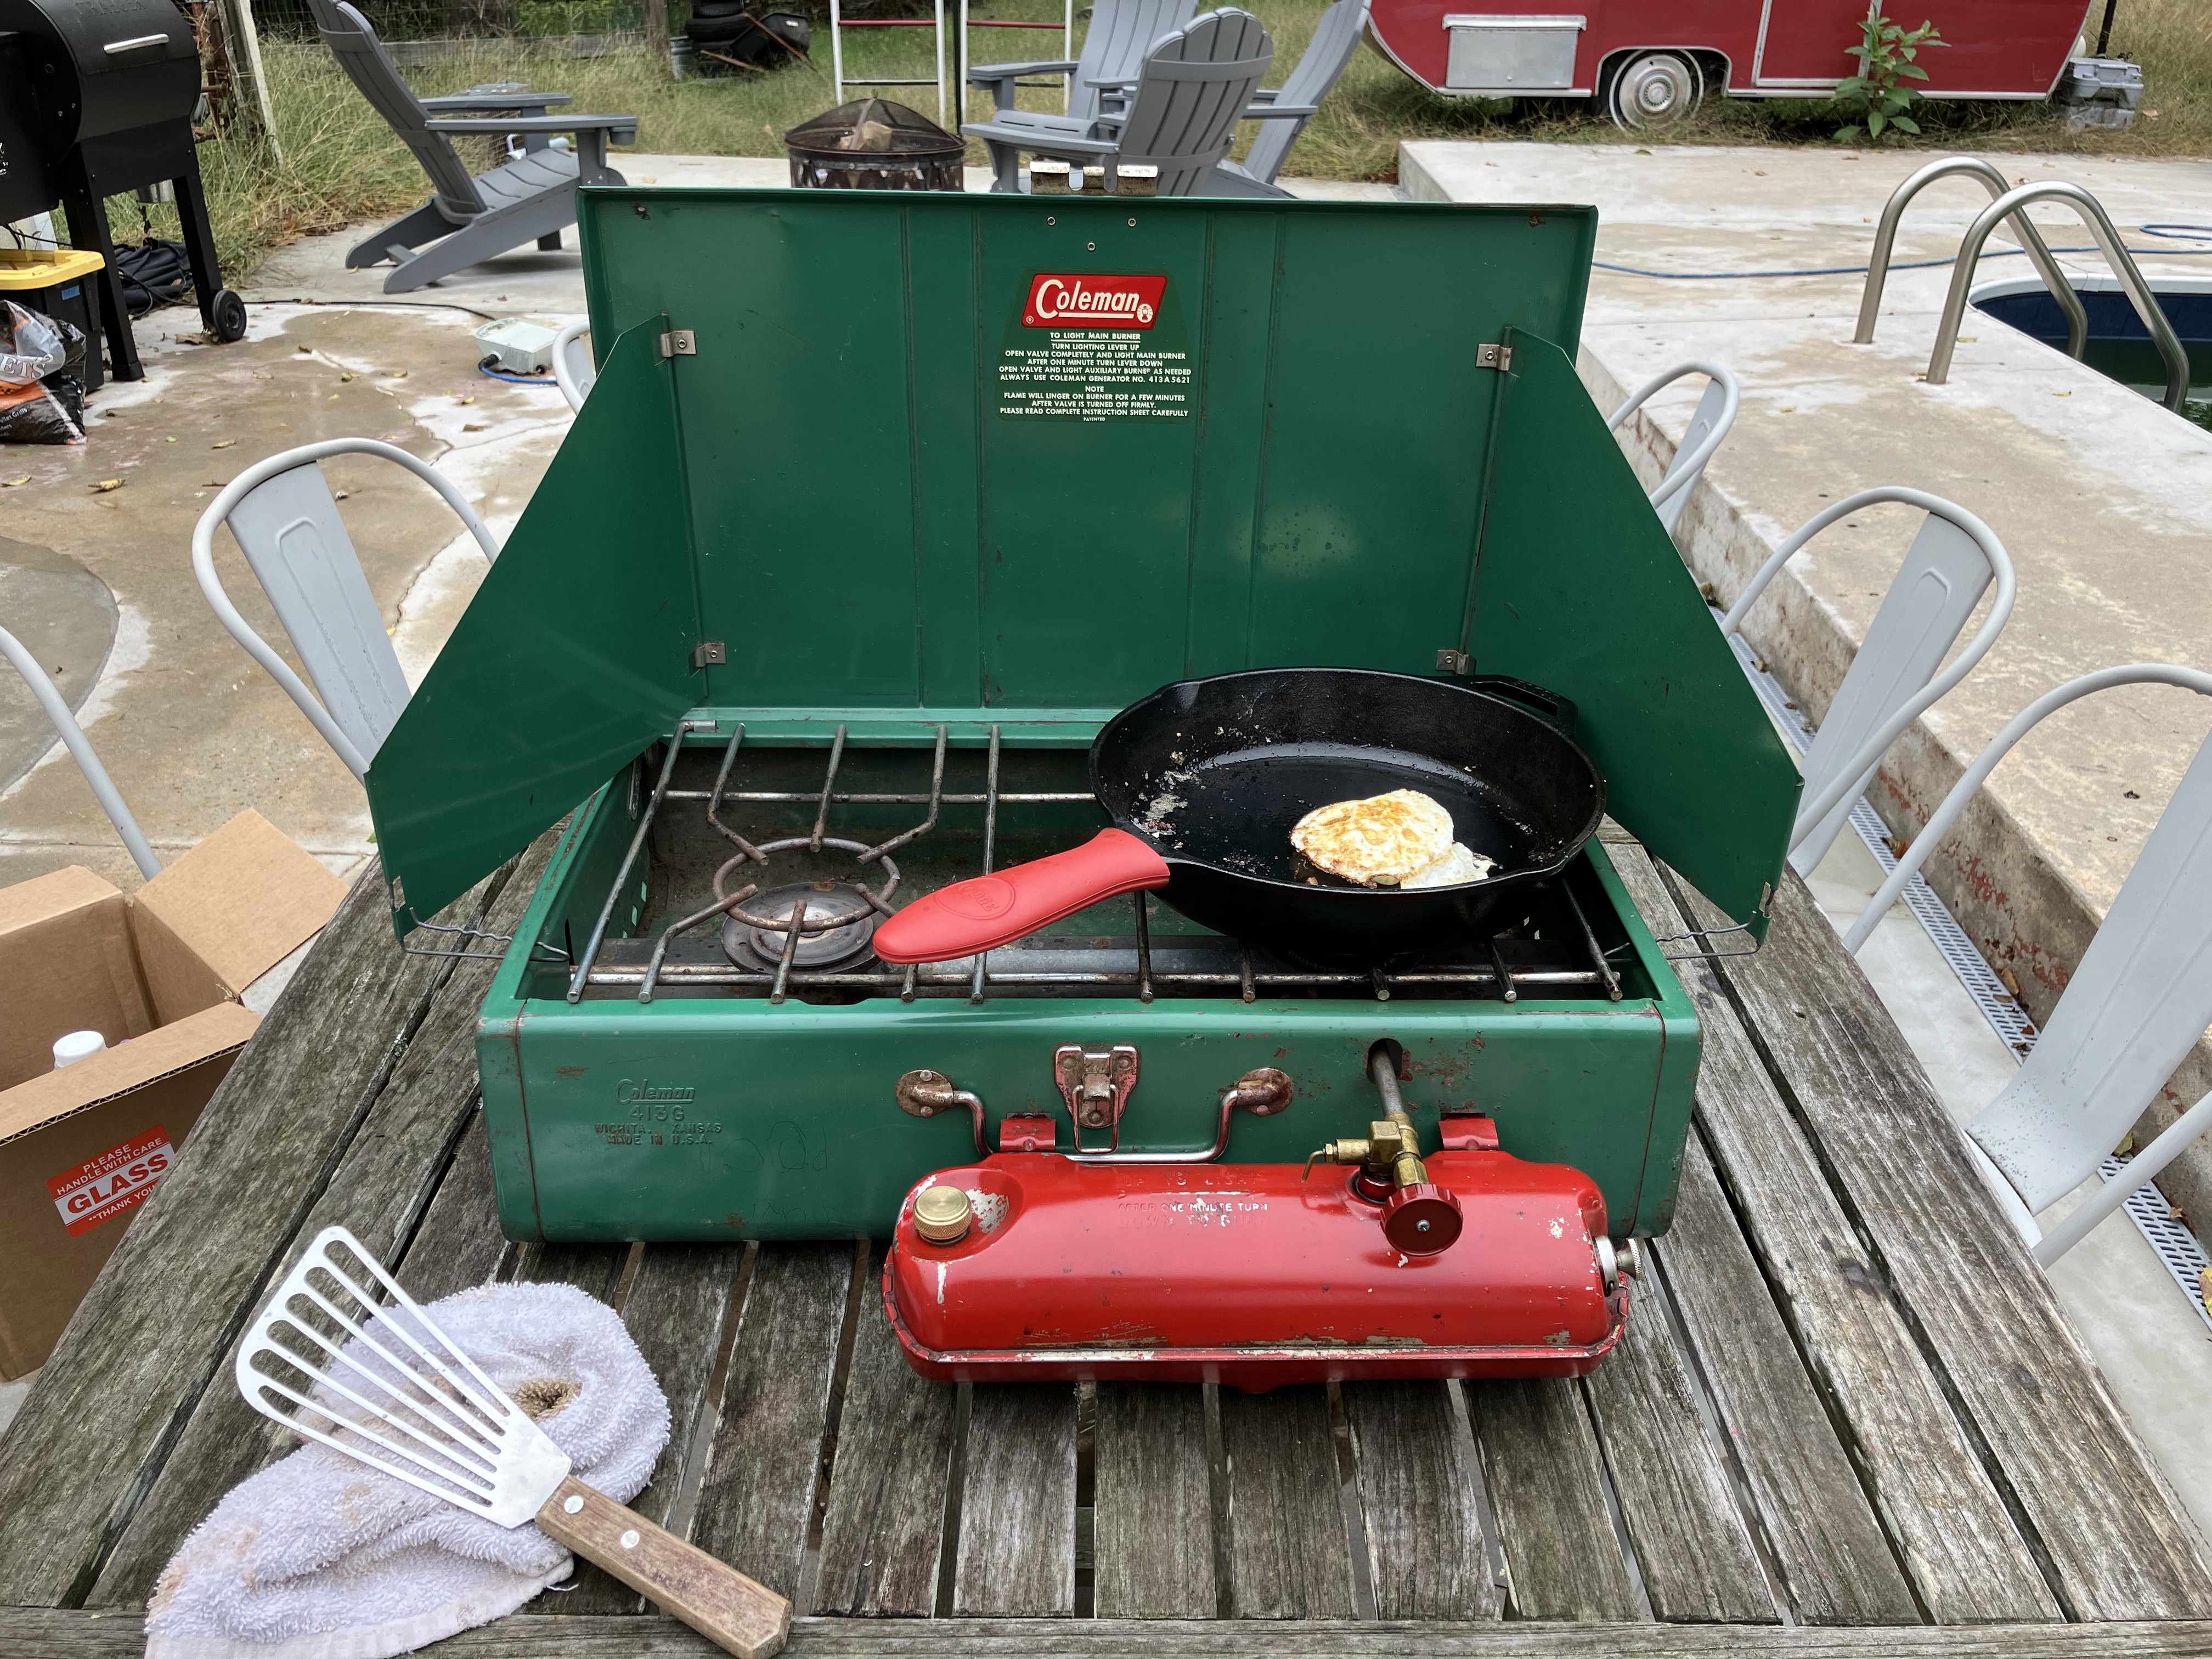
Putting the Coleman 413G camp stove to work!
With some fresh fuel in the tank, it was time for a test firing. The stove lit up right away, and after re-pumping the tank, I was able to get a nice, blue, almost invisible flame on both the main and secondary burners. This larger stove model will fit 2 12″ cast iron pans on it, which should work out really well for family camping trips. It fried an egg easily: success!
I recently picked up a vintage Coleman 200J lantern at a flea market for $20. I had been looking for some vintage camping gear for a few weeks and this was exactly what I wanted. My goal is replace some of my more modern camping gear with older equipment that, while perhaps a bit bulkier, is more reliable and rebuildable and will ultimately last a lot longer.
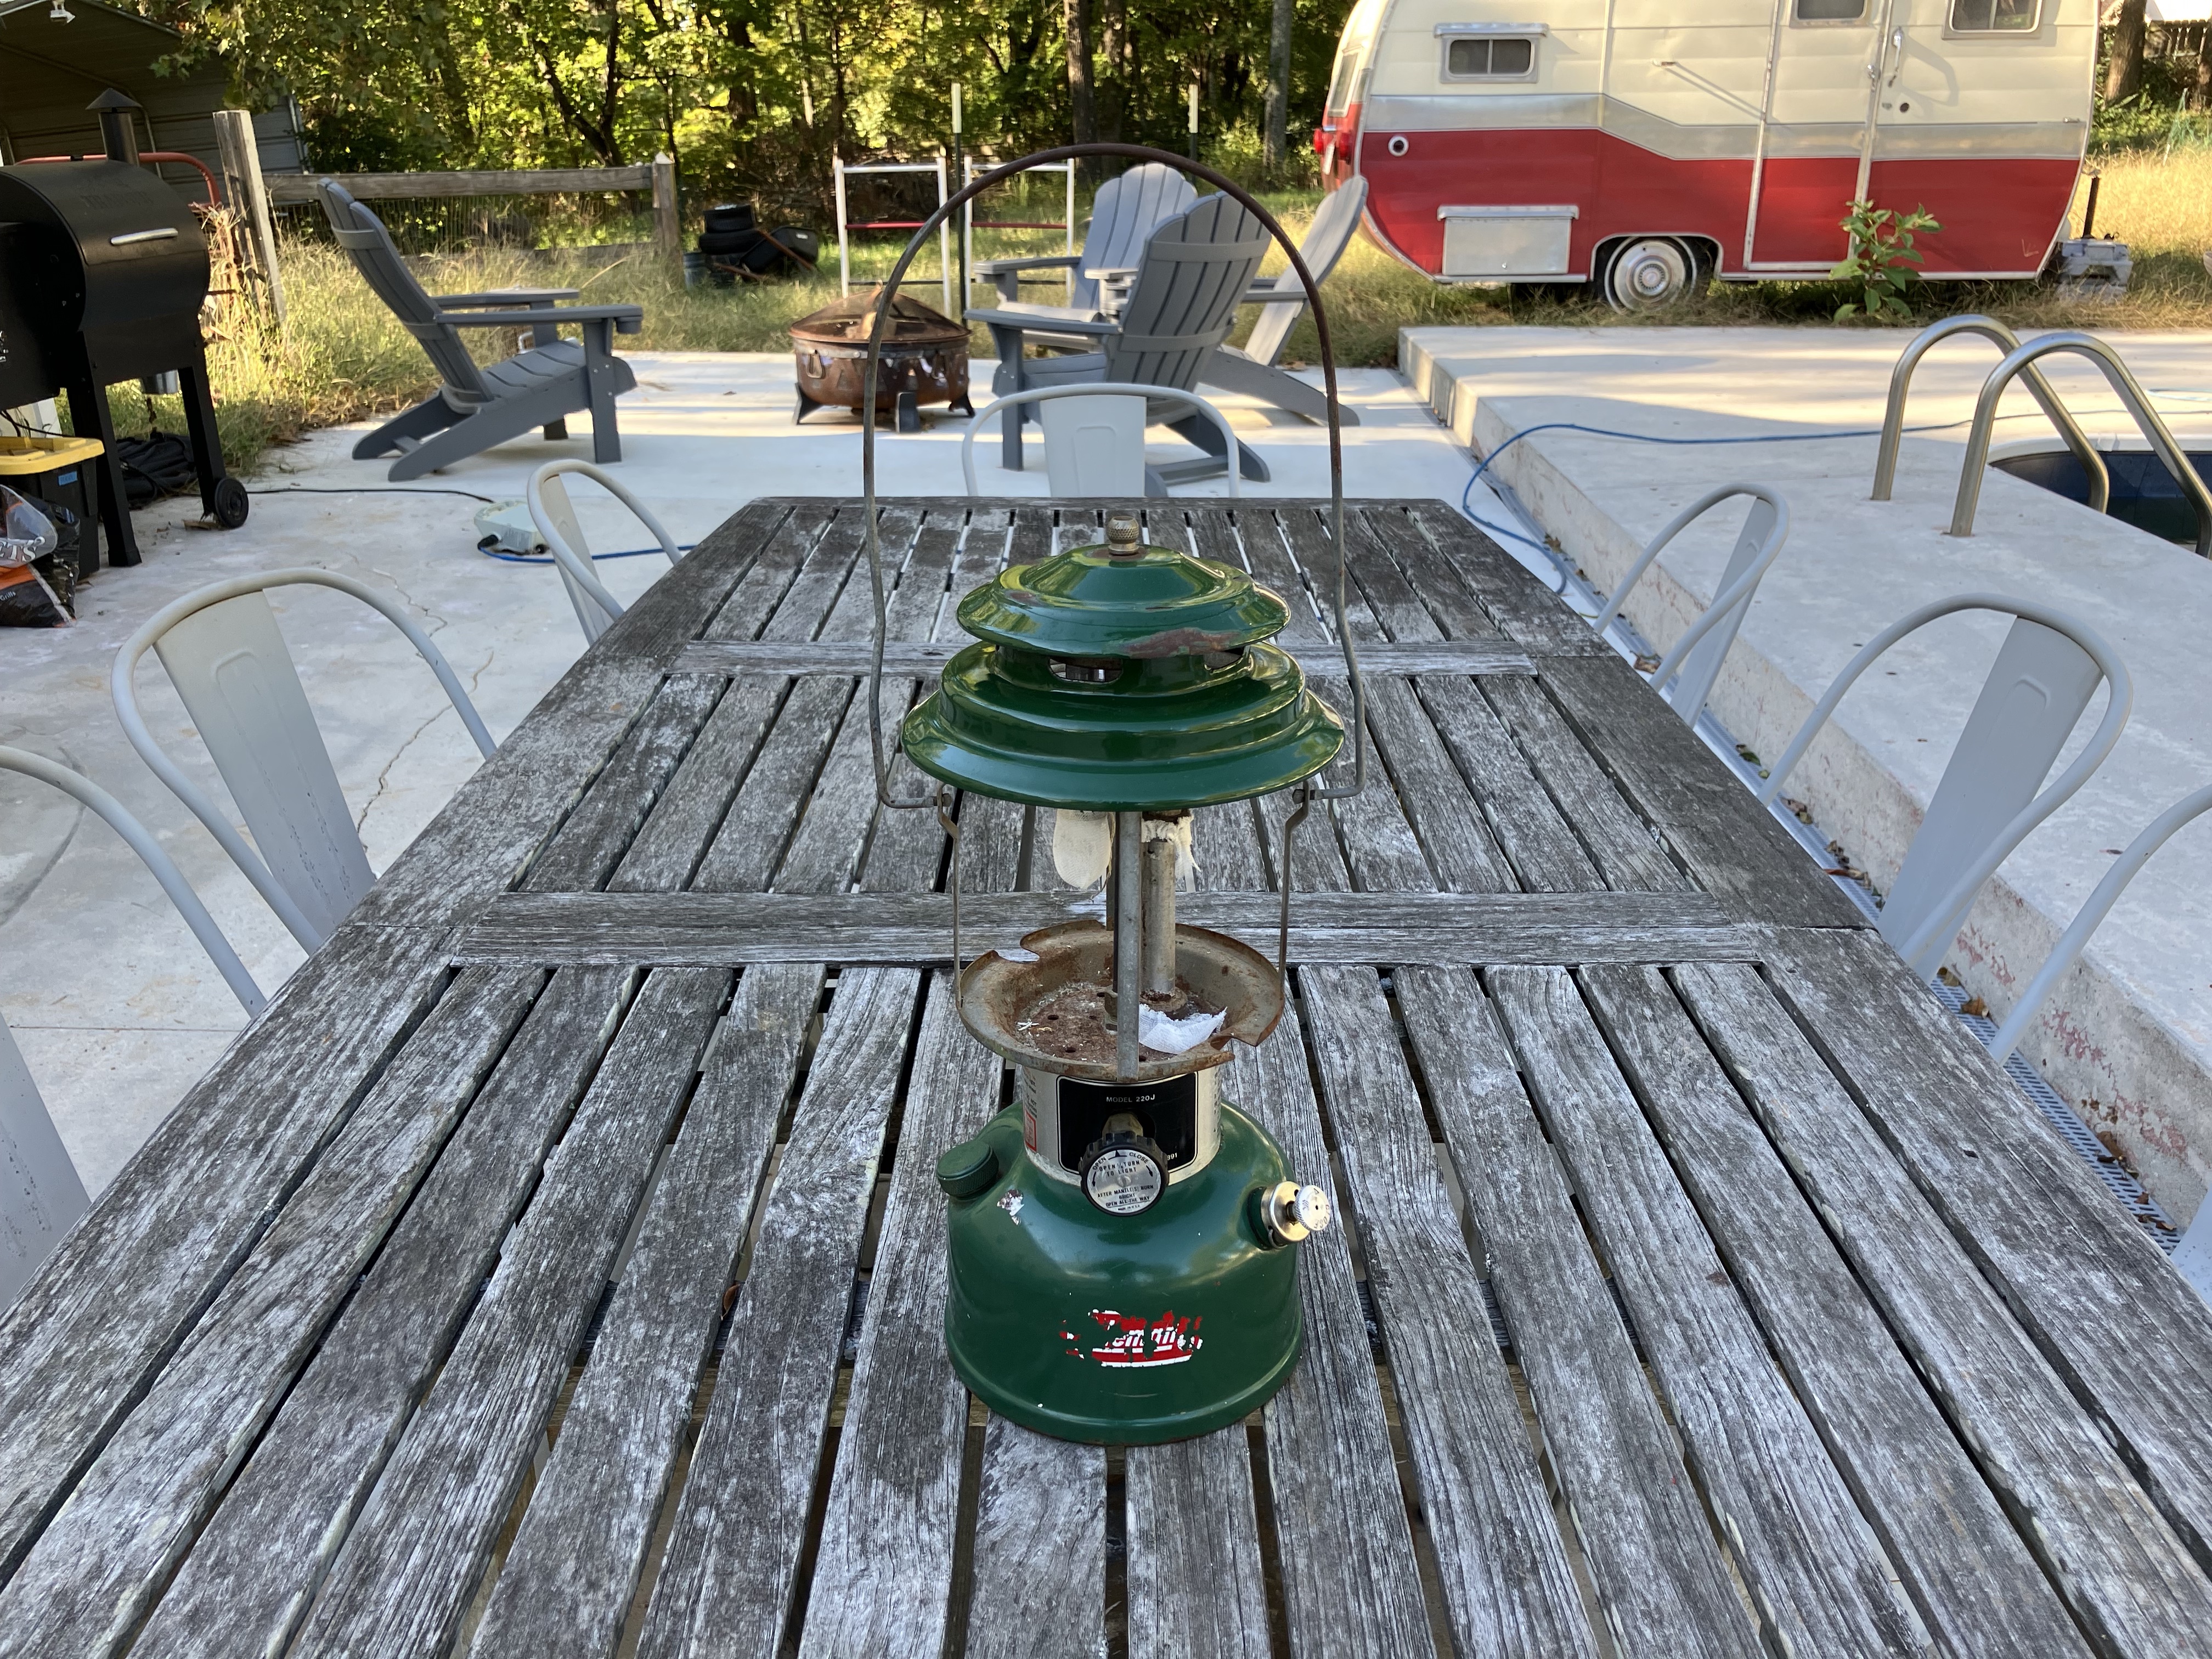
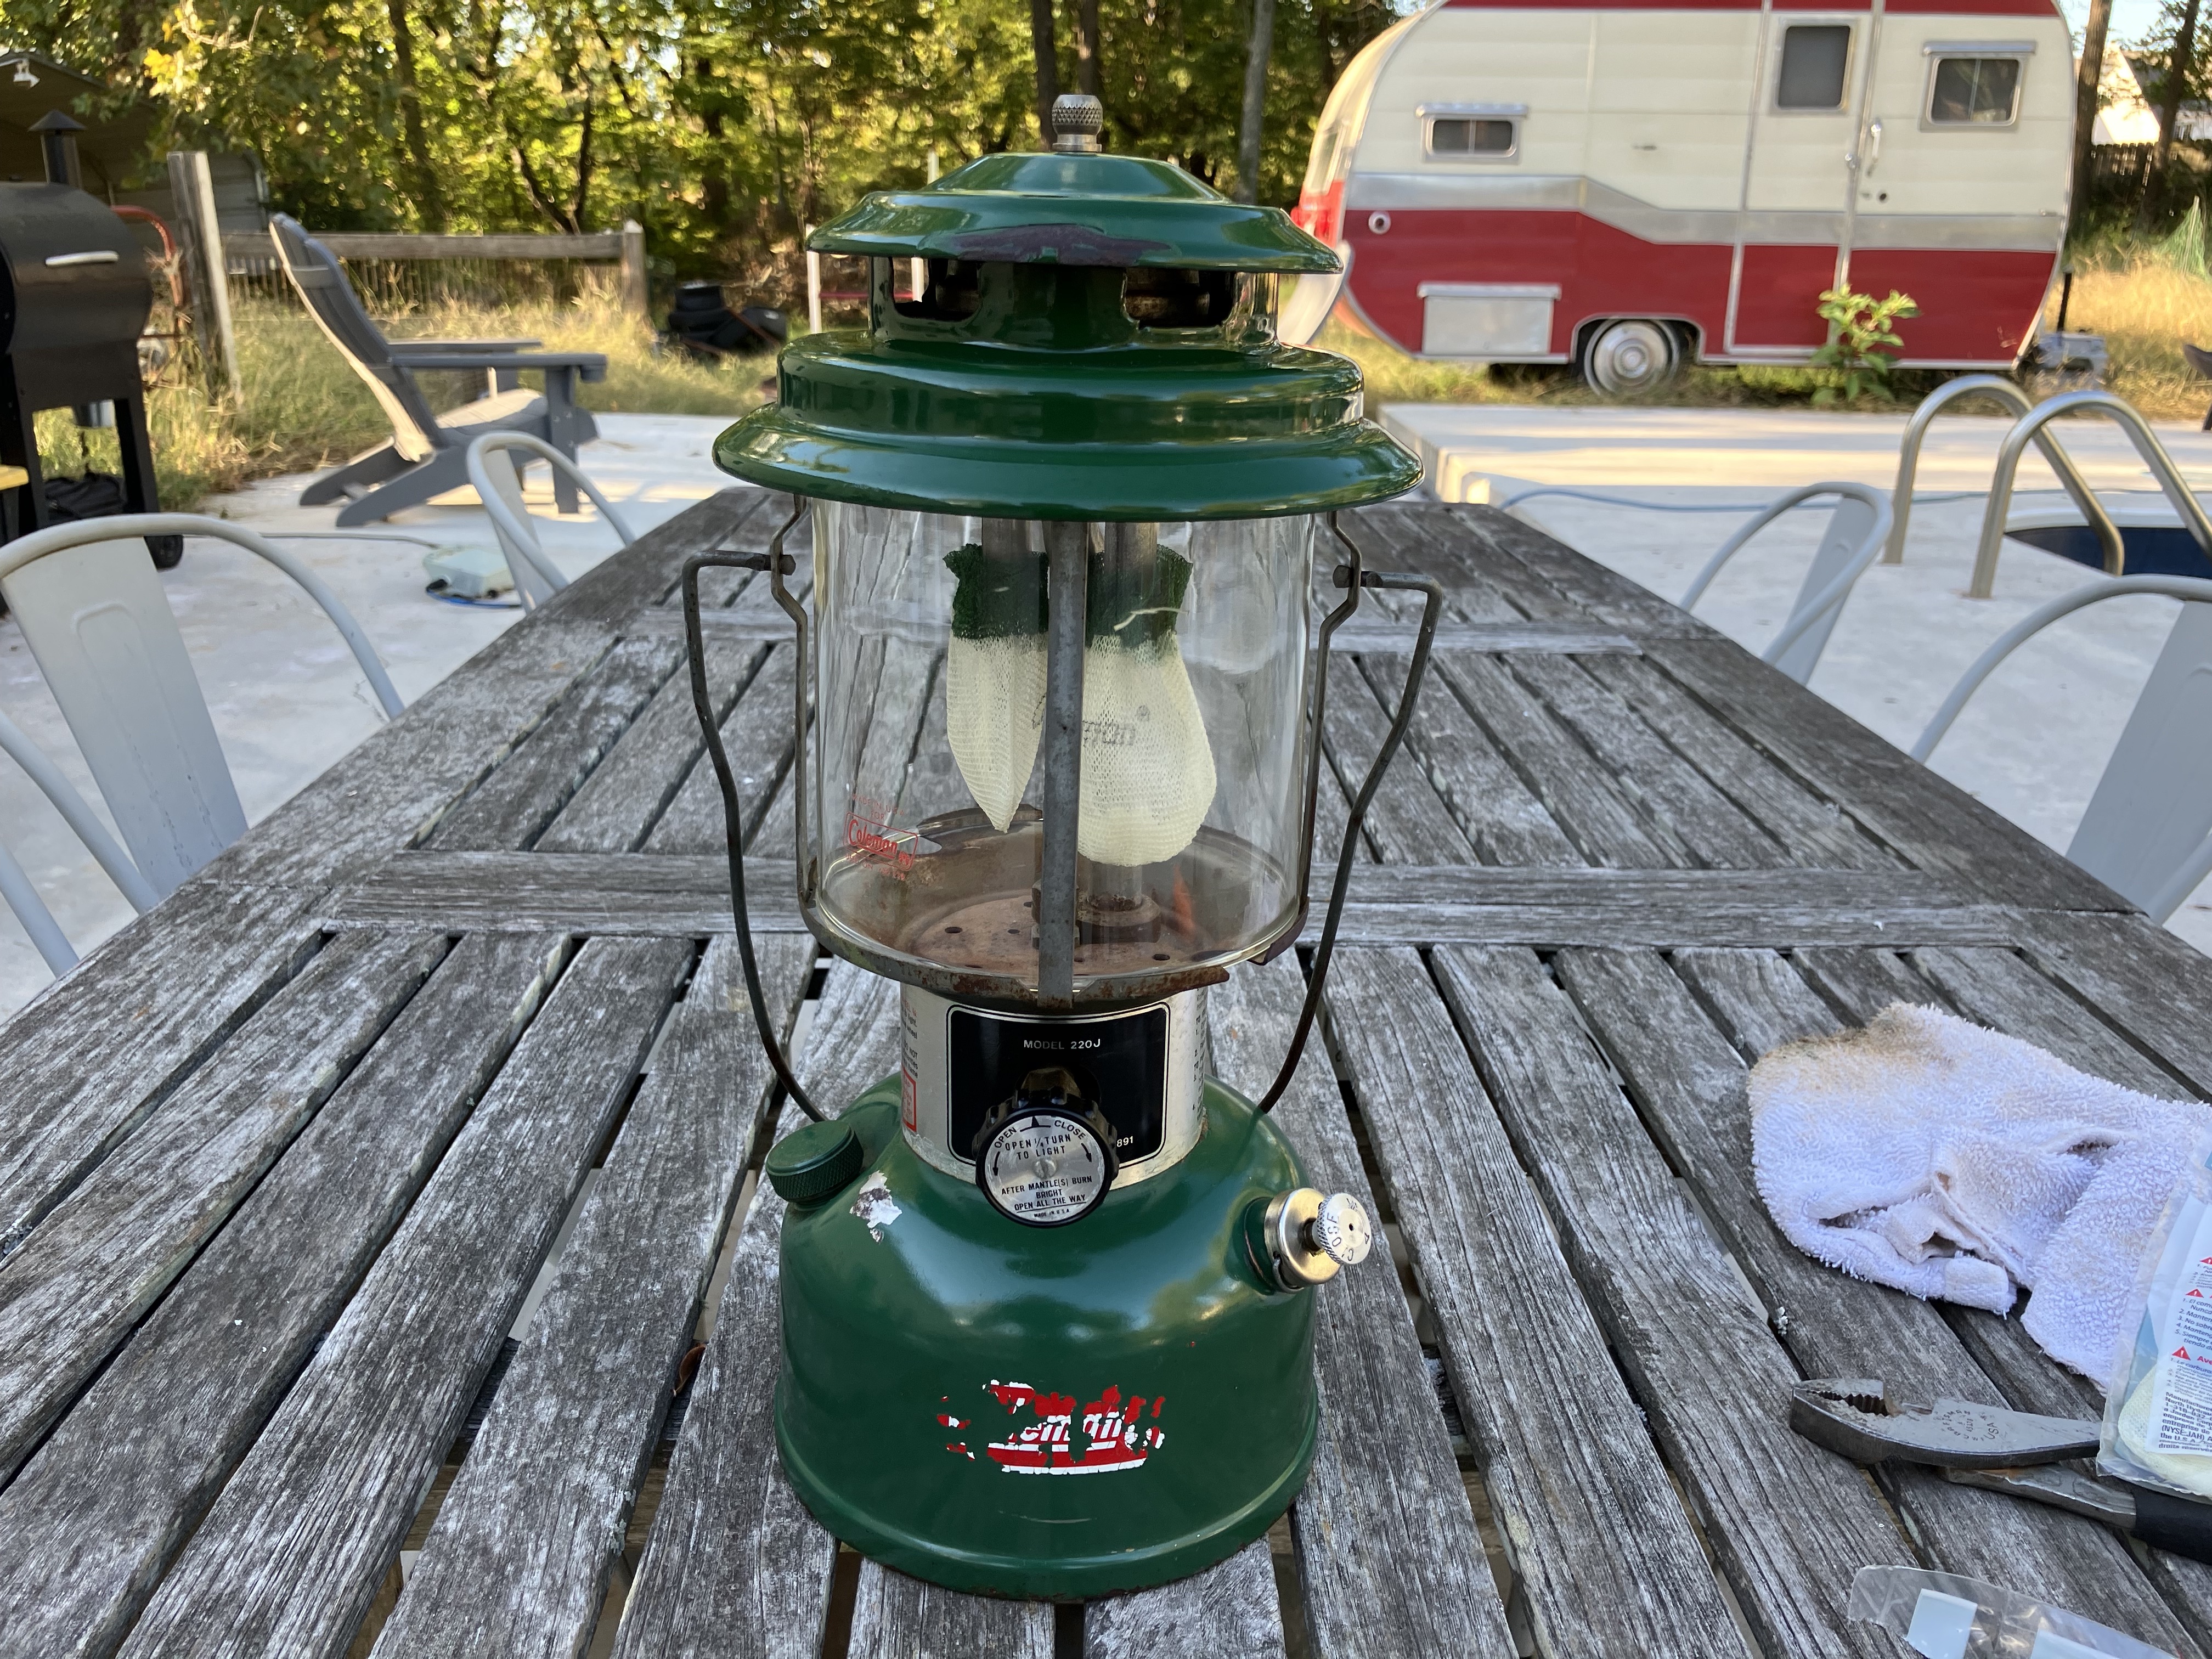
The 220J lantern with missing glass and old mantles.
The lantern is a Coleman model 220J manufactured in November 1976. It has a dent on the side near the bottom and the paint is chipping off in places, but it’s otherwise in pretty decent shape with all the parts. Unfortunately, as soon as I got it home and started to clean it, I dropped the glass globe and it shattered. That’s the first thing I added to the list of parts to buy, and, thankfully, Old Coleman Parts has replacement original globes with the same red logo on them.
Soaking the new leather pump cup in Ballistol. The plunger with the old rubber pump cup can be seen in the background on the left.
The second part I bought was a leather pump cup. I had noticed at the flea market that the pump didn’t build pressure, and when I pulled the plunger out, I confirmed it was one of the rubber pump cups that deteriorate over time. The leather pump cups, from what I’ve read, last much longer and just need to be oiled occasionally to stay in good shape. To break in the new leather pump cup, I soaked it in Ballistol to lubricate it and make it more pliable.
Plunger assembly with old backing plate and new leather pump cup and clip.
Then I disassembled the plunger and, after some trial and error, found that the old backing plate worked with the new leather pump cup and new clip. The leather pump cup comes with a new backing plate too, but maybe it doesn’t work with all models.
The 220J lantern with mantles and a new globe.
I gave everything a good wipe down, lightly scrubbing at rust with steel wool and a wire brush, and coating any exposed metal with Ballistol to protect it. Then I put on new mantles, carefully installed the new globe, and put the hat back on.
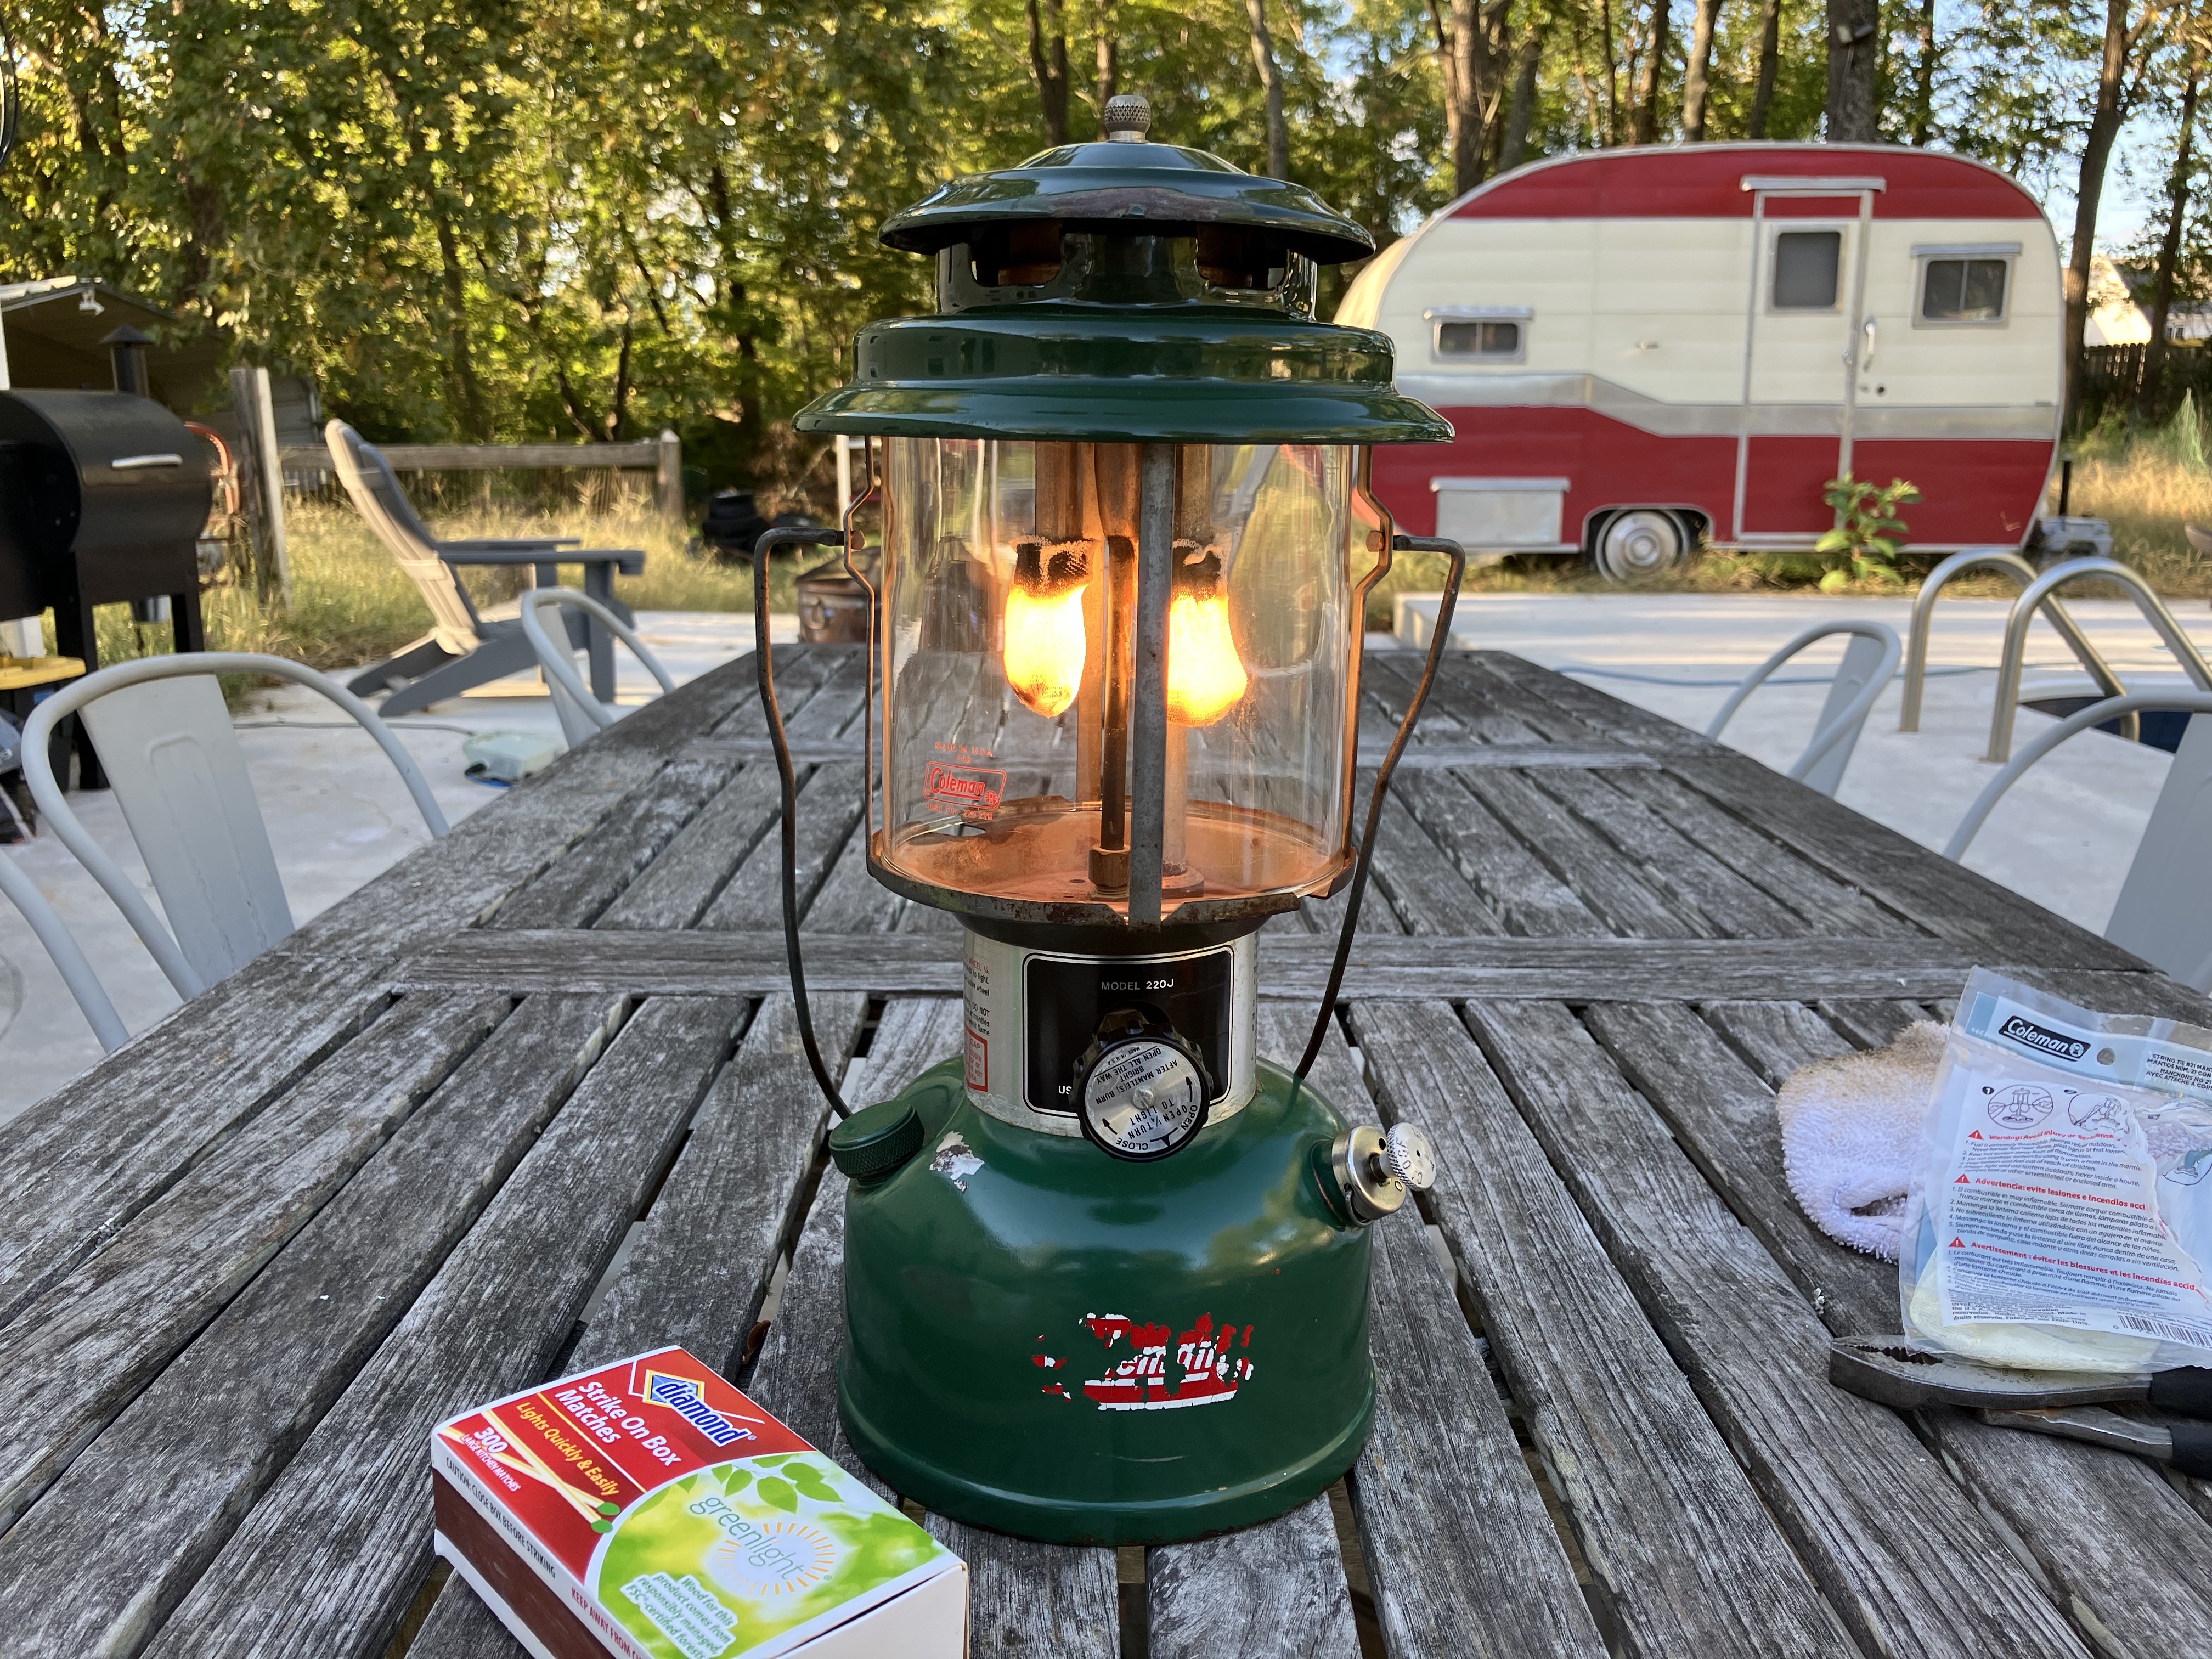
The new mantles warming up on the Coleman 220J lantern.
Following the instructions printed on the lantern body, I pumped up the tank, which successfully built pressure with the new pump cup, and lit the lantern, which started right up! Once the new mantles were fully ignited, it glowed nice and bright and put off a pleasant warmth. It’s hard to beat a classic Coleman lantern.
P.S. Another great resource for learning about and restoring these old pressure lanterns and other Coleman gear is Old Town Coleman. They have user manuals, parts diagrams, and lots of other useful information.
Recently, the rear window on my 2nd gen 4Runner started intermittently not rolling down. Pretty soon, it was intermittently working and usually didn’t work at all. When it worked, it worked great, but when it didn’t, nothing happened, so I knew it wasn’t the window motor. Since I could hear the rear window relay click when I turned the key in the tailgate, I suspected the contacts had worn out and the relays needed to be replaced.
(If you’re diagnosing rear window issues, 4Crawler has a great troubleshooting page that I found really helpful. It’s geared toward 1st gen 4runners, but most of it is applicable to 2nd gens as well.)
I had actually already replaced the rear window relays about 3 years ago, but I used some cheap Chinese relays from Amazon that weren’t built to last. This time I ordered 4 Panasonic relays from DigiKey. They’re a drop-in replacement for the original relays and are rated for 10A instead of 6A so they should last quite a bit longer.
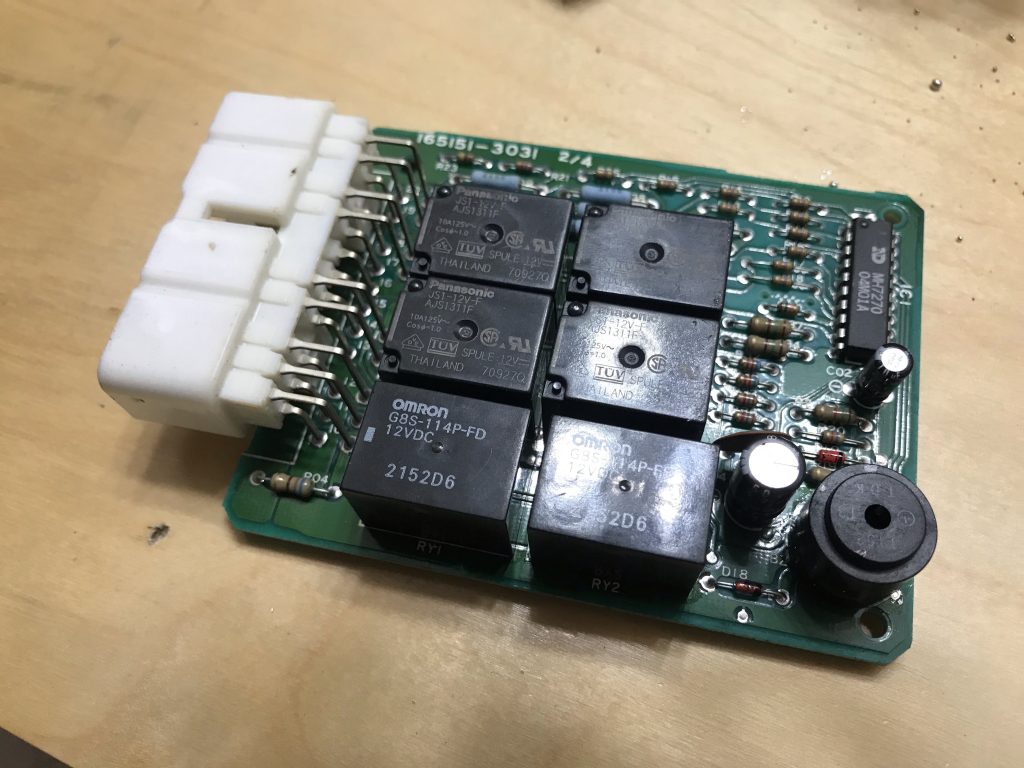
2 relays removed, 2 of the cheap Chinese relays in blue, and the 2 original larger relays at the bottom (never replaced).
This is a cheap fix to a common problem. I only paid $12.66 for these high-quality relays from DigiKey, half of which was shipping, and I already had all the tools. If you have to buy a soldering iron, solder, and flux, you might spend $30 or $40 total.
Accessing the Relay Box
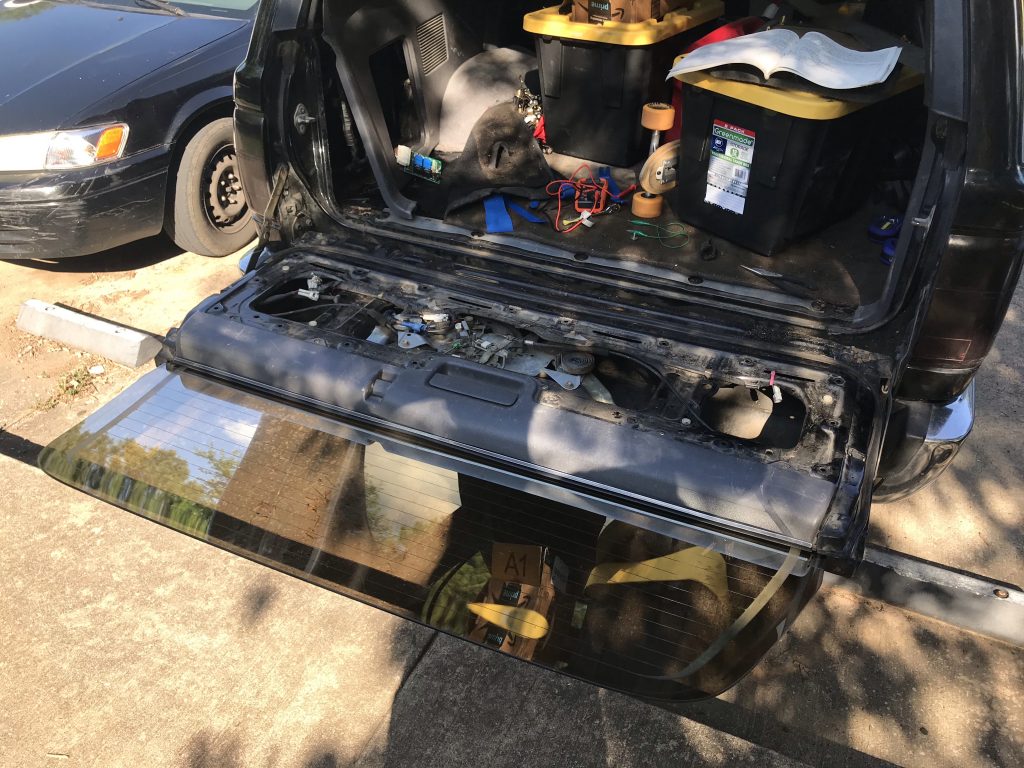
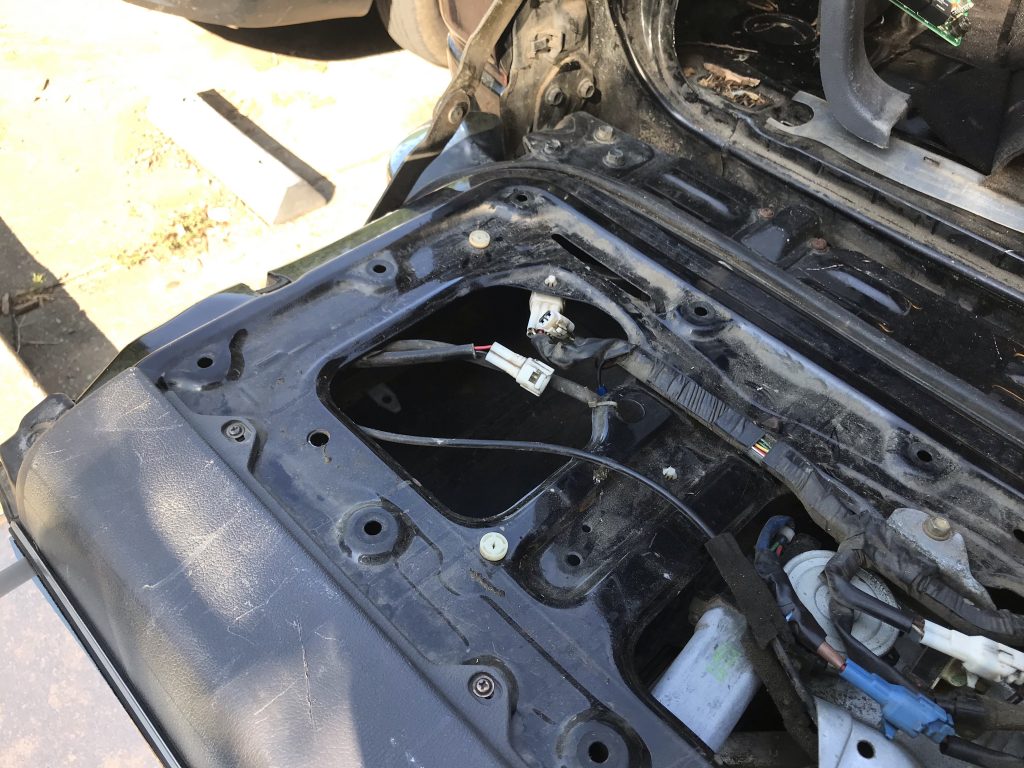
The first problem was that my window was rolled up, and I needed to open the tailgate to get to the relay box. To solve this, I ran jumper cables from the battery into the cargo area, popped off the tailgate panel inside, and used some alligator clip jumpers from the jumper cables to the pins on the rear window motor plug to roll the window down. Kind of a pain, but it worked!
With the tailgate open, I pulled off the trim along the bottom edge of the cargo area, and then pulled back the driver side quarter panel trim, just enough to access the bolts holding the relay box to the body. The relay box unplugs from the connector and then there are 3 enclosure pieces that pop off in order to slide the circuit board out.
You can see the quarter panel trim pulled back to access the relay box.
Replacing the Relays
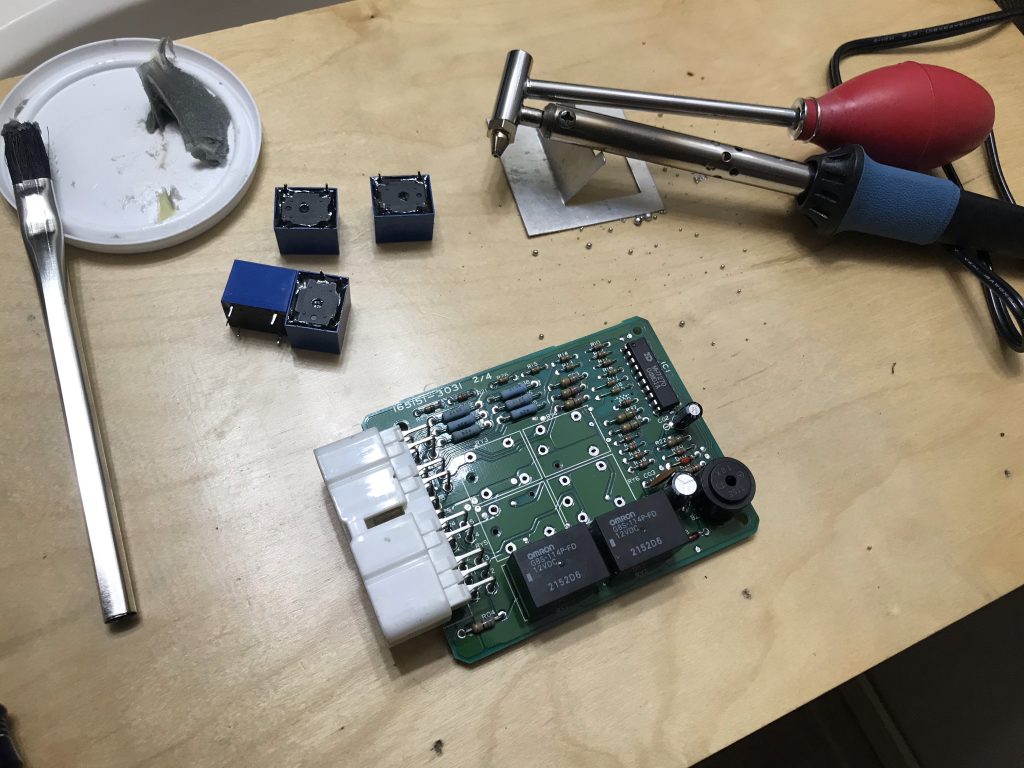
Once I had the circuit board free, I warmed up my solder sucker, dabbed a little flux on the joints, and proceeded to remove the solder from the old relays.
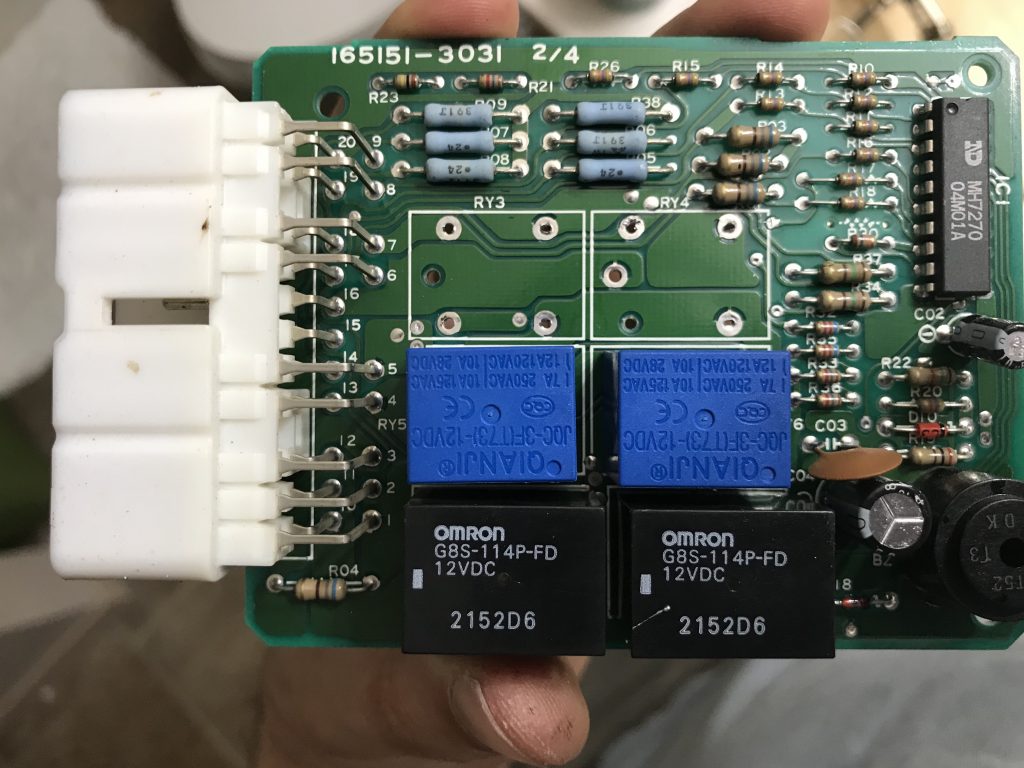
You’ll notice on the circuit board that the relays are labeled. By examining the wiring diagram and doing some probing on the circuit board, I worked out the following:
RY3 is the window up relay
RY4 is the window down relay
RY5 and RY6 appear to be for the rear washer
RY1 and RY2 appear to be for the rear wiper
I went ahead and replaced RY3, RY4, RY5, and RY6 since they were all the same cheap relays I had replaced before. If you’re only having problems with the window itself, you can probably get away with just replacing RY3 and RY4.
I highly recommend a solder sucker, desoldering iron, wick, or braid to remove the old relays. It’s not necessary, but it makes the process a lot faster and cleaner. Flux isn’t necessary either, but it helps.
With the solder removed, the old relays should pop out pretty easily with a little wiggling.
Old relays removed from the circuit board using my solder sucker.
The new relays fit snugly in the holes, so I didn’t end up needing a third hand. I had to re-tin my soldering iron but then I was able to quickly solder the pins to the board.
Be sure to use proper technique when soldering on the circuit board, since it is easy to damage the board. Make sure the soldering iron is clean and properly tinned first. Then get a bit of solder on the end of the iron, hold the relay pin in place, and touch the soldering iron to both the pad on the board and the pin. The solder should flow onto both the pad and the pin to make a solid connection. Let it cool without moving the pin, then move onto the next pin.
New relays installed on the circuit board.
With the new rear window relays installed, reinstall the relay box and test out the rear window. If the relays were the problem as they were on mine, it should be working like new now!
Switch Mod
While I had the circuit board out, I took the opportunity to do the switch mod that allows me to roll down the rear window using the switch in the center console without having the key in the ignition. Since using the key in the tailgate doesn’t require the ignition switch, it’s simply a matter of jumping the pins used for the tailgate switch to the pins used for the console switch.
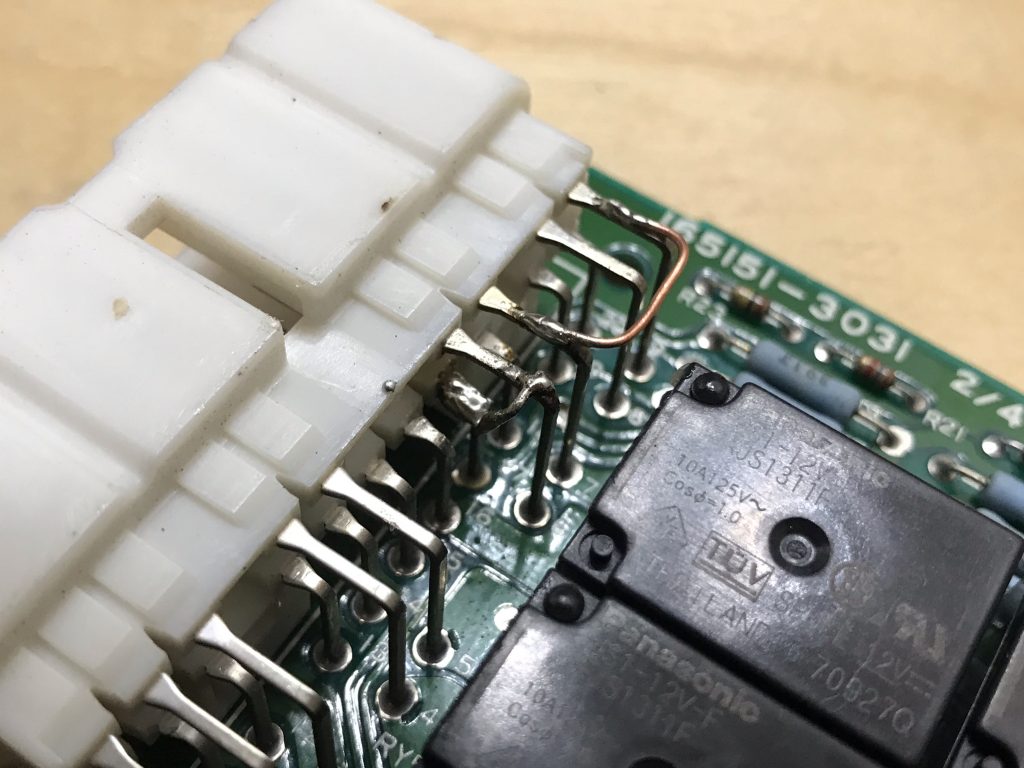
For the 2nd gen 4runner, the following pins are jumped:
I chose to jump the pins on the top of the circuit board by soldering some copper wire across the connector leads, but it was pretty tricky to solder pin 17 this way. Alternatively, you could jump the pins on the bottom of the circuit board where the connector isn’t in the way.
This mod worked great and really makes it easier to access the back without using my key at all. It also sets me up to install a future mod: an additional rear window switch located in the cargo area, so I can easily roll down the rear window if I’m sleeping in the back.
Bonus: Tailgate Access
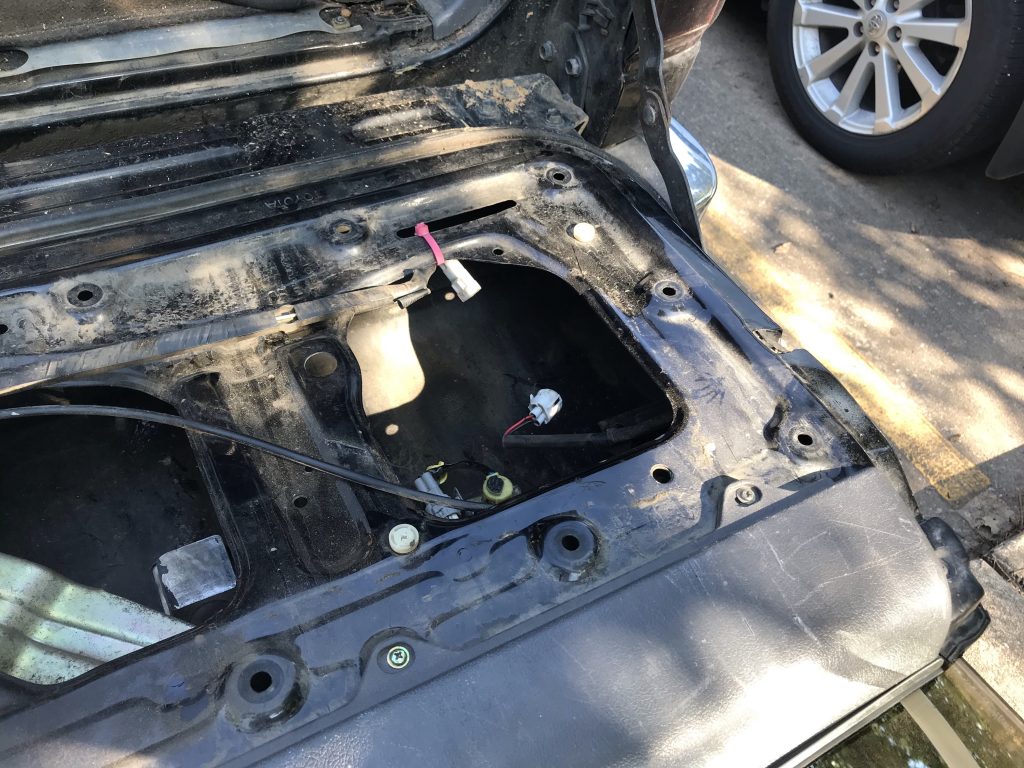
As an aside, once you have your rear window working, if you need to roll it up to access the guts of the tailgate while it’s open, you can disconnect the 2 rear window lock switches located on either side of the tailgate, and then roll the window up with the switch. This is handy for accessing the key switch in the tailgate from the inside. Careful not to roll it up too far, though!
Driver side rear window lock switch disconnectedPassenger side rear window lock switch disconnected
After poring over service manuals and forums, I believe I’ve finally pieced together what should be a functional EVAP system for my 3.4 swap using the components that I’ve gathered. I came up with 2 options: one using the 3rd-gen 1998 charcoal canister, and one using the original 2nd-gen 1992 charcoal canister.
General Approach
Overall, the goal is to build a system that satisfies the ECU’s EVAP-related inputs so it doesn’t throw any codes.
In both scenarios, I made use of following parts:
2002 ECU
2002 VSV for EVAP
2002 VSV for CCV (Canister Closed Valve)
1999 VSV for VPS (Vapor Pressure Sensor)
1999 VPS (Vapor Pressure Sensor)
The wiring is the same between the two systems, and the hose and vacuum lines are virtually the same as well. The primary difference between the two is the canister used, and how the VSV for CCV is hooked up (or not hooked up).
The biggest challenge to actually piecing this together will be adding connectors for the VSV for VPS and VPS, since I don’t currently have those on my wiring harness. I’ll either need to source replacement connectors from the right year (preferable) or just use terminals on the pins (not as clean).
Using the 1998 Charcoal Canister
Diagram with 1998 box-style charcoal canister showing wiring, hose routing, and air/vapor flow.
With the 1998 box-style charcoal canister, the setup is essentially the same as a typical 1996-2000 EVAP system. The primary difference is the addition of the VSV for CCV off of the 2002 harness, which my ECU expects to see.
The two tees in the fuel vapor lines shown in the diagram are actually integrated into the EVAP canister itself, so there won’t be any tee fittings to install.
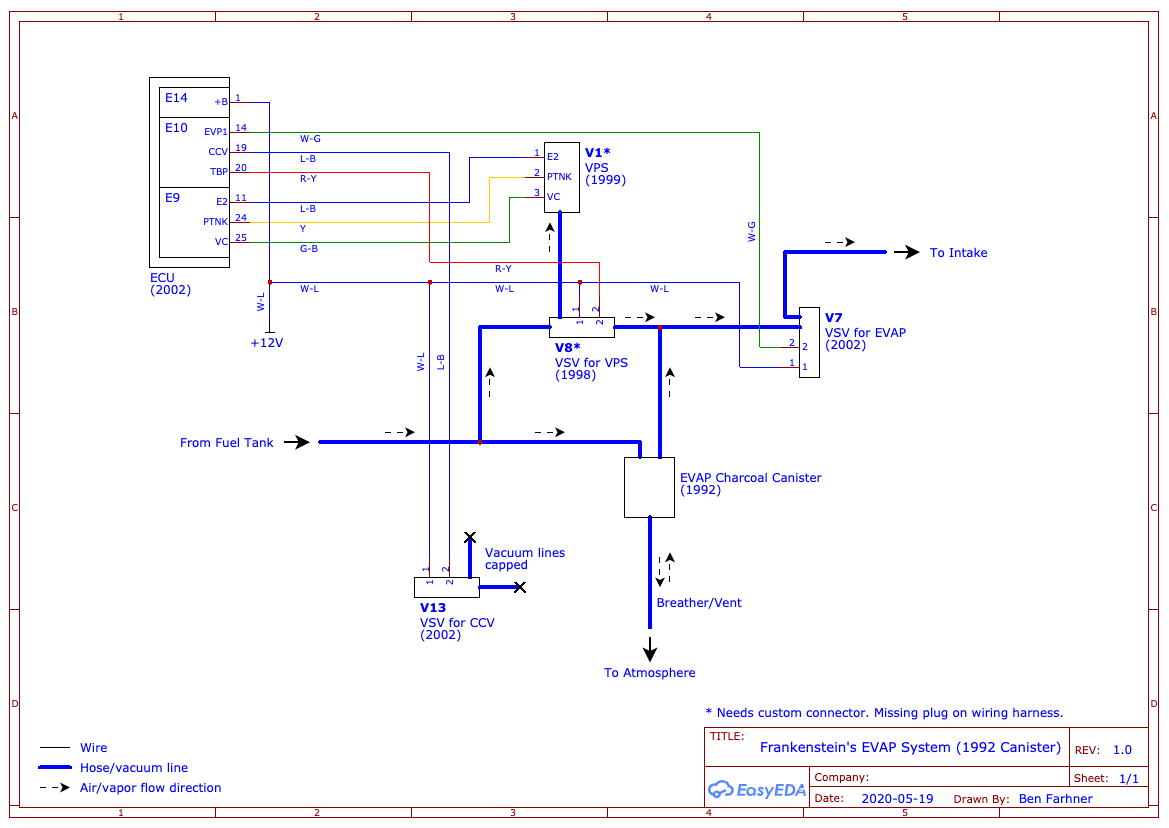
Using the 1992 Charcoal Canister
Diagram with 1992 cylinder-style charcoal canister showing wiring, hose routing, and air/vapor flow.
With the smaller 1992 cylinder-style charcoal canister, the system is mostly the same, but there isn’t a dedicated fresh air intake on the older canister, so the VSV for CCV can’t be hooked up. It will still be plugged into the ECU, but the hoses on the VSV will either be capped or removed completely, depending on what the ECU likes best. At least one person said it doesn’t have to be hooked up at all, but I like to avoid unused plugs if possible.
Additionally, the tees in the vapor lines shown in the diagram will actually require tee fittings since they are not integral in the older style canister.
Several of the parts I need are now packed in a box as we’re about to move across the country, so it may take me a bit to actually get around to installing the EVAP system for my 3.4 swap. Plenty of time to decide which option to go with, though!
When I did the 3.4 engine swap in my 4Runner, I didn’t pull over the EVAP system from the donor vehicle, so I’ve been running without one for a few months now. My donor vehicle for the swap, a 2002 4Runner, had the newer style EVAP system located back by the fuel tank, something I didn’t want on my ’92. Since then, I’ve acquired the older style 3rd gen EVAP canister and VSVs (Vacuum Switching Valves), and I still have the original ’92 canister, and I’m trying to piece together Frankenstein’s EVAP system from all these parts to work with my swap.
Parts
Here’s what I have to work with:
2002 engine wiring harness
2002 VSV for EVAP
2002 VSV for CCV (Canister Closed Valve)
1999 VPS (Vapor Pressure Sensor)
1999 VSV for EVAP
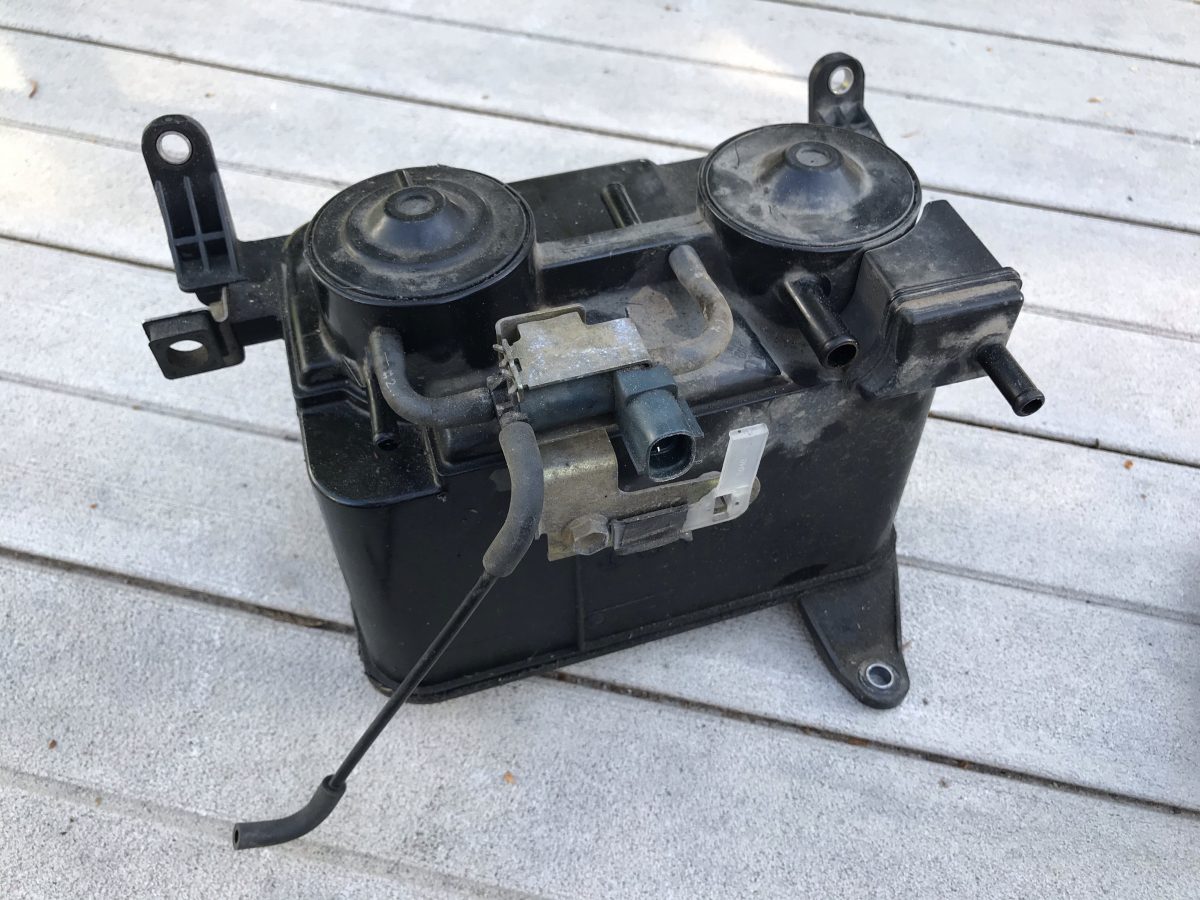
1998 EVAP canister (larger box style)
1998 VSV for VPS (Vapor Pressure Sensor)
1992 EVAP canister (smaller cylindrical style)
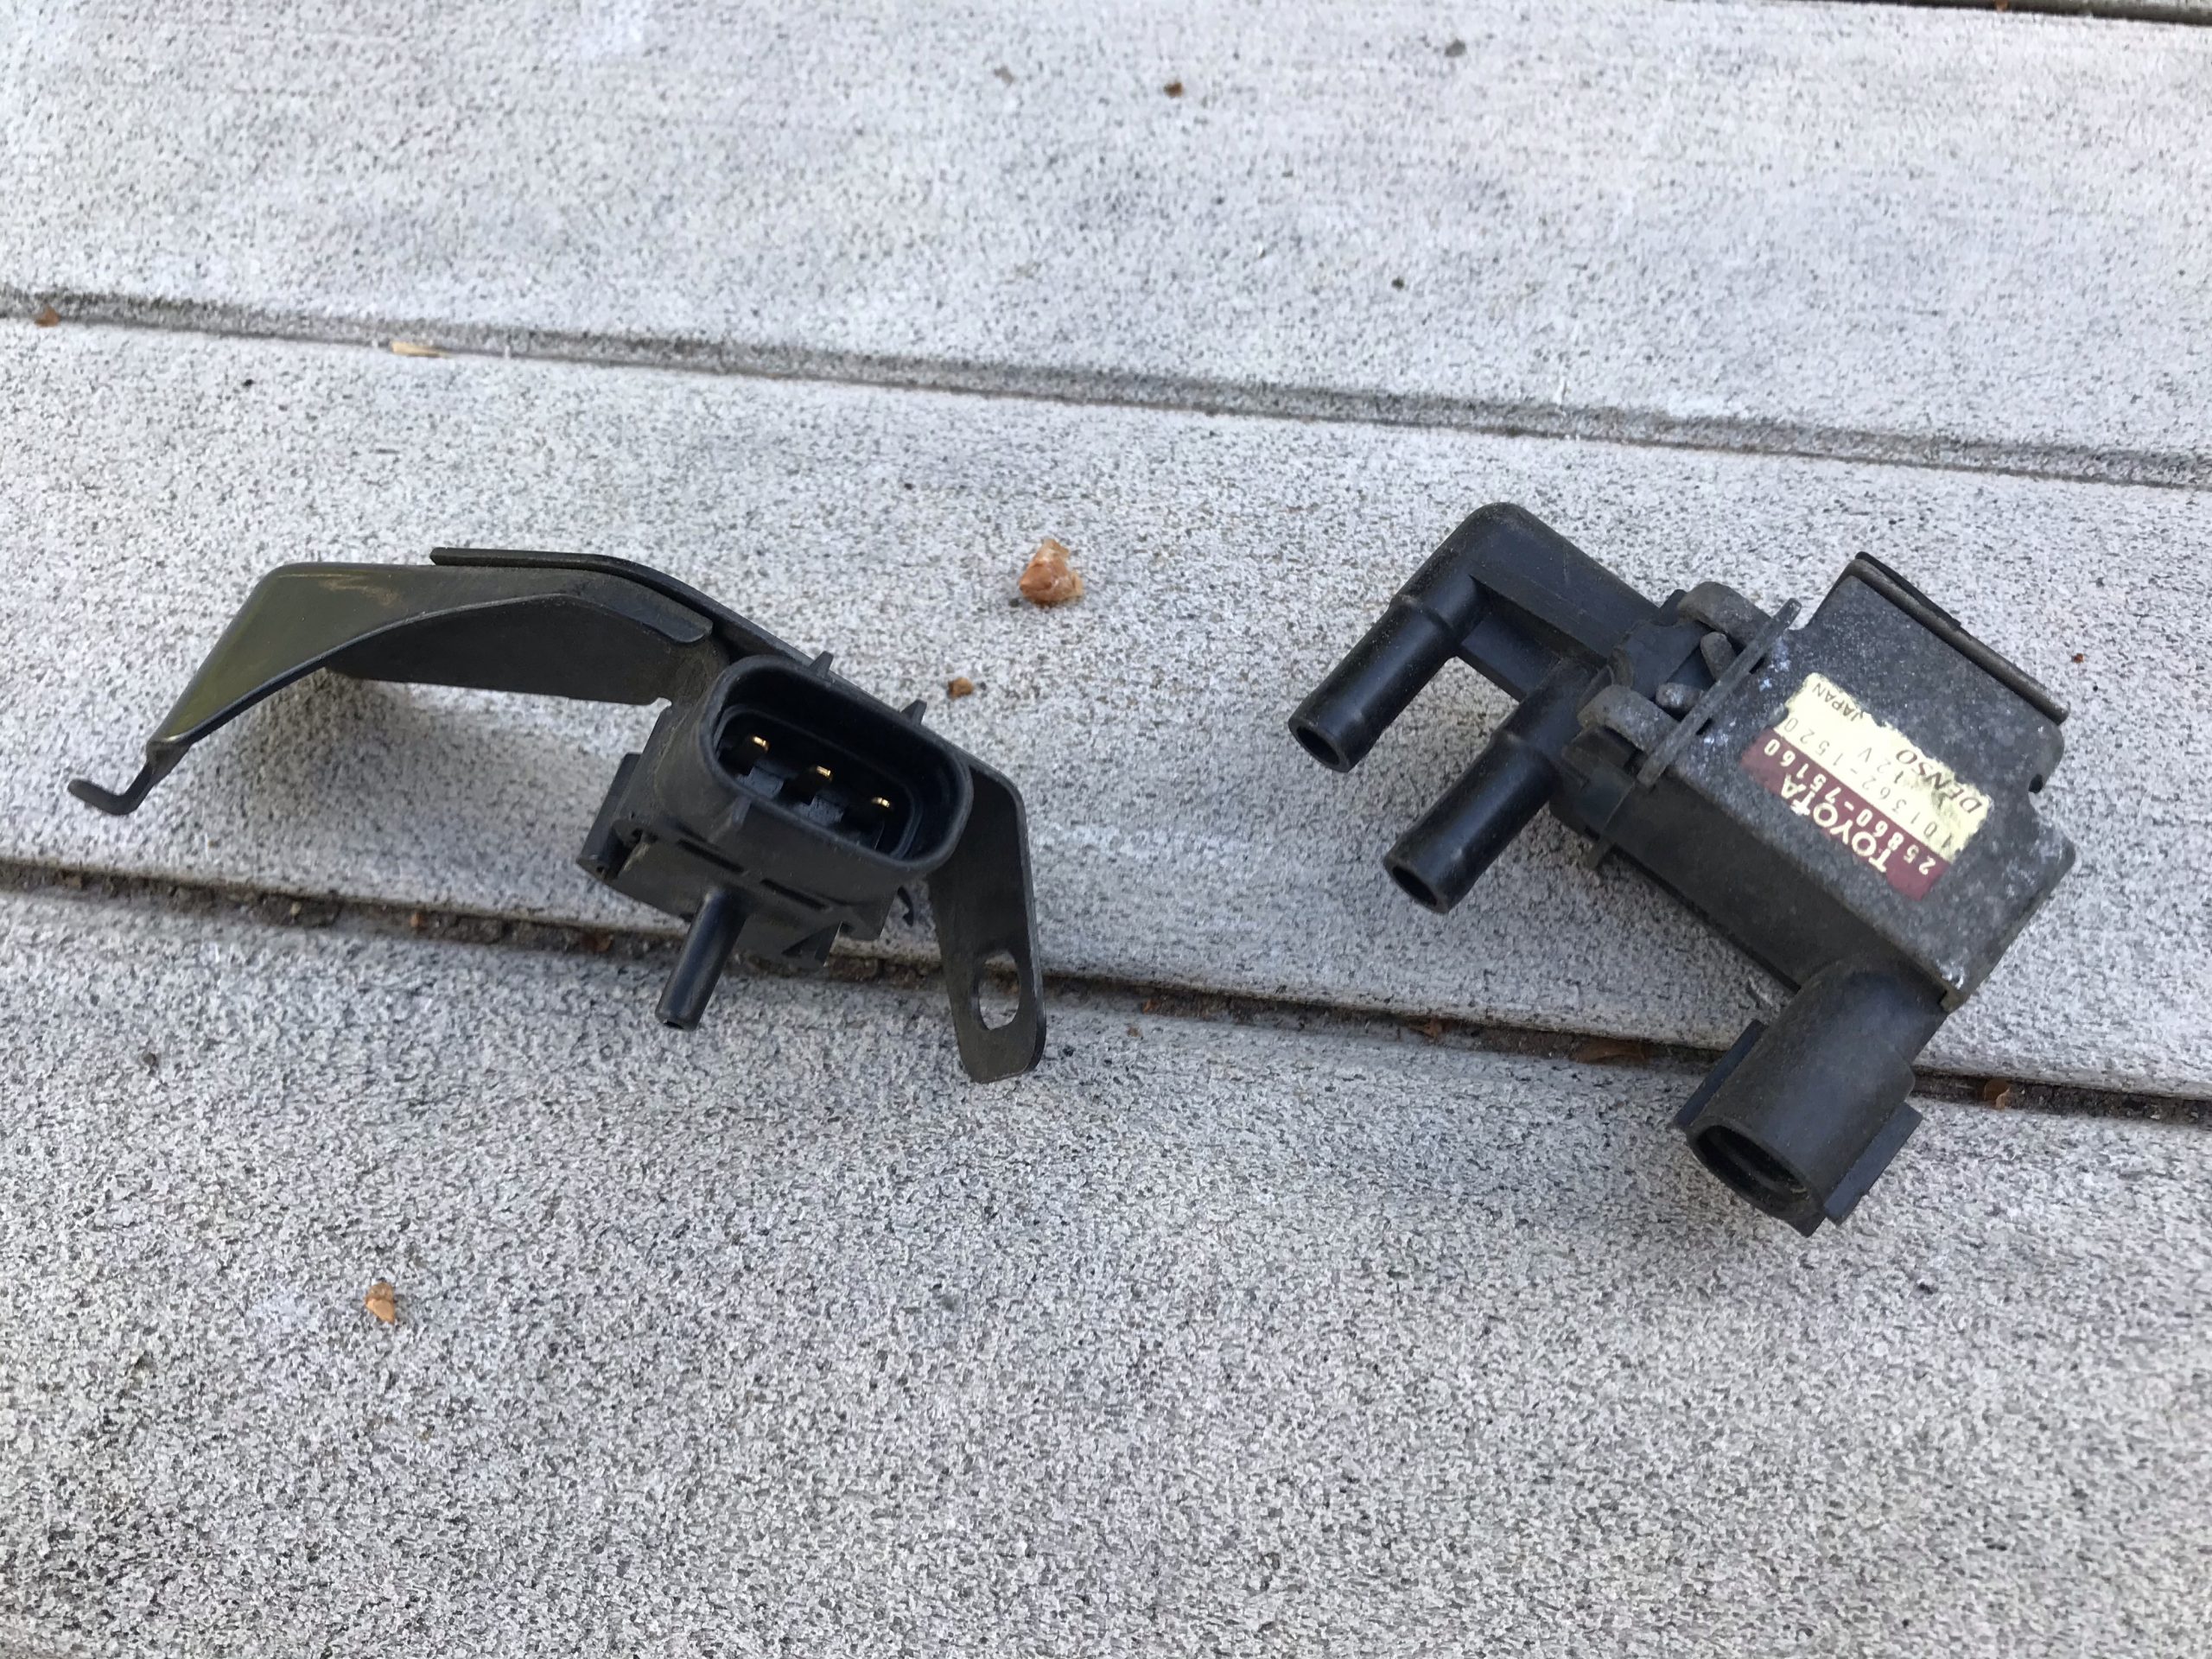
1999 VPS (left) and VSV for EVAP
I saw a few places reference the “VSV for EVAP” part as the “Canister Purge Solenoid,” which may come in handy when looking for replacement parts.
2002 VSV for EVAP (top left) and VSV for CCV (top middle), with hoses
Process
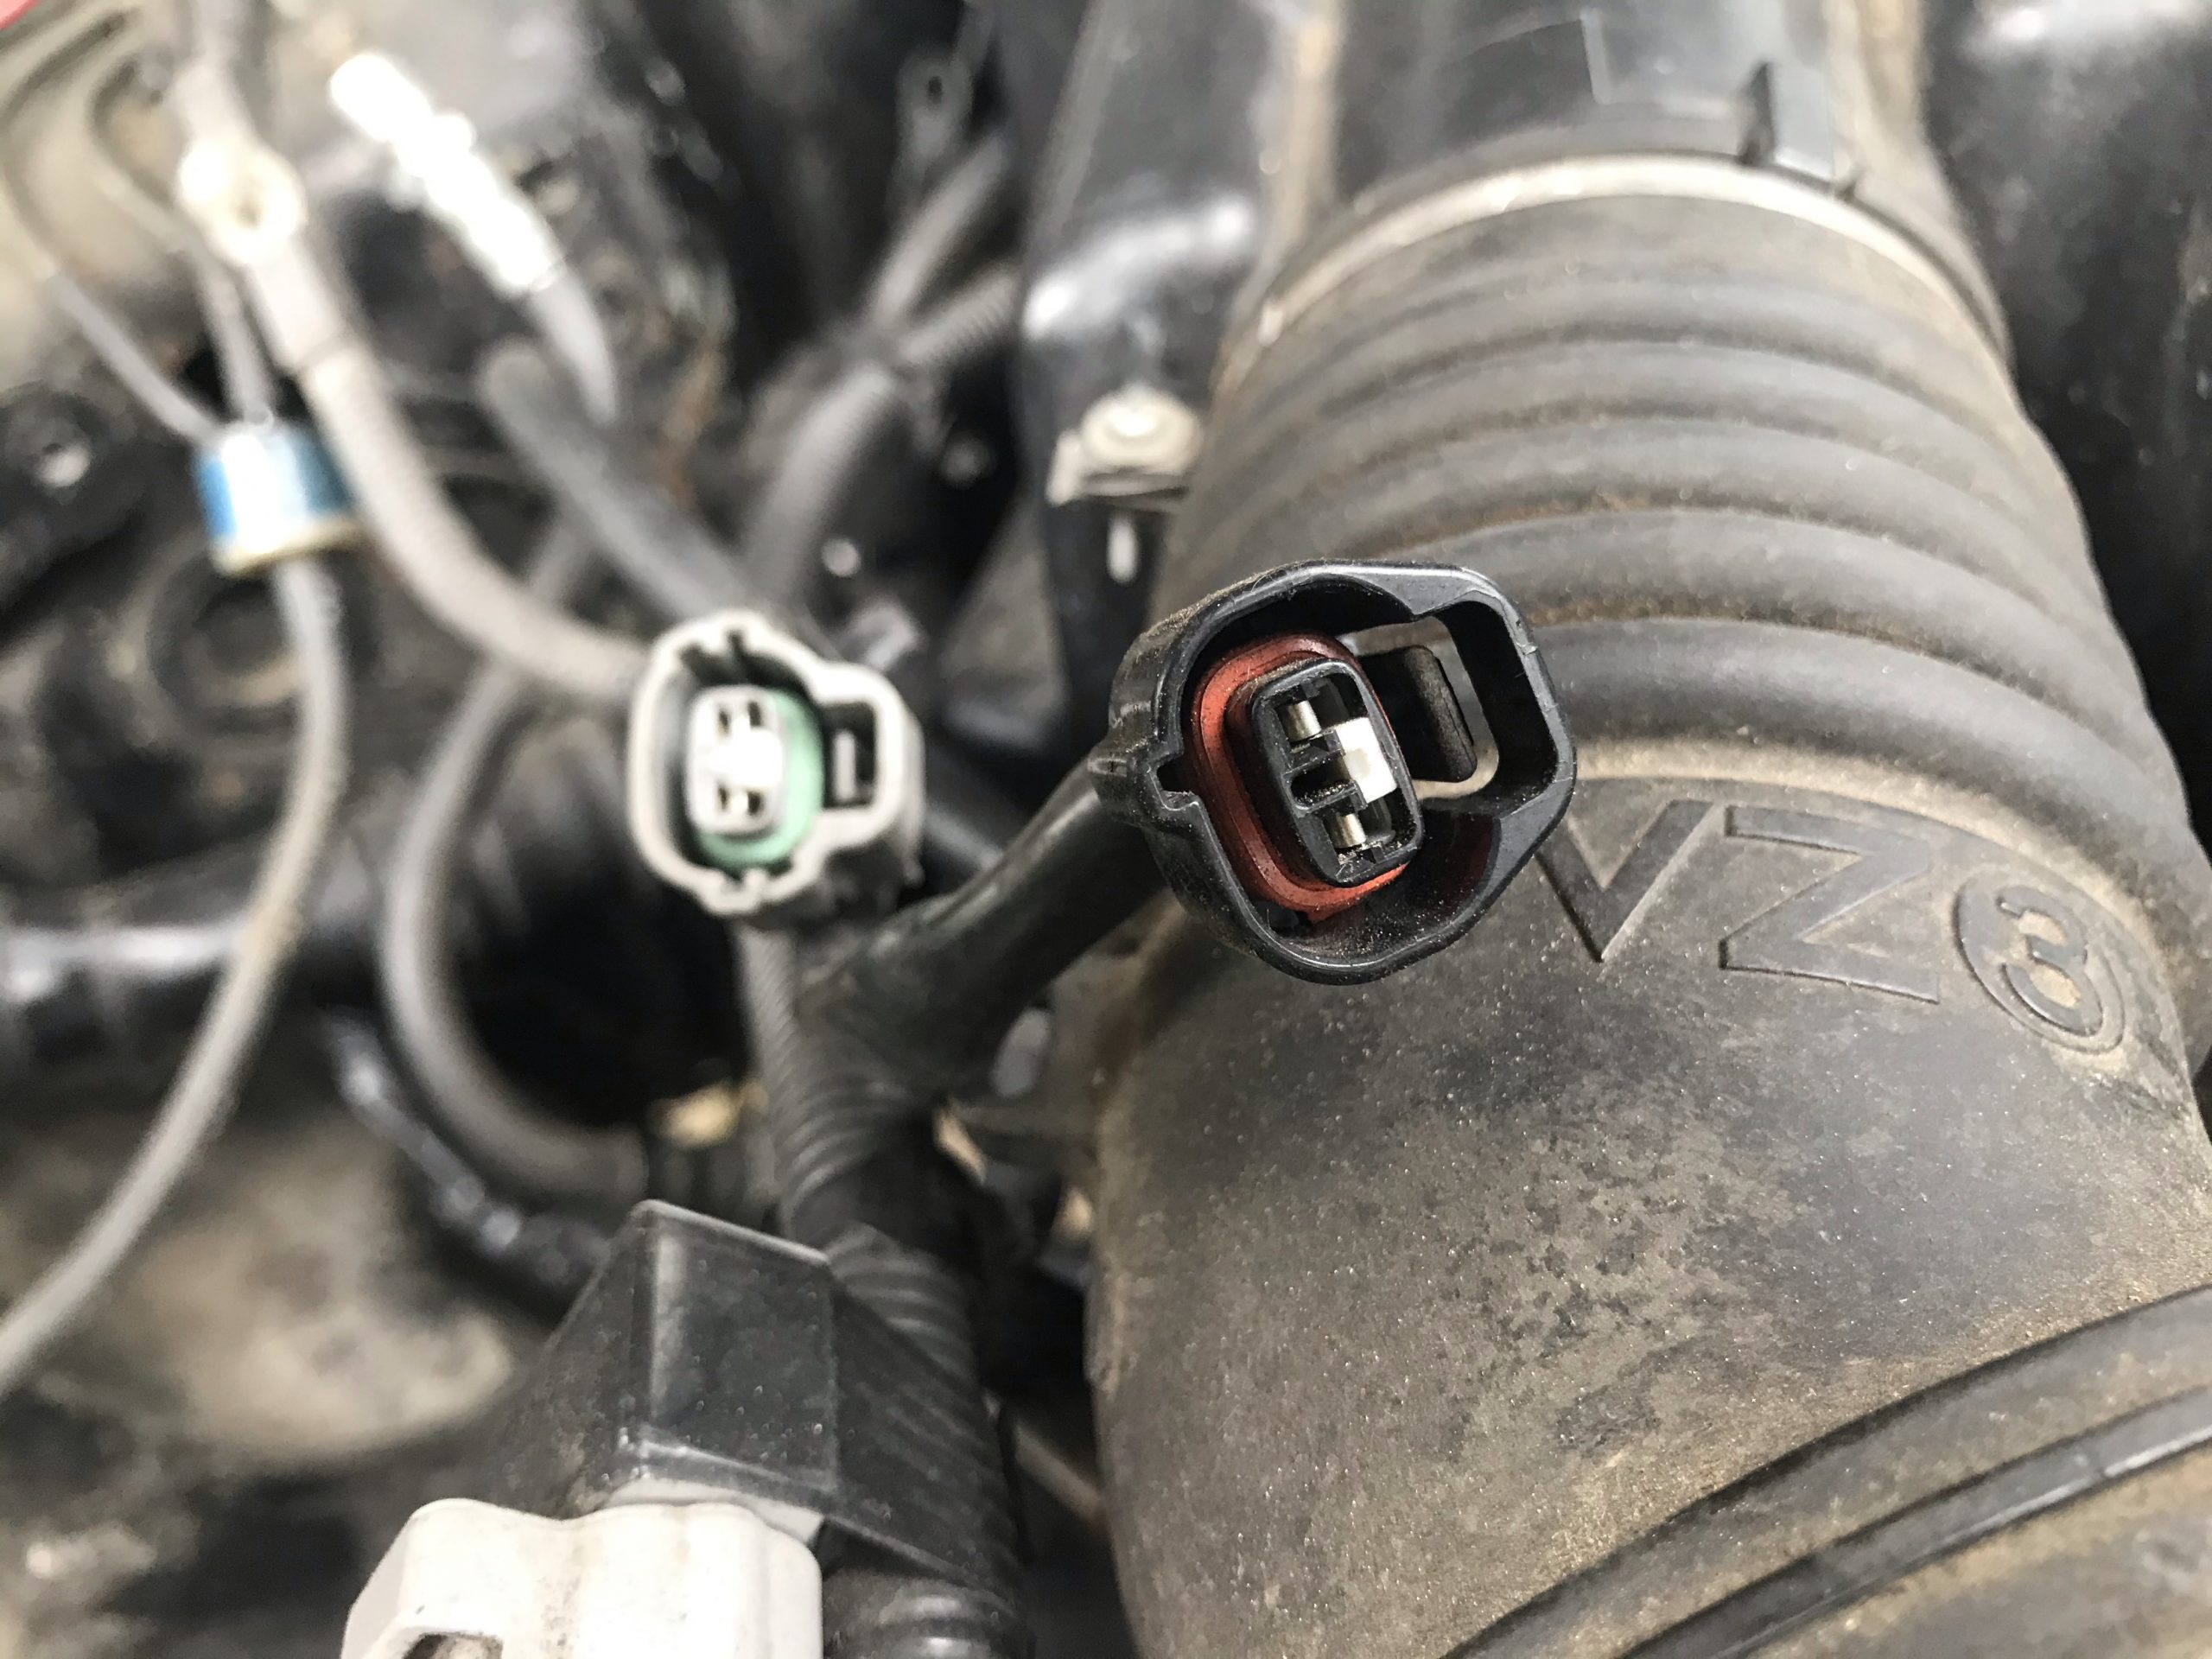
First, I had to figure out what plugs I had available on the 2002 engine harness to work with. Using the 2002 wiring diagram, I was able to locate the plugs for the VSV for EVAP and the VSV for CCV.
2002 engine harness plugs for the VSV for CCV (left, background) and VSV for EVAP (right, foreground)
However, the other 2 plugs were part of the body wiring harness on the donor car which I did not keep, so I’ll need to do some extra wiring work to hook up the VPS and VSV for VPS.
Check out Part 2 as I map all of this out and figure out how to hook it up so my 3.4 swap can have a working EVAP system!