After poring over service manuals and forums, I believe I’ve finally pieced together what should be a functional EVAP system for my 3.4 swap using the components that I’ve gathered. I came up with 2 options: one using the 3rd-gen 1998 charcoal canister, and one using the original 2nd-gen 1992 charcoal canister.
General Approach
Overall, the goal is to build a system that satisfies the ECU’s EVAP-related inputs so it doesn’t throw any codes.
In both scenarios, I made use of following parts:
- 2002 ECU
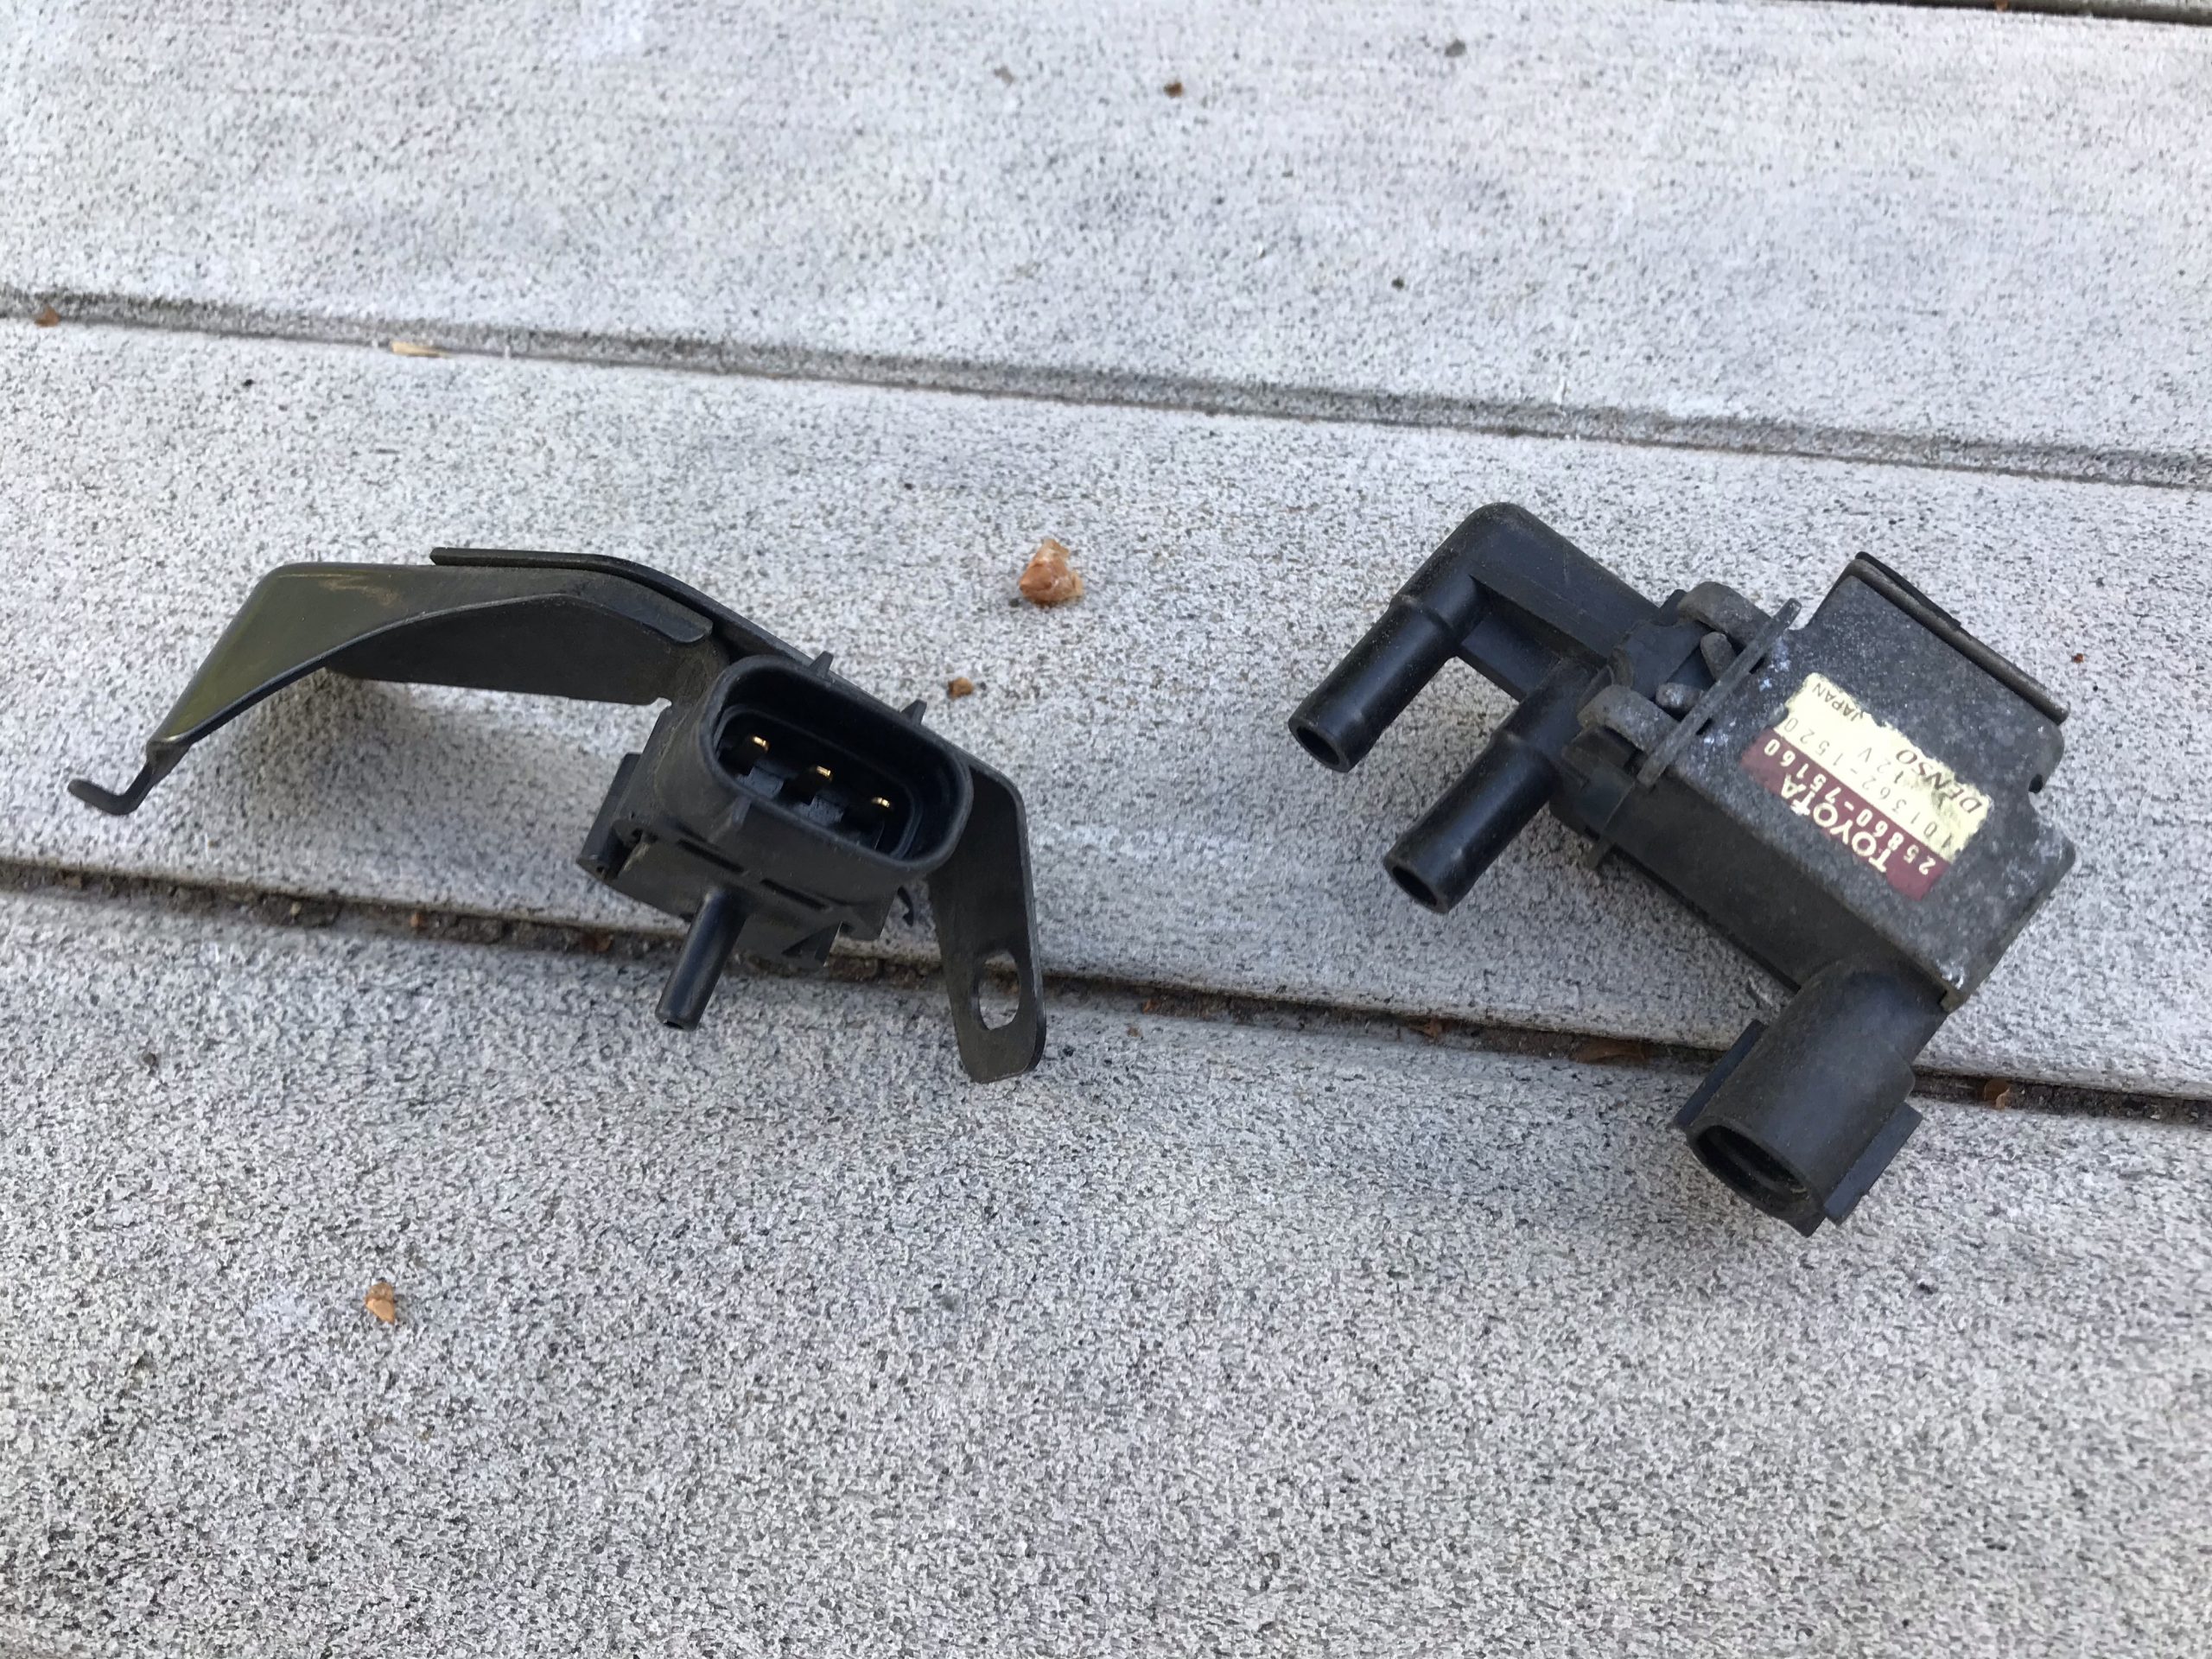
- 2002 VSV for EVAP
- 2002 VSV for CCV (Canister Closed Valve)
- 1999 VSV for VPS (Vapor Pressure Sensor)
- 1999 VPS (Vapor Pressure Sensor)
The wiring is the same between the two systems, and the hose and vacuum lines are virtually the same as well. The primary difference between the two is the canister used, and how the VSV for CCV is hooked up (or not hooked up).
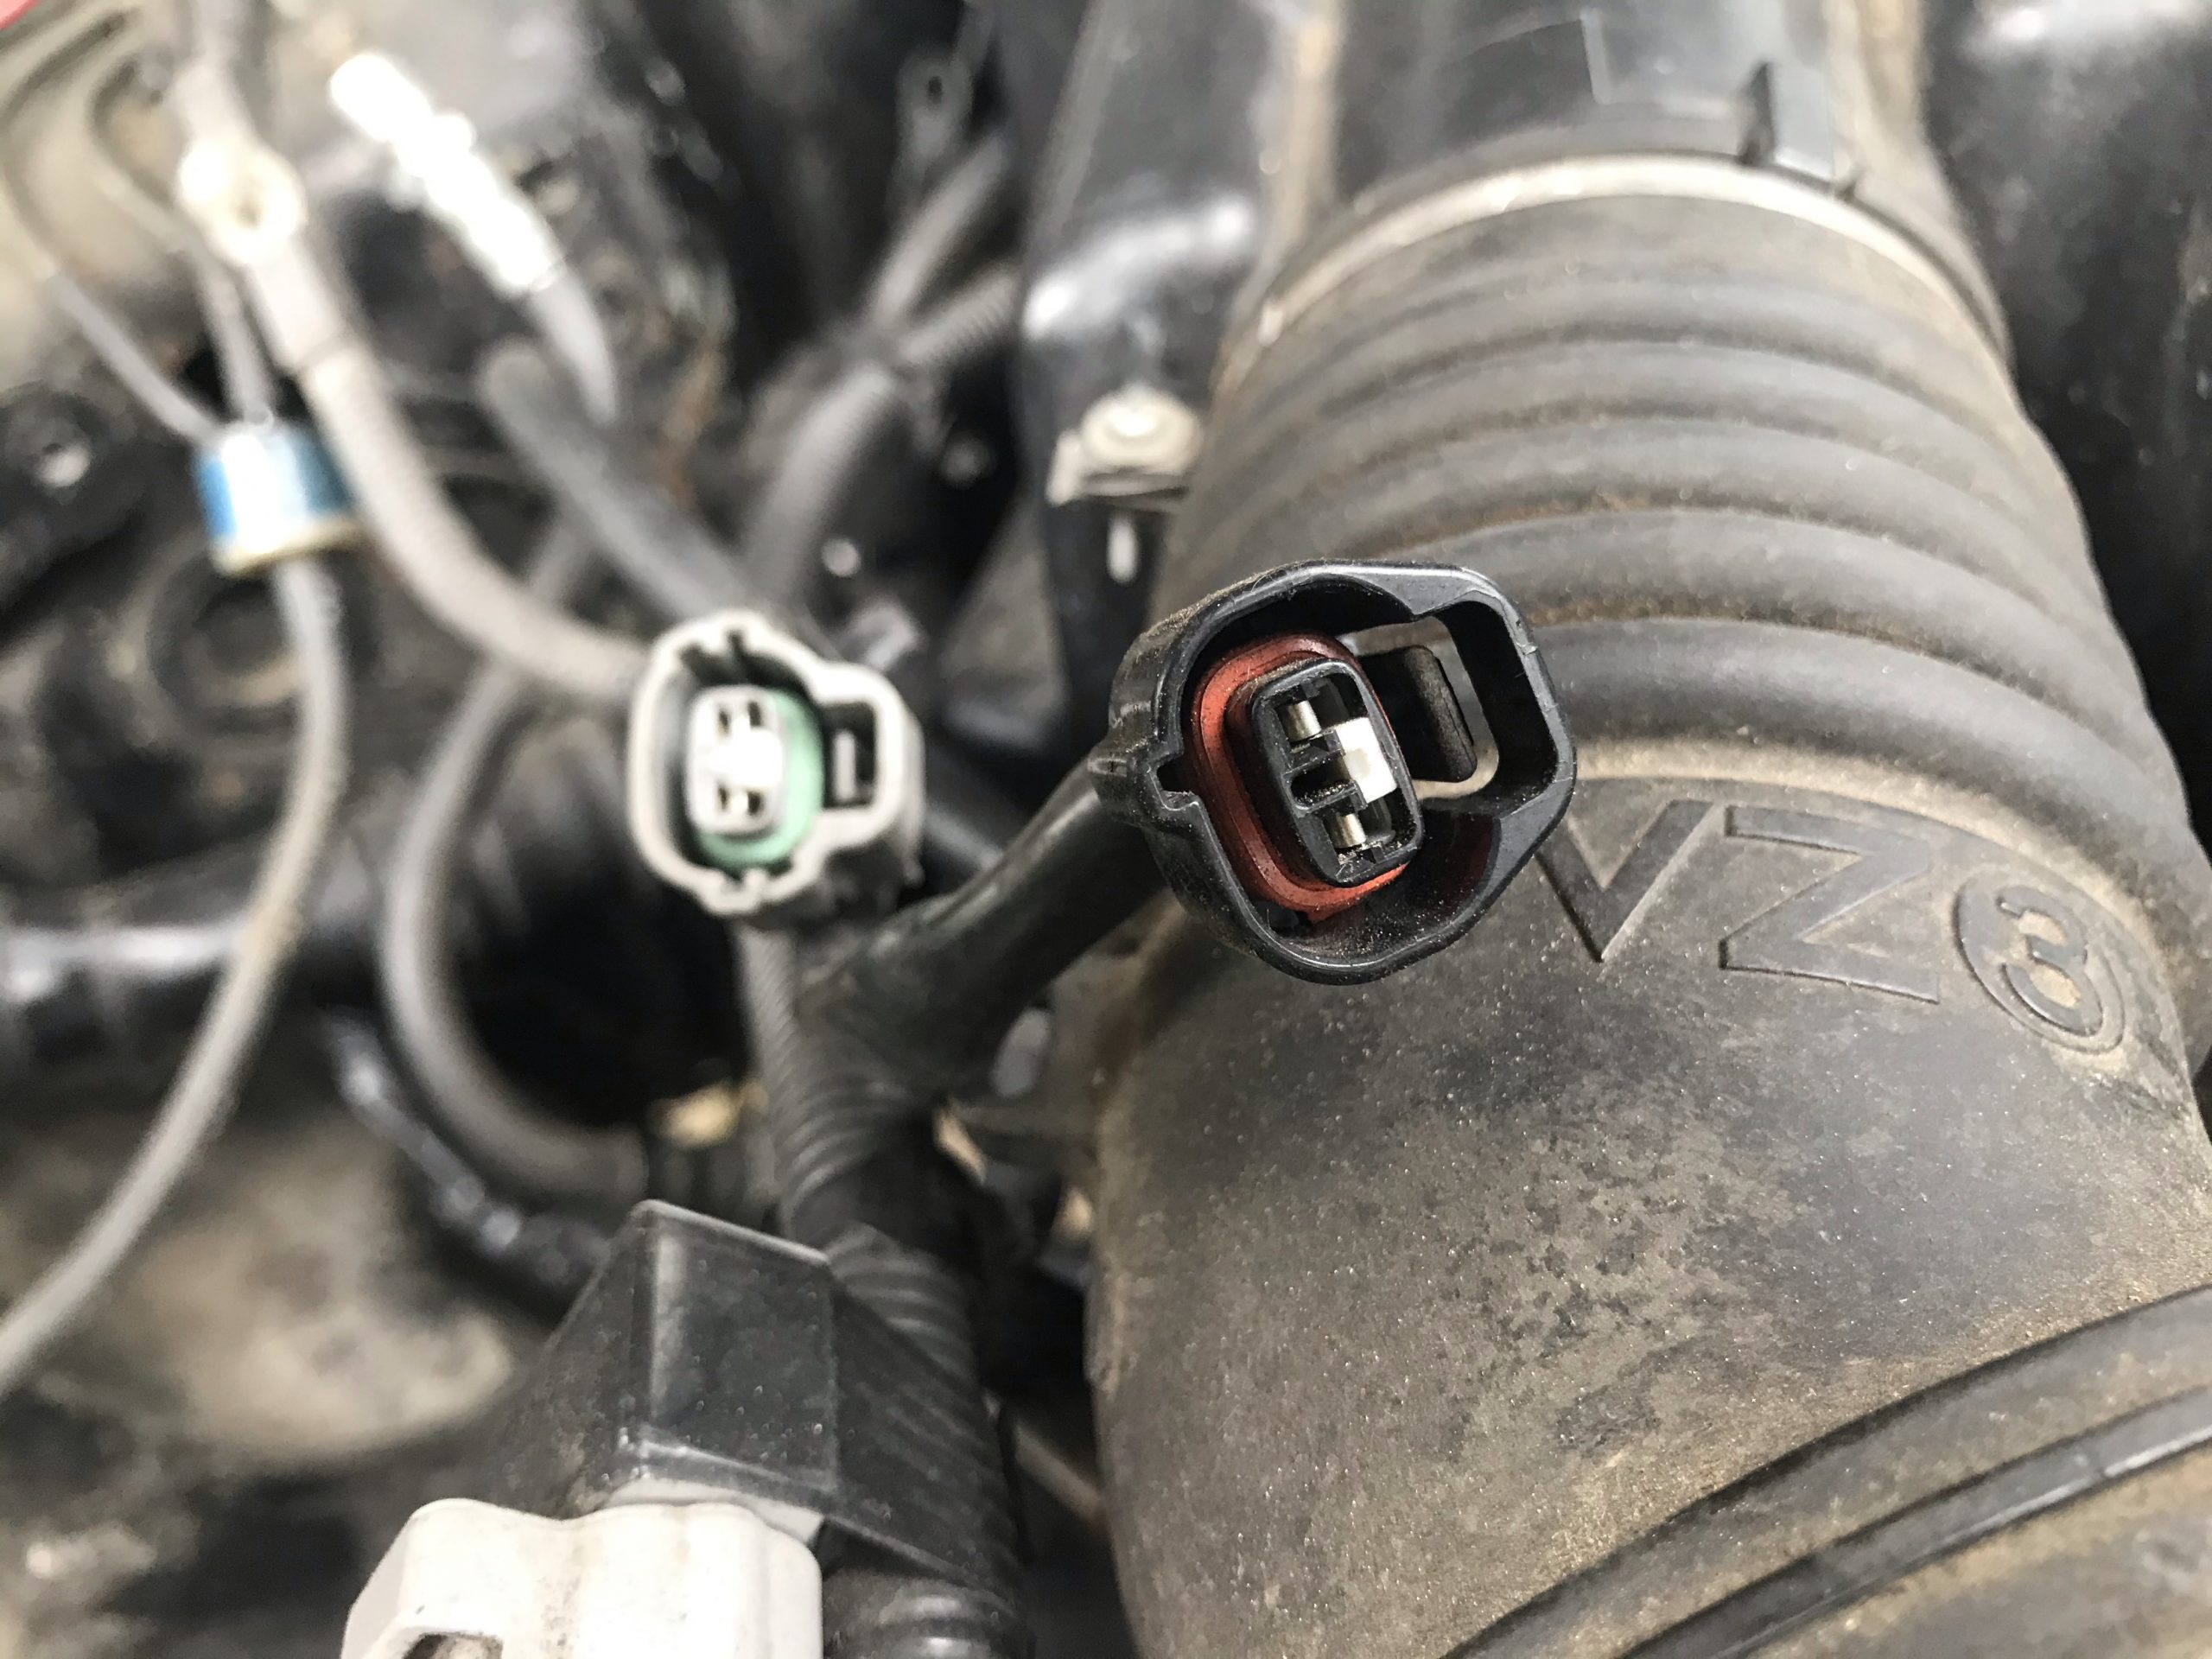
The biggest challenge to actually piecing this together will be adding connectors for the VSV for VPS and VPS, since I don’t currently have those on my wiring harness. I’ll either need to source replacement connectors from the right year (preferable) or just use terminals on the pins (not as clean).
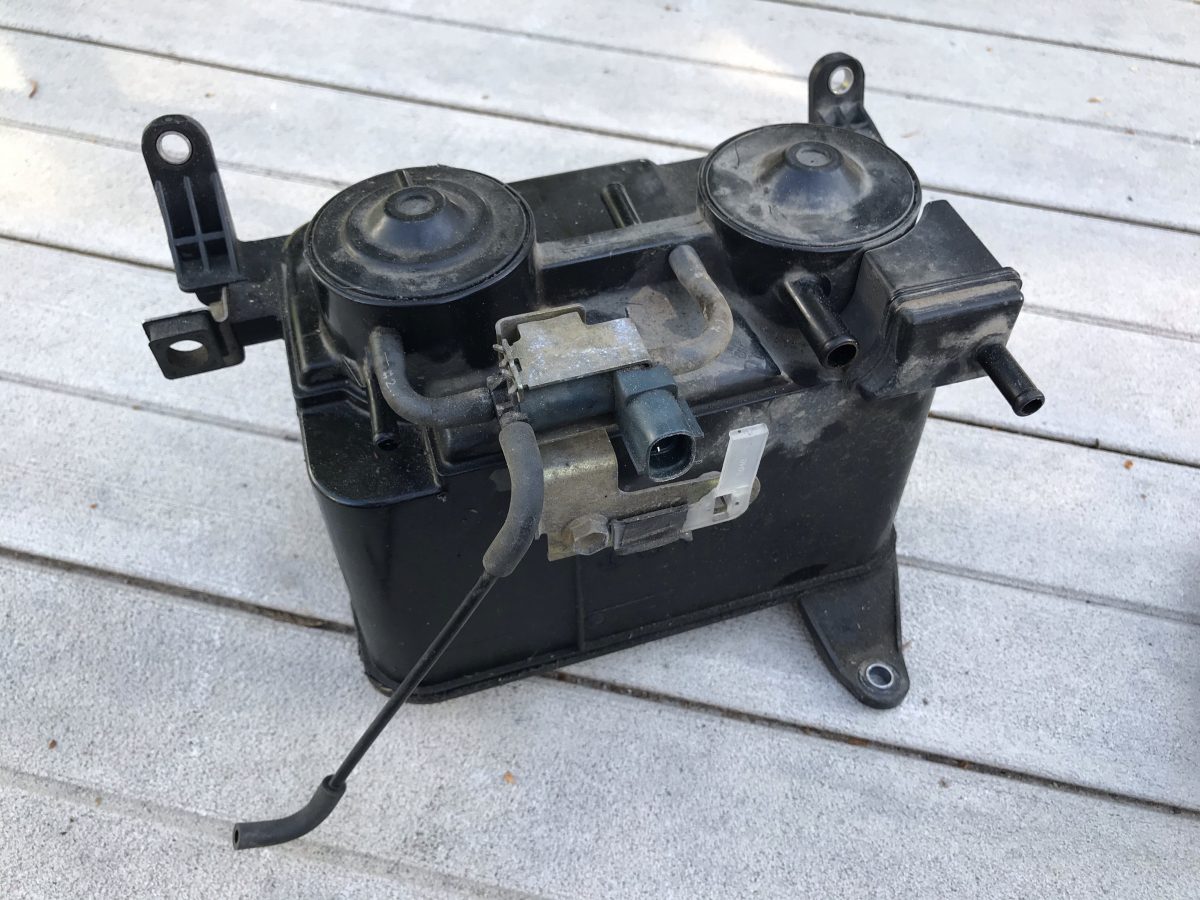
Using the 1998 Charcoal Canister

With the 1998 box-style charcoal canister, the setup is essentially the same as a typical 1996-2000 EVAP system. The primary difference is the addition of the VSV for CCV off of the 2002 harness, which my ECU expects to see.
The two tees in the fuel vapor lines shown in the diagram are actually integrated into the EVAP canister itself, so there won’t be any tee fittings to install.
Using the 1992 Charcoal Canister
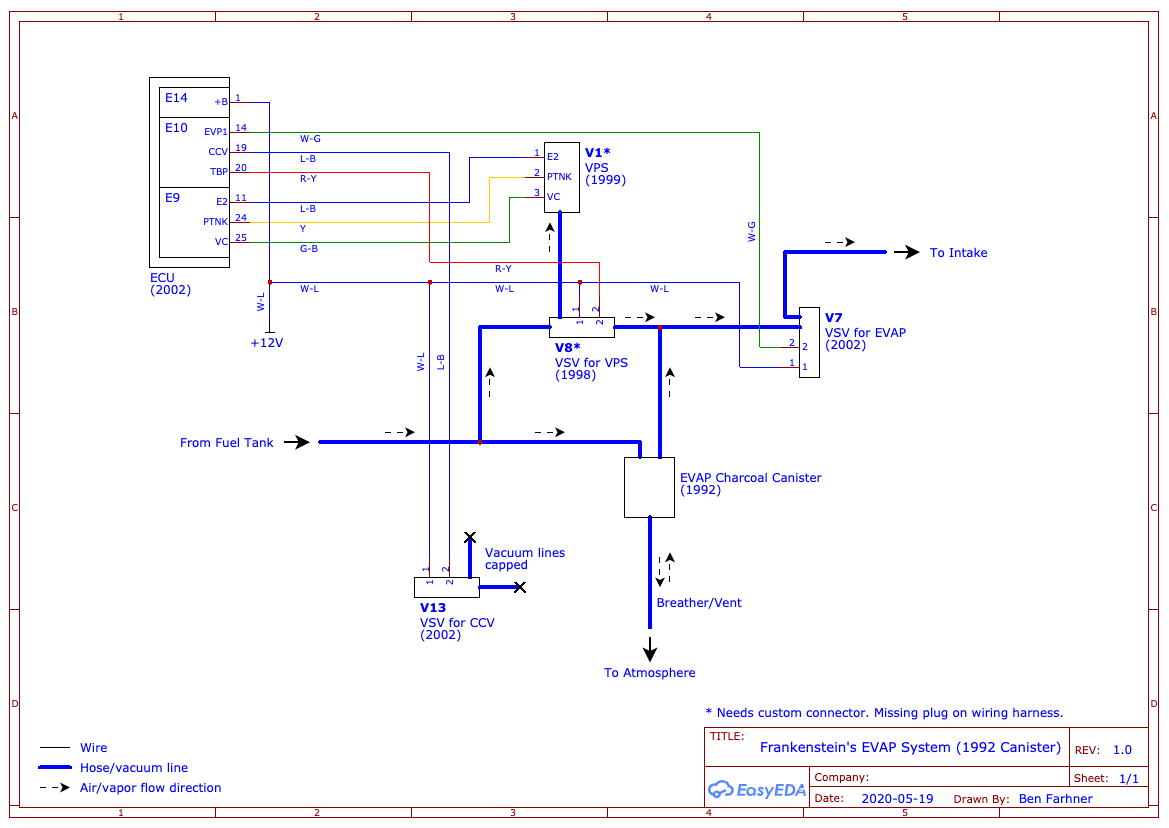
With the smaller 1992 cylinder-style charcoal canister, the system is mostly the same, but there isn’t a dedicated fresh air intake on the older canister, so the VSV for CCV can’t be hooked up. It will still be plugged into the ECU, but the hoses on the VSV will either be capped or removed completely, depending on what the ECU likes best. At least one person said it doesn’t have to be hooked up at all, but I like to avoid unused plugs if possible.
Additionally, the tees in the vapor lines shown in the diagram will actually require tee fittings since they are not integral in the older style canister.
Several of the parts I need are now packed in a box as we’re about to move across the country, so it may take me a bit to actually get around to installing the EVAP system for my 3.4 swap. Plenty of time to decide which option to go with, though!